
Stovetop Turkish Flatbread (No Oven Needed)

Soft, pillowy Turkish-style flatbreads cooked on the stovetop — no oven required. Ready with simple pantry ingredients and a skillet in under 90 minutes.
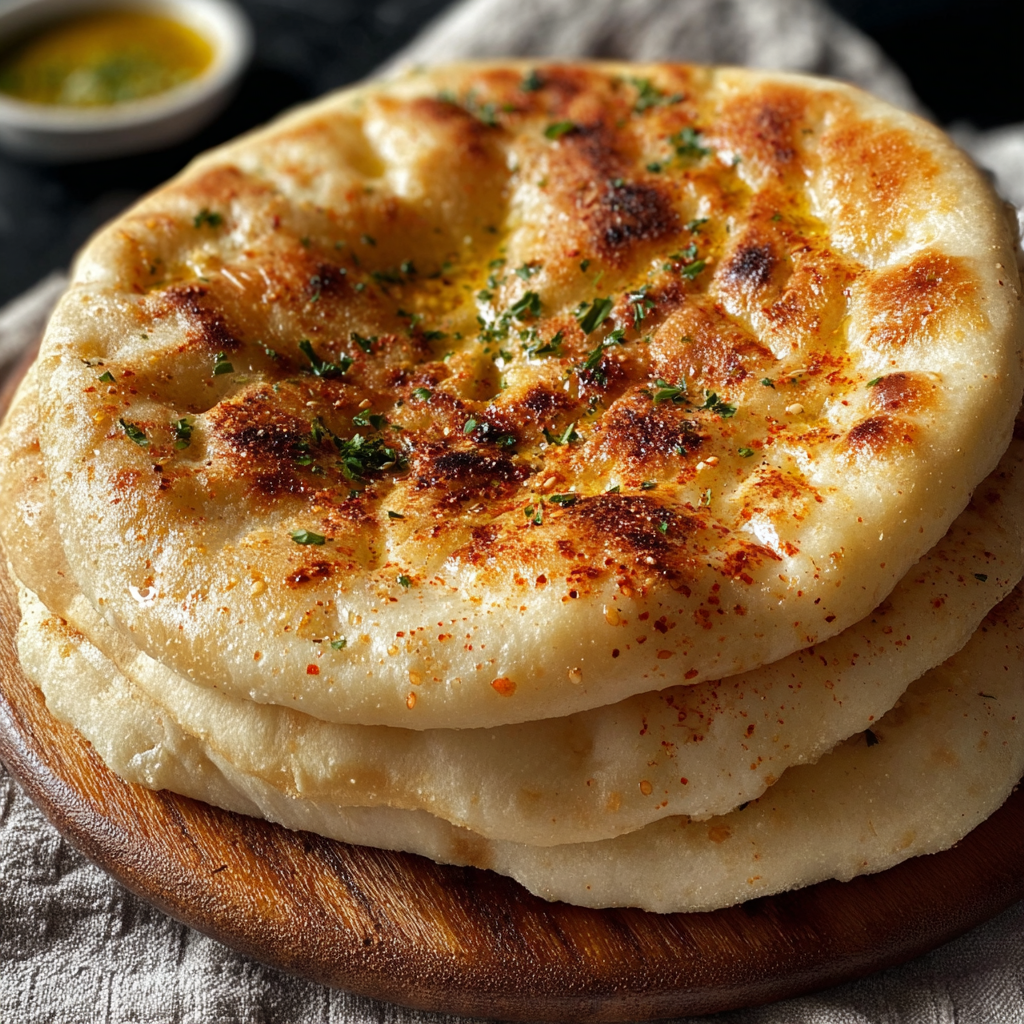
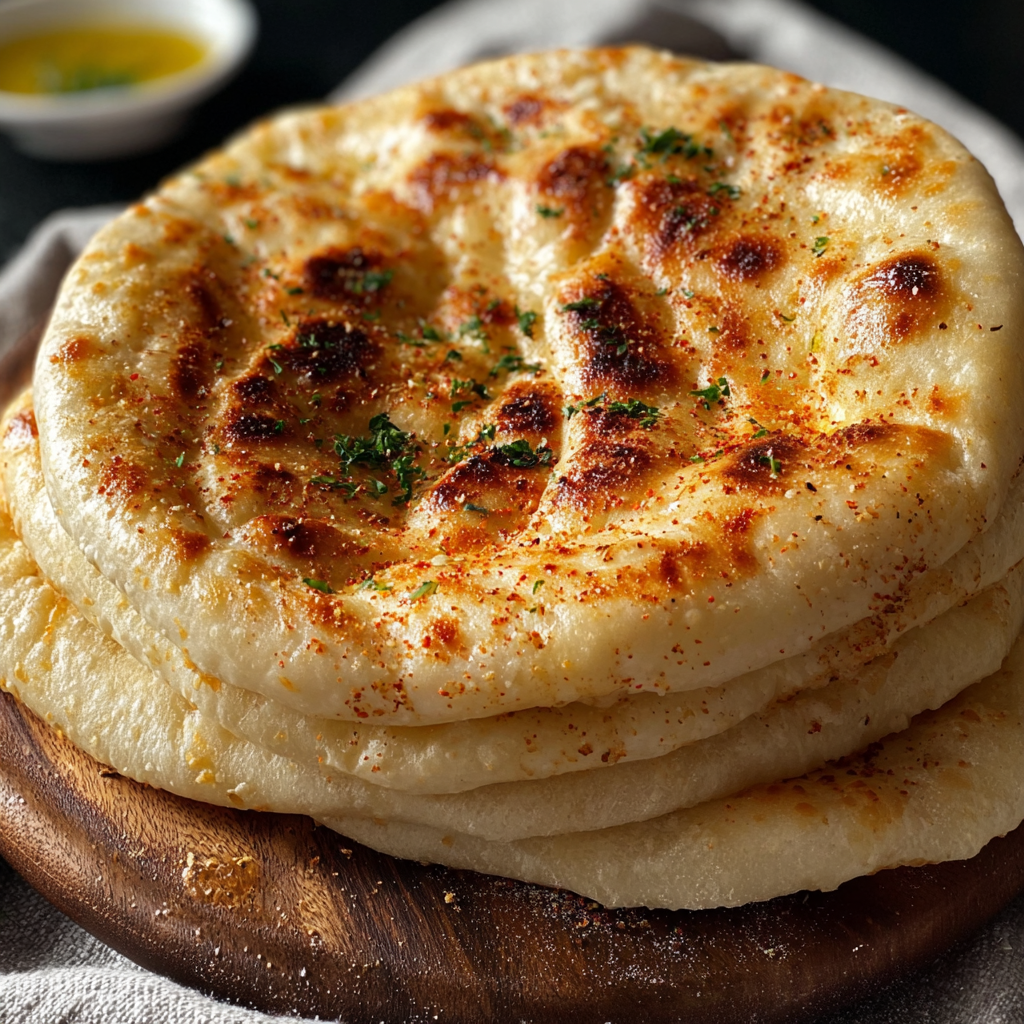
This simple Turkish-style flatbread has been a weekday favorite in our house for years. I first learned to make it on a rainy afternoon when the oven was in use and I needed fresh bread for a soup I was serving. The technique of cooking dough on a hot pan produces a bread with a tender interior and slightly blistered, golden exterior — all without an oven. The breads puff, bubble, and sometimes pop into balloon-like pockets that make tearing them open for sandwiches a small, joyous ritual. The texture is a soft chew with the satisfying irregular air pockets you want from good flatbread.
I discovered that using warm milk with warm water gives the dough extra tenderness and a softer crumb than water alone, and that a heavy-bottomed skillet creates the quick burst of heat the dough needs to puff. These rounds are great as a vehicle for dips, stuffed with grilled vegetables and cheese, or served alongside a hearty stew. Once you master the feel of the dough, you can have a batch on the table in well under 90 minutes from start to finish — including the time needed for the dough to double.
Why You'll Love This Recipe
- Cooked entirely on the stovetop — perfect when you don’t have or don’t want to use an oven, and great for small kitchens or camping on a portable burner.
- Uses pantry staples: all-purpose flour, dry yeast, sugar, salt, milk and water — most home cooks will have these on hand.
- Quick active time: about 20 minutes of hands-on work and easy resting time; dough proofs in roughly 1 hour while you prep other foods.
- Flexible: make 6 generous 7-inch rounds that are ideal for sandwiches, wraps, or tearing and dipping; the optional butter or olive oil finish elevates the flavor.
- Reliable rise and tender crumb thanks to warm liquid and a brief knead; a heavy skillet encourages upward puffing for attractive bubbles.
- Make-ahead friendly: dough can be refrigerated overnight for morning baking, or cooked breads freeze well for quick reheats.
I remember serving these to friends who had never had fresh homemade bread without an oven — they were surprised at how soft and airy the rounds were. My partner likes them brushed with a little melted butter and scattered with parsley, while my teenager prefers to spread tahini and honey. This recipe has become our go-to for casual dinners and impromptu guests because it’s fast, forgiving, and genuinely comforting.
Ingredients
- All-purpose flour: 4 cups. Use a well-packed, spooned-and-level cup measurement for consistent results. Most brands work — King Arthur and Bob’s Red Mill are reliable, but any standard all-purpose flour will yield the soft structure you want.
- Warm milk: 2/3 cup. Whole milk produces slightly richer, softer breads; 2% is fine if you prefer lower fat. Milk adds tenderness and helps browning on the pan.
- Warm water: 2/3 cup. Lukewarm (about 100 to 110°F) to activate the yeast without killing it. Combining milk and water balances richness and hydration.
- Instant dry yeast: 1 1/2 tablespoons. This is slightly more than a single packet; use active dry yeast if needed but proof it first in the warm liquids.
- Sugar: 1 tablespoon. Just enough to feed the yeast and help subtle browning; you can reduce slightly for savory uses but sugar helps rise.
- Salt: 2 1/2 teaspoons. Essential for flavor and controlling gluten development; table salt or fine sea salt works best.
- Optional topping — melted unsalted butter or olive oil: About 1 1/2 tablespoons (20 grams). Brushing warm breads adds shine and subtle richness; parsley adds a fresh finish.
Instructions
Activate yeast: Combine 2/3 cup warm milk, 2/3 cup warm water, 1 tablespoon sugar and 1 1/2 tablespoons instant yeast in a medium bowl or measuring cup. Stir gently and let rest 3 to 5 minutes until foamy and fragrant; if it doesn’t foam, the yeast may be inactive and should be replaced. Mix and knead: Add 4 cups all-purpose flour and 2 1/2 teaspoons salt to the liquid. Mix with a wooden spoon until a shaggy dough forms, then turn onto a lightly floured surface and knead by hand for 6 to 8 minutes until smooth and slightly springy. The dough should be tacky but not sticky; dust with a touch of flour if it clings excessively. First rise: Place dough in a lightly oiled bowl and cover with plastic wrap or a clean towel. Let it proof in a warm draft-free spot until doubled in size, about 60 minutes. A slightly warmer room accelerates fermentation; look for a clear doubling and small gas bubbles. Divide and rest: Punch the dough down gently and divide into 6 equal pieces. Shape each into a smooth round, cover with a plastic bag or bowl, and let rest 10 minutes — this relaxes the gluten and makes rolling easier. Shape rounds: On a lightly floured surface, roll or press each ball into an 7-inch (18 cm) round about 1/8-inch (5 mm) thick. Work gently so the rounds remain slightly puffy; you want thin centers but a little air in the dough for puffing. Preheat skillet: Place a heavy skillet or cast-iron pan over medium heat and let it heat for several minutes. A thick-bottomed pan is important — thin pans lose heat quickly and won’t create the burst of steam that puffs the bread. Cook the breads: Cook rounds one at a time in the dry skillet over medium heat. When lots of bubbles form on the surface, flip to the other side. If a bread puffs into a balloon, reduce heat to low and cover briefly with a cloth to prevent over-browning while trapping steam so the interior finishes cooking. Cook until both sides show golden blisters and the bread feels light and cooked through, about 1½ to 3 minutes per side depending on heat. Finish and serve: Transfer cooked breads to a plate and brush with 1 1/2 tablespoons melted butter or olive oil, then sprinkle with chopped parsley if desired. Serve warm.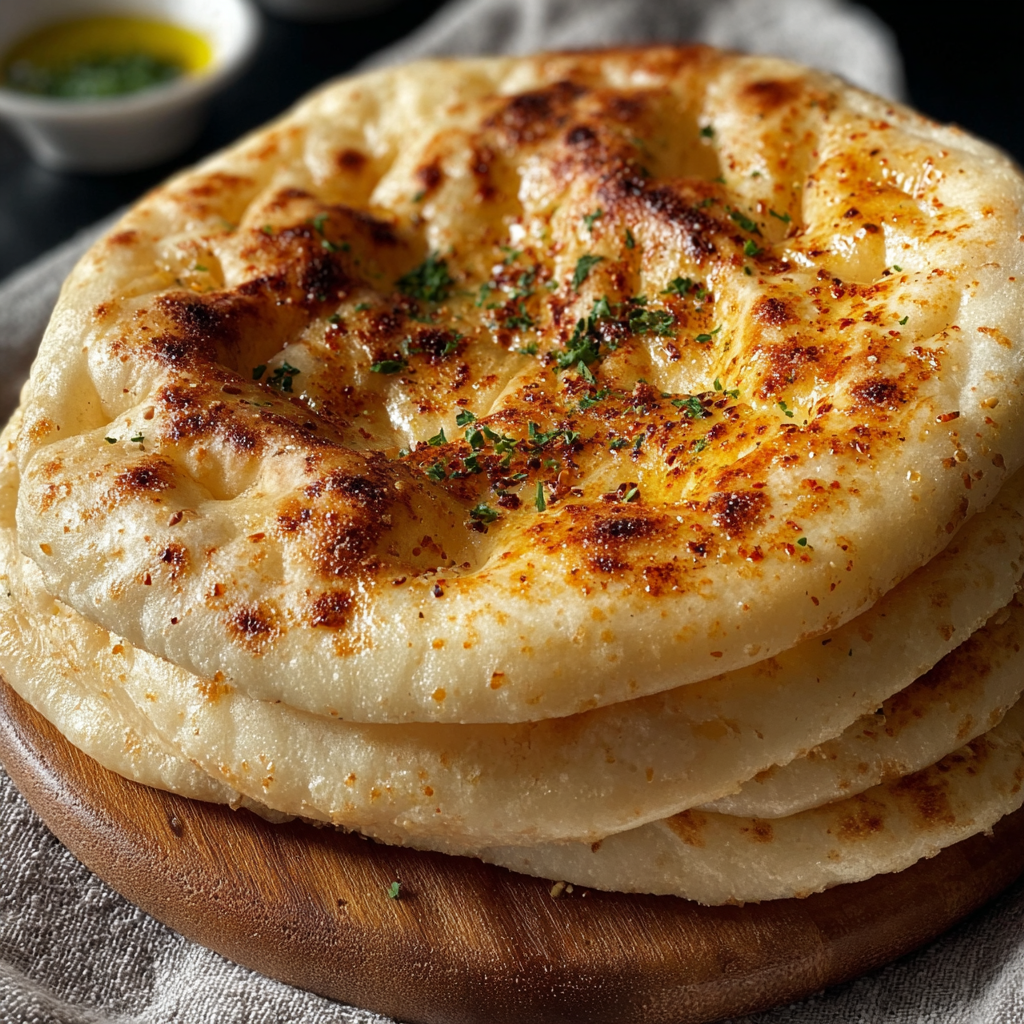
You Must Know
- The breads freeze well for up to 3 months; cool completely, stack with parchment between layers, and store in a freezer bag. Reheat from frozen in a hot skillet or wrapped in foil in a low oven.
- This method is high in carbohydrates from the flour; each round provides a satisfying base for proteins and vegetables when building a balanced meal.
- Use a heavy pan for best puffing. If your skillet is thin, cook on the hottest possible setting without burning — but expect less dramatic rise.
- If you want dairy-free breads, substitute warm almond or oat milk and brush with olive oil instead of butter; the dough will still be tender.
- Leftover rounds are great sliced and toasted for croutons or torn for a quick breadcrumb blitz in the food processor.
My favorite thing about this method is how the breads transform during cooking: those first bubbles that form tell you you’ve got steam trapped in the dough and that the crumb will be airy and pleasant. Family members have made a ritual of watching the bread puff, and we’ll often pause mid-meal to laugh when one pops spectacularly. The simplicity of ingredients and the immediacy of stovetop cooking make these rounds a dependable comfort food.
Storage Tips
Store cooled breads at room temperature wrapped in a clean kitchen towel or in a bread box for up to 2 days to keep them soft. For longer storage, place parchment between each round and freeze in an airtight bag for up to 3 months. To reheat, warm in a hot skillet for 30–60 seconds per side or steam briefly under a lid to restore softness. Avoid microwaving for long periods; it makes bread gummy. If you plan to freeze, brush lightly with oil before stacking to prevent sticking and maintain an inviting sheen after reheating.
Ingredient Substitutions
Whole wheat flour can be used for half the flour amount to add nuttiness and fiber; replace up to 50% without major changes, but expect a denser crumb and slightly more water absorption. For dairy-free versions, substitute plant-based milks in equal volume and finish with olive oil. If you only have active dry yeast, dissolve it in the warm liquids and wait 5–10 minutes until foamy before mixing. For a richer flavor replace 1/4 cup of water with yogurt or use 2 tablespoons olive oil in the dough for a silkier texture.
Serving Suggestions
Serve warm with labneh and olive oil, use as a wrap for grilled meats and vegetables, or tear and dip into a hearty stew. For breakfast try filling with scrambled eggs, feta and herbs, or slice open to make a pocket sandwich with roasted red peppers and hummus. Garnish with chopped parsley, za’atar, sesame seeds, or nigella seeds for an aromatic finish. These rounds are also excellent alongside soups, roasted eggplant salads, or as an impromptu pizza base when finished under a broiler briefly.
Cultural Background
Flatbreads are a cornerstone of Turkish and wider Middle Eastern cuisines, with regional variations that include yufka, lavash and bazlama. The approach here is similar to bazlama — a yeasted, pan-cooked round — traditionally made on a sacgriddle or over a wood-fired surface. These breads were originally crafted for quick cooking on domestic griddles, making them an everyday staple for scooping sauces and wrapping simple fillings. The magic is in steam and heat: quickly sealing moisture into the dough creates those characteristic pockets.
Seasonal Adaptations
In spring and summer, fold chopped mint or dill into the dough for a fresh lift and serve with cooling cucumber-yoghurt salads. In autumn, add roasted garlic or pumpkin purée for extra flavor and moisture; reduce water slightly if adding purees. For winter gatherings, increase butter finishing and sprinkle with warm spices like smoked paprika for cozy richness. The dough tolerates small additions of grated cheese or herbs, but keep additions modest so the bread can still puff.
Meal Prep Tips
Make the dough the night before and refrigerate after the initial mix; it will slowly proof and develop more flavor. In the morning, bring to room temperature, divide, rest 10 minutes and cook. Cooked rounds freeze beautifully — layer them between parchment and pull out only what you need. For quick lunches, spread with a flavored hummus, add roasted vegetables and greens, and roll into a portable wrap. Use a small cooler with insulated containers to keep them fresh when packed for picnics or workdays.
These stovetop rounds are simple, adaptable and a small daily pleasure. Whether you tuck them into a weeknight sandwich or serve them as part of a leisurely weekend spread, they invite sharing and experimentation. Try them once and you’ll be surprised how often you reach for this easy, handmade bread.
Pro Tips
Use a heavy-bottomed skillet (cast iron preferred) for even heat and better puffing.
Keep liquids lukewarm (about 100–110°F) to activate the yeast without killing it.
Let dough rest 10 minutes after dividing so gluten relaxes and rolling becomes easier.
If breads puff too quickly then collapse, reduce the heat slightly and cover briefly to finish cooking.
For a softer crumb, replace 1/4 cup water with yogurt or an extra tablespoon of milk.
This nourishing stovetop turkish flatbread (no oven needed) recipe is sure to be a staple in your kitchen. Enjoy every moist, high protein slice — it is perfect for breakfast or as a wholesome snack any time.
Tags
Stovetop Turkish Flatbread (No Oven Needed)
This Stovetop Turkish Flatbread (No Oven Needed) recipe makes perfectly juicy, tender, and flavorful steak every time! Serve with potatoes and a side salad for an unforgettable dinner in under 30 minutes.
Ingredients
Dough
Topping (optional)
Instructions
Activate yeast
Combine warm milk, warm water, sugar and instant yeast. Stir and rest 3–5 minutes until foamy to confirm yeast is active.
Mix and knead
Add flour and salt, mix until shaggy, then knead 6–8 minutes until smooth and slightly springy. The dough should be tacky but not sticky.
First rise
Place dough in an oiled bowl, cover and proof in a warm place until doubled, about 60 minutes.
Divide and rest
Divide into 6 equal pieces, shape into rounds, cover and rest 10 minutes to relax gluten.
Shape rounds
Press or roll each piece into an 7-inch (18 cm) round about 1/8-inch (5 mm) thick. Keep centers slightly puffy for lift.
Preheat skillet
Heat a heavy skillet over medium heat for several minutes until evenly hot; a thick pan ensures better rising.
Cook the breads
Cook each round in the dry skillet. When bubbles form, flip. If a bread balloons, reduce heat to low and cover briefly with a cloth to finish.
Finish and serve
Brush warm breads with melted butter or olive oil and sprinkle with parsley. Serve immediately or store cooled in a towel.
Last Step: Please leave a rating and comment letting us know how you liked this recipe! This helps our business to thrive and continue providing free, high-quality recipes for you.
Nutrition
Did You Make This?
Leave a comment & rating below or tag
@solushcooks on social media!
Categories:
You might also like...

Spaghetti Squash Mac & Cheese
A lighter take on a classic comfort favorite that swaps pasta for roasted spaghetti squash and keeps all the creamy, cheesy goodness with optional broccoli or chicken for extra heartiness.

Coconut Cream Pie Overnight Oats
A dreamy no-cook breakfast that tastes like coconut cream pie — creamy coconut milk, tangy Greek yogurt, shredded coconut, and optional banana make mornings feel indulgent and effortless.

Roasted Sweet Potato Rounds with Honey & Feta
Crisp-edged sweet potato rounds roasted until tender, finished with salty feta, a drizzle of honey, and fresh parsley—an effortless crowd-pleaser for gatherings or weeknights.
Did You Make This?
Leave a comment & rating below or tag @solushcooks on social media!
Rate This Recipe
Share This Recipe
Enjoyed this recipe? Share it with friends and family, and don't forget to leave a review!
Comments (1)
This recipe looks amazing! Can't wait to try it.
Comments are stored locally in your browser. Server comments are displayed alongside your local comments.

Hi, I'm Lena!
What's Popular

30-Minute Meals!
Join to receive our email series which contains a round-up of some of our quick and easy family favorite recipes.