
>>

Decadent chocolate muffins with a cool peppermint finish — perfect for holiday mornings, cozy dessert spreads, or a festive treat with coffee.

This recipe for Peppermint Hot Chocolate Muffins has been a holiday staple in my kitchen for years. I first developed it on a snowy December morning when I wanted the comfort of hot cocoa in a handheld form. The result is a tender, deeply chocolatey muffin flecked with melty chips and brightened by a whisper of peppermint — the same satisfying warmth as a mug of cocoa but portable and bake-friendly. It quickly became our go-to for brunch gatherings and school bake sales because the mint-and-chocolate pairing feels festive without being fussy.
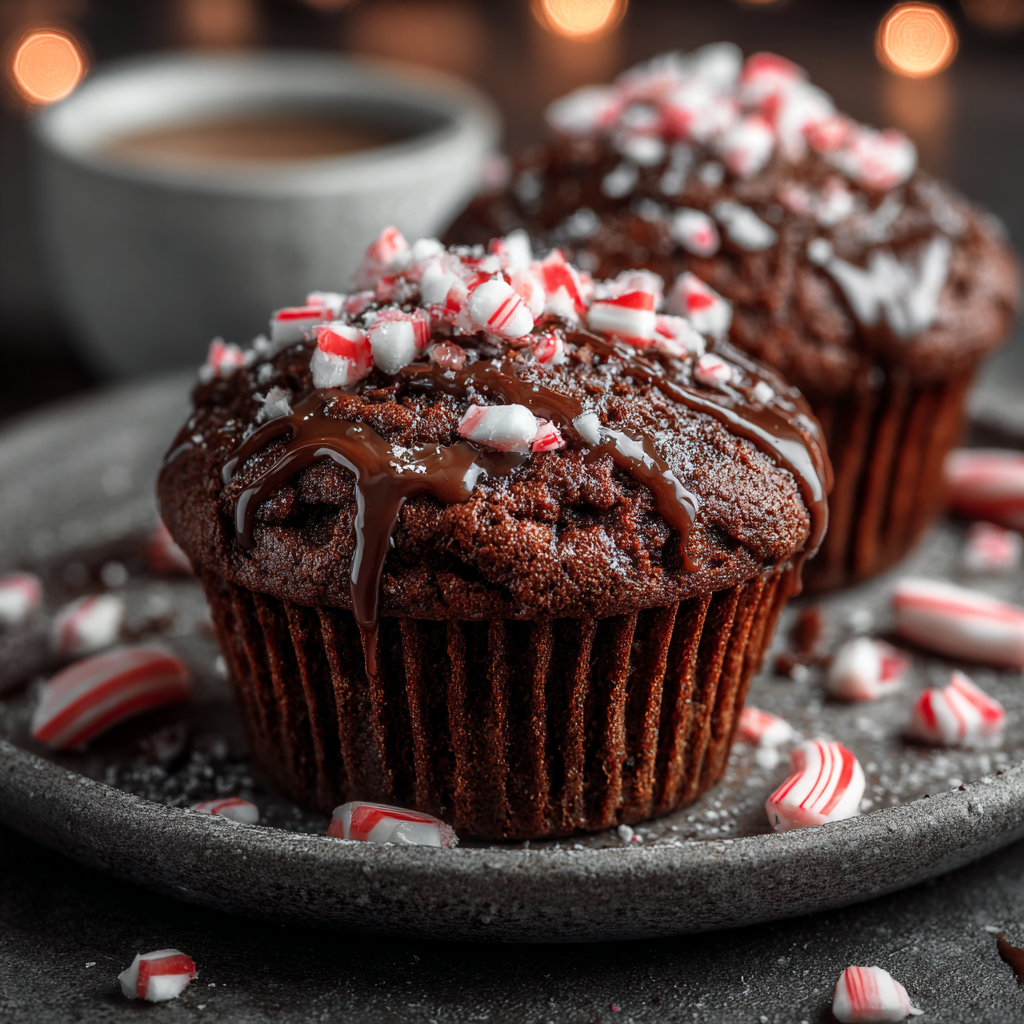
What makes these muffins special is the balance of texture and flavor: a soft, cake-like crumb that stays moist thanks to oil and buttermilk, a rich cocoa backbone, and a peppermint glaze that adds a crisp, cooling finish when sprinkled with crushed candy cane. I love how the aroma of cocoa fills the house while they bake, and the kids always crowd the kitchen when the glaze starts to harden. If you want a small indulgence that reads as both classic and seasonal, these deliver every time.
I’ve watched friends pass around these muffins at holiday brunches and seen adults sneak second helpings; one neighbor even used the basic batter to make a small sheet cake for a last-minute party. The family reactions — big smiles and requests to “make these every year” — are why this recipe stays in my regular rotation.
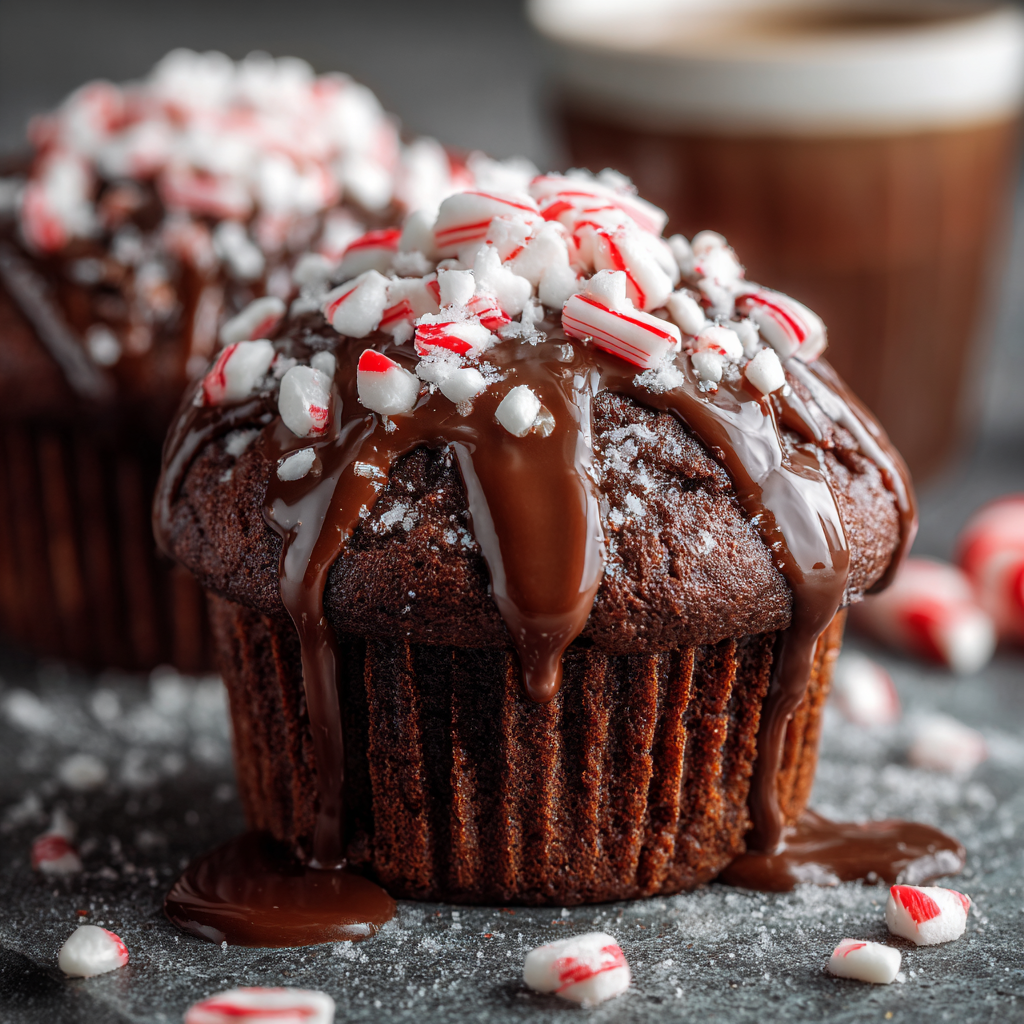
One of my favorite things about this recipe is how flexible it feels: I’ve halved the glaze, skipped the chips for a smoother crumb, and even baked the batter in a loaf pan for a holiday snack bread that travels well. At neighborhood cookie swaps these muffins always stand out for their glossy, candy-speckled tops and cocoa-forward taste.
Store cooled, glazed muffins in a single layer in an airtight container. If stacking, separate layers with parchment paper to protect the glaze. At room temperature they’ll stay fresh for 48 hours; for longer storage, freeze unglazed muffins in a labeled freezer bag for up to three months. Thaw overnight in the refrigerator and apply the glaze the next day for the best texture. Reheat a chilled muffin in a 300°F oven for 8–10 minutes or 15–20 seconds in the microwave to recapture that fresh-baked warmth.
If you don’t have buttermilk, substitute 1 cup of milk with 1 tablespoon vinegar or lemon juice — let it sit for 5 minutes to slightly curdle. For dairy-free needs, use an unsweetened plant-based milk plus 1 tablespoon vinegar and dairy-free chocolate chips; the muffins will still be tender thanks to the oil. For a deeper chocolate profile, replace 1/4 cup of flour with 1/4 cup additional cocoa and reduce sugar by 2 tablespoons; expect a slightly denser crumb. Swap peppermint extract for 1/2 teaspoon instant espresso for a mocha twist.
Serve warm with a dusting of additional powdered sugar and a small peppermint stick on the side for sipping hot chocolate. They pair beautifully with strong coffee or a creamy latte. For a dessert platter, place mini whipped cream dollops on the side and scatter extra crushed candy canes for color. These are ideal for holiday brunches, school parties, or tucked into lunchboxes as a seasonal surprise.
Chocolate-and-mint pairings are a classic combination in many Western dessert traditions, often associated with winter holidays thanks to the refreshing contrast of mint to rich chocolate. Hot chocolate itself has origins tracing back to Mesoamerica, later evolving in Europe into the dessert beverage we know today. These muffins bring that beverage tradition into baked form — an American-style adaptation that takes the comforting elements of a cocoa drink and combines them with quick-bread baking techniques popular in home kitchens.
For a winter holiday variation, fold in chopped toasted hazelnuts or replace the peppermint glaze with salted caramel for a contrast to the cocoa. In warmer months, use a lighter glaze with orange zest instead of peppermint for a chocolate-orange riff. You can also top unglazed muffins with a dollop of mascarpone and a sprinkle of shaved chocolate for an elevated brunch presentation.
Make the batter the night before and refrigerate in a covered bowl; give it a gentle stir and scoop into lined tins before baking in the morning for fresh muffins with minimal morning effort. Alternatively, bake a double batch and freeze individual muffins once cooled; remove the desired number the night before to thaw in the fridge. Pack in single-serve containers or wrap in parchment for grab-and-go breakfasts during busy holiday mornings.
These Peppermint Hot Chocolate Muffins are an approachable, festive treat that blends timeless flavors with everyday practicality. Whether you’re serving them at a cozy brunch or handing them out on a cold morning, they’re easy to make, easy to love, and wonderfully adaptable. I hope they become a favorite in your kitchen too — feel free to experiment and make them your own.
Measure flour by spooning into the cup and leveling to avoid dense muffins.
Use room-temperature eggs for better emulsion and lift.
Don’t overmix the batter; stop when a few streaks of flour remain for a tender crumb.
Allow muffins to cool completely before glazing to prevent the glaze from melting away.
Reserve some chocolate chips to sprinkle on top for an attractive finish.
This nourishing peppermint hot chocolate muffins recipe is sure to be a staple in your kitchen. Enjoy every moist, high protein slice — it is perfect for breakfast or as a wholesome snack any time.
If you don’t have buttermilk, use 1 cup milk plus 1 tablespoon white vinegar or lemon juice; let it sit for 5 minutes.
Yes — freeze unglazed for up to 3 months. Thaw in the refrigerator and glaze after thawing for best texture.
This Peppermint Hot Chocolate Muffins recipe makes perfectly juicy, tender, and flavorful steak every time! Serve with potatoes and a side salad for an unforgettable dinner in under 30 minutes.
Preheat oven to 350°F. Line a 12-cup muffin tin with liners or grease each cup.
Whisk together flour, cocoa, sugar, baking powder, baking soda, and salt in a large bowl until evenly combined.
Whisk buttermilk, oil, eggs, vanilla, and peppermint extract in a separate bowl until blended.
Pour wet into dry and fold gently with a spatula until just combined; avoid overmixing to keep muffins tender.
Fold in chocolate chips, then fill each muffin cup about two-thirds full using a scoop for consistent sizing.
Bake at 350°F for 18–22 minutes until a toothpick comes out with a few moist crumbs. Cool 5 minutes in pan, then cool on a wire rack.
Whisk powdered sugar with milk and peppermint extract until smooth; adjust to desired consistency.
Drizzle glaze over cooled muffins and top with crushed candy canes. Let set 15–20 minutes before serving.
Last Step: Please leave a rating and comment letting us know how you liked this recipe! This helps our business to thrive and continue providing free, high-quality recipes for you.
Leave a comment & rating below or tag
@solushcooks on social media!

A lighter take on a classic comfort favorite that swaps pasta for roasted spaghetti squash and keeps all the creamy, cheesy goodness with optional broccoli or chicken for extra heartiness.

A dreamy no-cook breakfast that tastes like coconut cream pie — creamy coconut milk, tangy Greek yogurt, shredded coconut, and optional banana make mornings feel indulgent and effortless.

Crisp-edged sweet potato rounds roasted until tender, finished with salty feta, a drizzle of honey, and fresh parsley—an effortless crowd-pleaser for gatherings or weeknights.
Leave a comment & rating below or tag @solushcooks on social media!
Enjoyed this recipe? Share it with friends and family, and don't forget to leave a review!
This recipe looks amazing! Can't wait to try it.
Comments are stored locally in your browser. Server comments are displayed alongside your local comments.

Join to receive our email series which contains a round-up of some of our quick and easy family favorite recipes.
