
No-Bake Cookie Lasagna

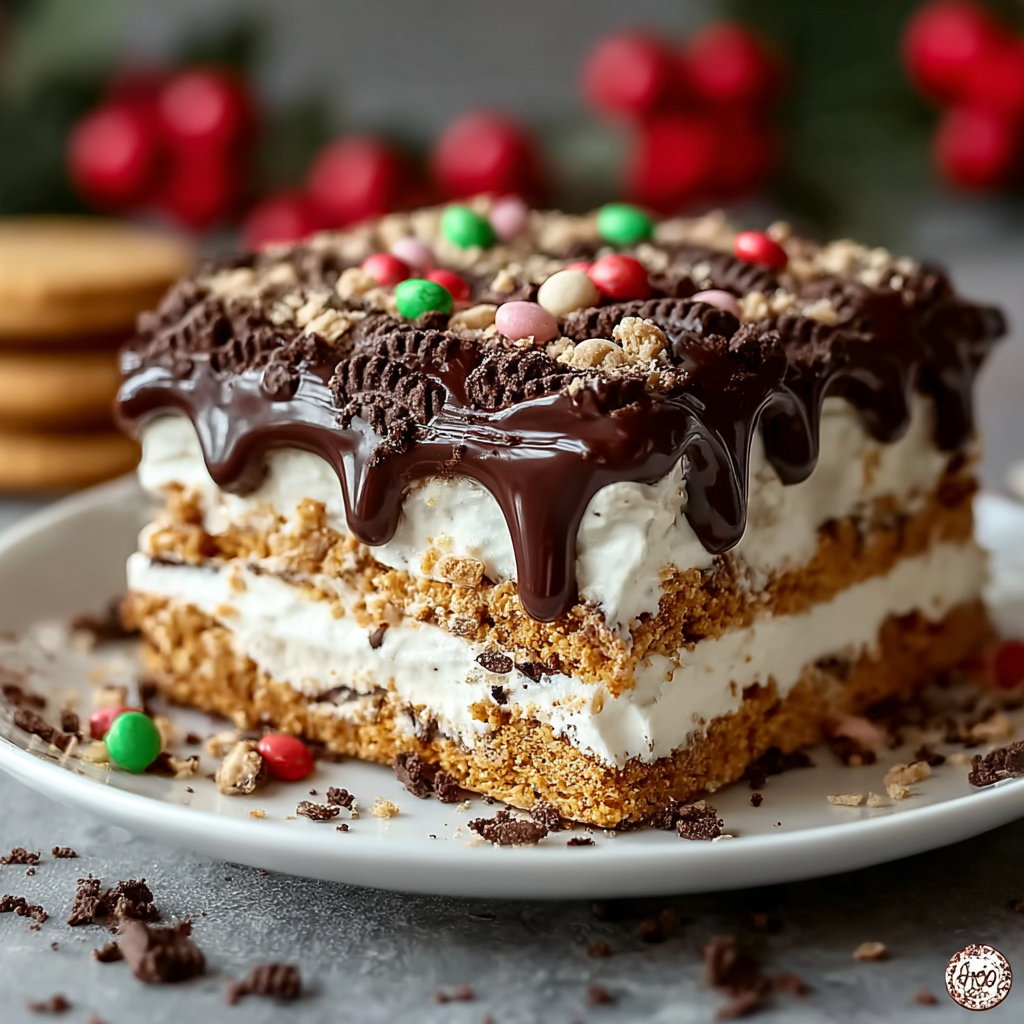
Layers of Oreo crust, creamy sweet cheese, chocolate and vanilla pudding, topped with whipped cream and holiday candies — a festive no-bake treat perfect for gatherings.

This no-bake cookie lasagna has become my holiday shortcut for dessert tables and last-minute celebrations. I first made it one December when the oven gave out during a cookie marathon; I had the pantry staples and a craving for something nostalgic and over-the-top. The result was an immediate crowd-pleaser: a crunchy Oreo base, a smooth sweetened cream cheese layer, and two distinct pudding layers that read like a diner parfait on parade. Everyone reached for seconds, and it vanished faster than cookies on a baking sheet.
What makes this dish special is the contrast of textures and the freedom to dress it up for the season. The crushed cookies set into a firm, chocolaty foundation that snaps under a velvety cream cheese layer. The chocolate and vanilla pudding layers bring familiar flavors children love, while a generous cloud of whipped topping softens the sweetness and adds a mousse-like finish. I discovered that a longer chill improves sliceability and deepens the flavors, turning a simple combination into a showstopper that’s easy to scale for a crowd.
Why You'll Love This Recipe
- Totally no-bake: Assemble in under 30 minutes and let the refrigerator do the work, making it ideal for busy holidays and potlucks.
- Pantry-friendly ingredients: Uses store-bought cookies and instant pudding mixes available year-round, so you can make it at a moment's notice.
- Kid-approved and festive: Chocolate, vanilla, whipped cream, sprinkles and mini candies make it a hit with children and adults alike.
- Make-ahead friendly: Can be prepared a day ahead and stays fresh in the fridge, saving stress on party day.
- Customizable: Swap flavors, add extracts, or change the candy topping for any season or dietary need.
- Serves a crowd: A 9x13 pan yields about a dozen generous squares, perfect for gatherings.
I first brought this to a neighbor's holiday brunch and watched everyone trade plates until the last square disappeared. Over the years I refined the proportions: a slightly denser crust with just enough butter, a cream cheese layer that’s lightly sweetened so it doesn’t compete with the pudding, and precise milk measurements for the instant puddings so they set to the right firmness. Family members now ask for this instead of pie during the holidays—proof that simple, well-balanced elements win hearts.
Ingredients
- Oreos (36 cookies): Choose classic chocolate sandwich cookies for the deepest flavor. Crushing finely gives a stable crust; use a food processor or seal in a bag and roll with a rolling pin.
- Unsalted butter (1/2 cup): Melted and mixed with the crumbs to bind the crust. Unsalted keeps the sweetness controlled; you can add a pinch of salt if your cookies are very sweet.
- Cream cheese (8 ounces): Full-fat, softened to room temperature for smooth blending. Brands like Philadelphia provide consistent texture and tang.
- Granulated sugar (1/4 cup): Sweetens the cream cheese layer without overpowering. Powdered sugar can be used for a slightly smoother result, but reduce to 3 tablespoons.
- Milk for the cream layer (2 tablespoons): Any milk you have on hand; it loosens the cream cheese for easier folding with whipped topping.
- Vanilla extract (1 teaspoon): Enhances the dairy flavors; pure vanilla gives the best aroma.
- Whipped topping (1 1/2 cups + 1 1/2 cups): Use whipped cream or a stable whipped topping. One portion folds into the cream cheese, the other spreads on top as the finishing cloud.
- Instant vanilla pudding (3.4 ounces): Prepared with 1 1/2 cups cold milk — this yields a thick vanilla layer that contrasts the chocolate.
- Instant chocolate pudding (3.4 ounces): Also prepared with 1 1/2 cups cold milk. For a deeper chocolate taste use Dutch-process hot cocoa powder in addition.
- Cold milk (3 cups total): Divided 1 1/2 cups for each pudding mix. Cold milk gives the instant puddings time to thicken properly.
- Christmas sprinkles and mini M&Ms: Seasonal candies add color and crunch; feel free to swap for chopped nuts or shaved chocolate.
Instructions
Prepare the crust:Crush 36 Oreo cookies to a fine crumb using a food processor or a heavy rolling pin in a sealed bag. Combine the crumbs with 1/2 cup melted unsalted butter and stir until evenly moistened. Press the mixture firmly into the bottom of a 9x13-inch pan using the bottom of a measuring cup for an even, compact base. Chill in the refrigerator for at least 10 minutes to set — this prevents the crust from sliding when you add layers.Make the cream cheese layer:Beat 8 ounces softened cream cheese with 1/4 cup granulated sugar, 2 tablespoons milk and 1 teaspoon vanilla extract until silky and free of lumps. Fold in 1 1/2 cups whipped topping gently to keep the mixture airy. Spread this even layer over the chilled crust with an offset spatula, smoothing to the edges to create a barrier so pudding layers don’t mix with the crust.Prepare the puddings:In two separate bowls, whisk each 3.4-ounce instant pudding mix with 1 1/2 cups cold milk. Whisk briskly for 2 minutes until beginning to thicken; allow 2–3 minutes more to fully set. For best texture, chill the puddings briefly if your kitchen is warm — they should be spoonable but not runny.Layer the puddings:Spoon the chocolate pudding over the cream cheese layer first, spreading gently to cover without disturbing the layer beneath. Next, spoon the vanilla pudding over the chocolate layer, smoothing the top carefully. Chilling the pan 10–15 minutes between layers helps maintain clean divisions if you prefer a defined two-tone effect.Add the final topping and garnish:Spread the remaining 1 1/2 cups whipped topping over the pudding layers in a soft cloud. Press a few decorative dollops with the back of a spoon if desired. Sprinkle with Christmas sprinkles and scatter mini M&Ms or holiday candies across the surface. Cover and refrigerate for at least 4 hours, but overnight yields cleaner slices and a firmer set.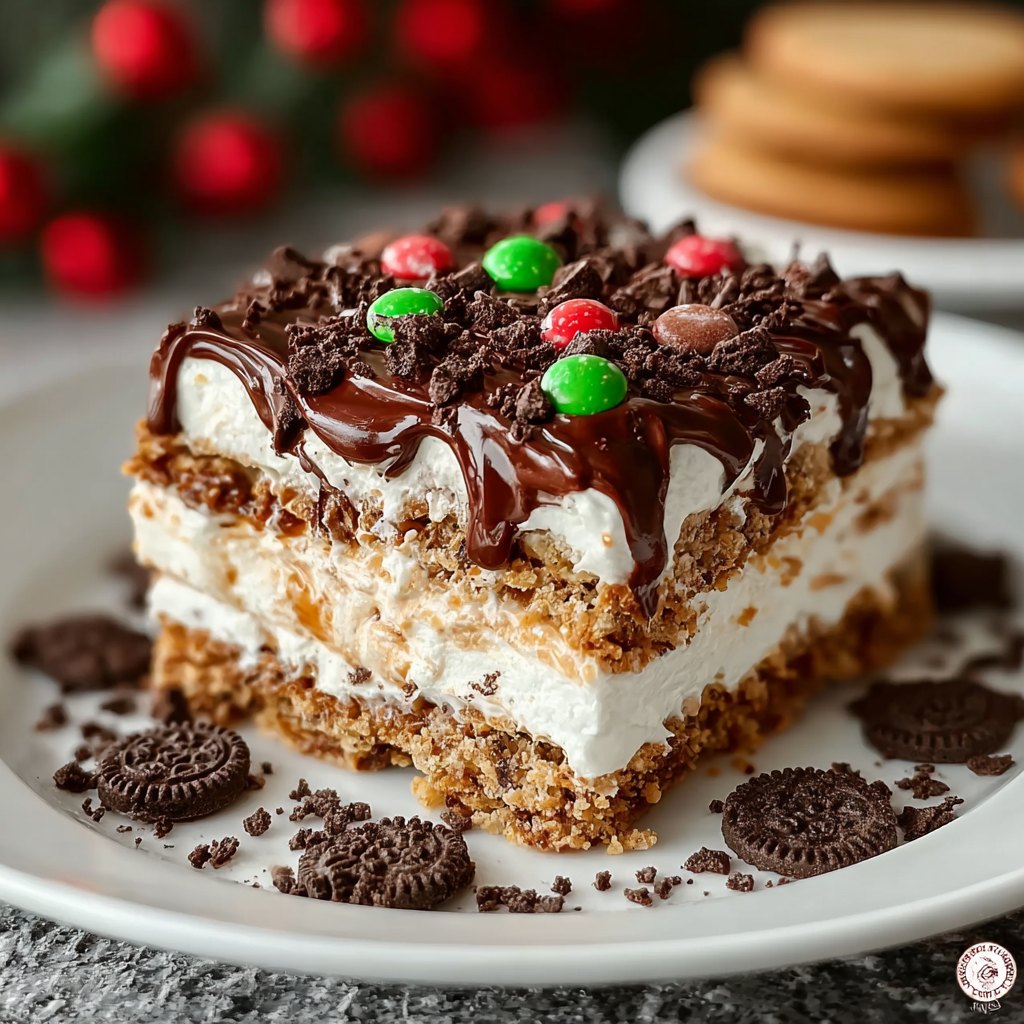
You Must Know
- Refrigerate for at least 4 hours; overnight is best for neat slices and a firmer texture. It freezes well for up to 3 months in an airtight container.
- High in dairy and gluten: this contains cream cheese, whipped topping and Oreo cookies, so it is not suitable for dairy-free or gluten-free diets without substitutions.
- Keep covered in the fridge to prevent the whipped topping from absorbing fridge odors; use plastic wrap or an airtight lid.
- For cleaner slices, chill a thin-bladed knife and wipe it between cuts.
- Calories are moderate to high per serving; consider smaller slices for large gatherings.
My favorite aspect of this dish is how reliably it brings people together. I’ve watched neighbors share stories over a square of this after a community potluck, and the bright candy topping always draws the kids while adults linger on the coffee. The contrast between the crisp cookie base and the pillowy top never fails to get compliments, and I’ve learned that letting the pan rest undisturbed in the fridge rewards you with slices that look as good as they taste.
Storage Tips
Store in the refrigerator in the original pan, tightly covered with plastic wrap or with a fitted lid to keep moisture and odors out. It will keep well for 3 to 4 days; after that the cookie crust begins to soften and the colors may dull. For longer storage, cut into squares, place in a single layer on a tray and freeze for 1 hour, then transfer to an airtight container between layers of parchment paper and freeze up to 3 months. Thaw in the refrigerator overnight before serving for best texture.
Ingredient Substitutions
For a gluten-free version, use gluten-free chocolate sandwich cookies in place of Oreos and choose gluten-free instant puddings. For dairy-free needs, substitute dairy-free cream cheese and whipped topping alternatives and use dairy-free puddings prepared with almond or oat milk; expect a slightly different set and mouthfeel. If you prefer less sweetness, reduce the granulated sugar in the cream cheese layer to 2 tablespoons and choose reduced-sugar pudding mixes.
Serving Suggestions
Serve chilled in slices alongside strong coffee or hot cocoa. For a party, plate squares on dessert plates with a small spoon of warm berry compote for brightness or a dusting of cocoa powder for a sophisticated touch. Garnish each portion with a fresh mint leaf or a few extra mini candies to echo the festive topping. This also pairs well with vanilla ice cream for an indulgent duo.
Cultural Background
Layered chilled desserts echo classic American and European trifle traditions but with a modern, convenience-driven twist that rose in popularity with the availability of instant pudding mixes and store-bought cookies. This version leans into nostalgic mid-20th-century pantry shortcuts that make entertaining easier, marrying the simplicity of instant components with the visual appeal of layered puddings and whipped toppings often found at family gatherings.
Seasonal Adaptations
Swap the holiday candies and sprinkles for pastel candies and lemon zest in spring, or use pumpkin spice instant pudding and toasted pecans in autumn for a seasonal twist. For summer cookouts, top with fresh berries and a sprinkle of toasted coconut. Small adjustments to extracts—try peppermint at Christmastime or almond in March—can transform the flavor profile for different celebrations.
Meal Prep Tips
Assemble the base and cream cheese layer the evening before, then prepare puddings and layer them the next day shortly before guests arrive. Keep toppings in separate bowls and finish the assembly 30 minutes before serving to keep the whipped topping pristine. Portioning in advance into individual cups makes transport and serving easier for potlucks and picnics, and chilled single servings are perfect for grab-and-go dessert plates.
This dish makes gatherings effortless: minimal hands-on time, a reliable crowd-pleaser, and endless ways to personalize. I hope you make it your own and discover the little swaps that become your family’s favorite tradition.
Pro Tips
Press the Oreo crust firmly and evenly into the pan to prevent the base from crumbling when sliced.
Chill the pan for at least 4 hours or overnight for the best texture and cleaner slices.
Wipe a warm knife between cuts for neater portions and less topping drag.
This nourishing no-bake cookie lasagna recipe is sure to be a staple in your kitchen. Enjoy every moist, high protein slice — it is perfect for breakfast or as a wholesome snack any time.
Tags
No-Bake Cookie Lasagna
This No-Bake Cookie Lasagna recipe makes perfectly juicy, tender, and flavorful steak every time! Serve with potatoes and a side salad for an unforgettable dinner in under 30 minutes.
Ingredients
Crust
Cream Cheese Layer
Pudding Layers
Topping
Instructions
Crush cookies and form crust
Crush 36 Oreo cookies to fine crumbs. Mix with 1/2 cup melted unsalted butter until evenly moistened. Press firmly into the bottom of a 9x13-inch pan and chill for at least 10 minutes to set.
Prepare cream cheese layer
Beat 8 ounces softened cream cheese with 1/4 cup granulated sugar, 2 tablespoons milk and 1 teaspoon vanilla until smooth. Fold in 1 1/2 cups whipped topping gently and spread over chilled crust.
Make puddings
In two bowls, whisk each 3.4-ounce instant pudding mix with 1 1/2 cups cold milk until thickened. Let set briefly until spoonable but not runny.
Layer puddings
Spread chocolate pudding over the cream cheese layer, then carefully spread the vanilla pudding over the chocolate. Chill 10-15 minutes between layers if desired for defined separation.
Top and chill
Spread remaining 1 1/2 cups whipped topping over the puddings, decorate with sprinkles and mini candies, then refrigerate at least 4 hours or overnight before slicing.
Last Step: Please leave a rating and comment letting us know how you liked this recipe! This helps our business to thrive and continue providing free, high-quality recipes for you.
Nutrition
Did You Make This?
Leave a comment & rating below or tag
@solushcooks on social media!
Categories:
You might also like...

Spaghetti Squash Mac & Cheese
A lighter take on a classic comfort favorite that swaps pasta for roasted spaghetti squash and keeps all the creamy, cheesy goodness with optional broccoli or chicken for extra heartiness.

Coconut Cream Pie Overnight Oats
A dreamy no-cook breakfast that tastes like coconut cream pie — creamy coconut milk, tangy Greek yogurt, shredded coconut, and optional banana make mornings feel indulgent and effortless.

Roasted Sweet Potato Rounds with Honey & Feta
Crisp-edged sweet potato rounds roasted until tender, finished with salty feta, a drizzle of honey, and fresh parsley—an effortless crowd-pleaser for gatherings or weeknights.
Did You Make This?
Leave a comment & rating below or tag @solushcooks on social media!
Rate This Recipe
Share This Recipe
Enjoyed this recipe? Share it with friends and family, and don't forget to leave a review!
Comments (1)
This recipe looks amazing! Can't wait to try it.
Comments are stored locally in your browser. Server comments are displayed alongside your local comments.

Hi, I'm Lena!
What's Popular

30-Minute Meals!
Join to receive our email series which contains a round-up of some of our quick and easy family favorite recipes.