
>>

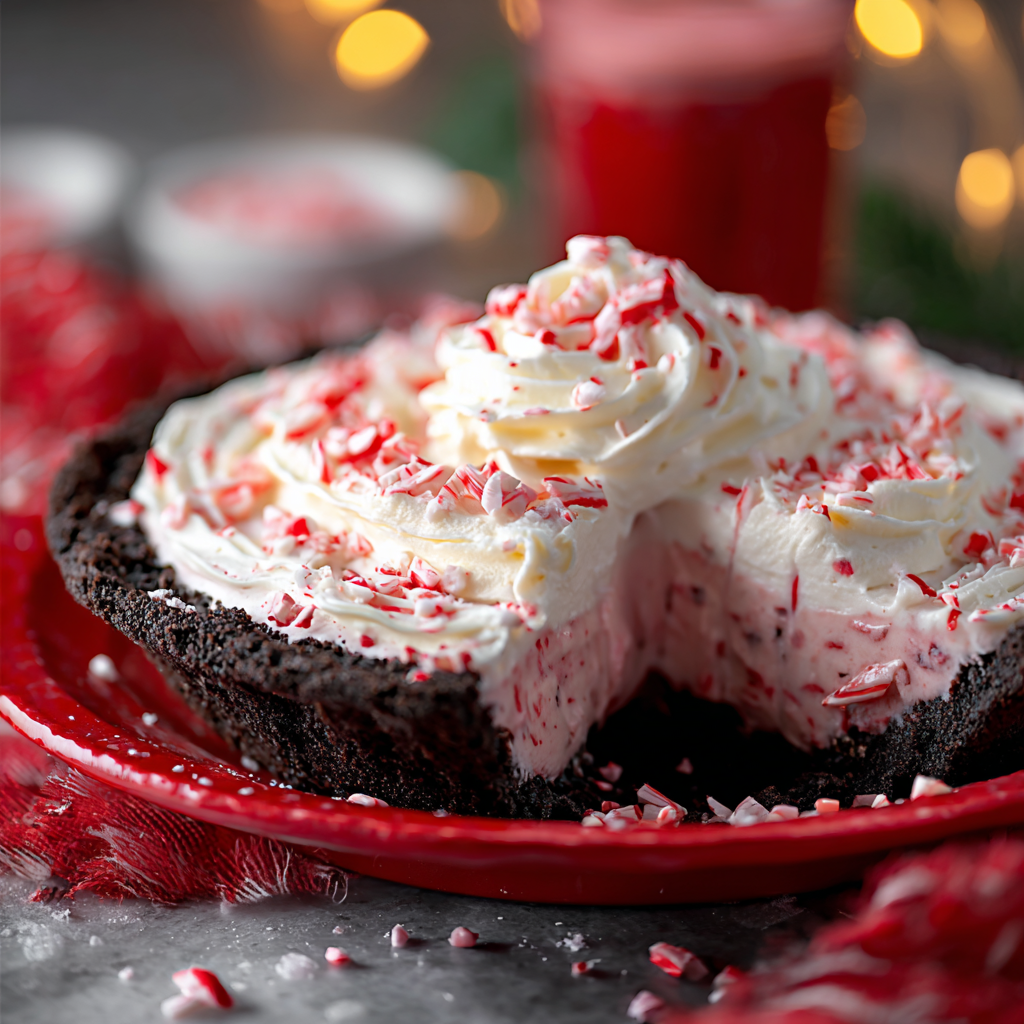
A festive, no-bake peppermint pie with a chocolate cookie crust, creamy peppermint filling, and fluffy topping — perfect for holiday gatherings.

This peppermint pie has been my holiday shortcut and showstopper for years: a chocolate cookie crust filled with a fluffy, mint-scented cream that sets in the fridge while I wrap presents. I first developed this version during a particularly busy December when I needed a dessert that looked special but didn’t demand oven time. The texture is cool and airy with a gentle peppermint snap from crushed candy, and the color pops with a soft pink swirl that always gets compliments. It’s sweet, bright, and pleasantly minty without overpowering the palate.
What makes this pie special is how approachable it is—no tempering, no blind baking—yet it delivers a restaurant-worthy experience. The filling is silky thanks to room-temperature cream cheese whipped with heavy cream, and a little peppermint extract deepens the flavor while powdered sugar balances the coolness. My family immediately took to it as a holiday staple; neighbors ask for a slice, and the kids love the crushed candy garnish. It’s one of those dishes I’ll make when I want something festive but fuss-free, and it always disappears.
In my own experience this pie became our go-to when we hosted several family dinners in a single season. I would assemble it in the morning, wrap gifts, and by dessert time it was perfectly set. My niece nicknamed it “Santa’s mint cloud,” and that stuck. The combination of creamy texture, peppermint crunch, and chocolate base keeps people coming back for seconds, and the simple technique makes it a reliable crowd-pleaser every holiday.

I love how this pie brings memories of tree trimming and holiday music—it's the one dessert I can assemble while the oven is busy with other dishes, yet it still looks like I spent hours on it. Family members often ask for the “minty one” first, and it’s become part of our holiday ritual: make the crust festive, let the filling set, and serve with hot cocoa for a cozy finish. Watching guests’ faces when they taste the airy peppermint filling is my favorite part.
Store the finished pie covered in the refrigerator for up to 3–4 days. Use a pie carrier or a cake dome if transporting to a holiday party—slightly tilt the lid to keep the whipped topping intact. For longer storage, freeze the whole pie tightly wrapped in plastic wrap and then aluminum foil for up to 2 months; thaw in the refrigerator overnight before serving. To re-fluff the whipped topping after thawing, add a few fresh dollops of whipped cream on top.
For a gluten-free option, swap the Oreo crust for a certified gluten-free chocolate cookie crust or make your own with gluten-free chocolate wafer cookies and melted butter. If dairy is a concern, use full-fat dairy-free cream cheese and coconut cream whipped to medium peaks—note texture will be slightly different. For a less sweet version, reduce powdered sugar to 1 1/4 cups and increase vanilla to keep depth. If peppermint extract is too strong, substitute with 1/2 teaspoon and add 1 teaspoon of finely grated orange zest for a festive twist.
Serve chilled slices with a small scoop of vanilla ice cream or a drizzle of warm chocolate sauce for contrast. Garnish plates with a sprig of fresh mint and extra crushed peppermint around the edge. This pie works well as the final course to a heavy holiday meal because its light, whipped texture cleanses the palate. For buffet-style serving, cut into smaller wedges and place on a platter dusted with cocoa powder for a refined presentation.
Mint and chocolate pairings have long been popular in Western confectionery, with the candy-cane motif emerging as a Christmas symbol in the 19th century. This no-bake version channels classic holiday flavors—mint, chocolate, and cream—into a chilled centerpiece that reflects modern home entertaining trends where convenience meets tradition. It’s a contemporary adaptation of layered mint desserts that were popularized in mid-20th century home cookbooks, updated for busy hosts who want a festive finish without long oven times.
Spring and summer can receive a bright twist by substituting crushed strawberries or raspberries for the peppermint and leaving out the extract, creating a pink-tinged berry cream. For a winter spice variation, add 1/4 teaspoon ground cinnamon and swap crushed peppermint for chopped chocolate-spiced biscuits. Serve mini versions in ramekins for Valentines or holiday cookie exchanges—top each with an edible gold dust or crushed peppermint for seasonal shine.
Make the filling up to two days ahead and keep it covered in the refrigerator; assemble into the crust the day you plan to serve for the freshest presentation. Portion the crushed peppermint into small containers so pieces stay crisp. If you need to speed chilling, pop the assembled pie into the freezer for 45–60 minutes, but don’t forget it—move it to the refrigerator to finish firming. For individual servings, spoon filling into mini tart shells and chill the same way.
Final thoughts: This no-bake peppermint pie is a dependable holiday hero—simple to make, festive to look at, and delightful to taste. Whether you’re hosting a big family dinner or bringing a dessert to a neighbor, it’s the kind of make-ahead treat that feels homemade and special.
Soften cream cheese to room temperature to avoid lumps and achieve a silky texture.
Whip heavy cream to medium peaks so it folds smoothly into the filling without deflating.
Pulse peppermint candies coarsely for crunch; reserve larger shards for garnish to add visual contrast.
Use a hot, clean knife wiped between cuts for neat slices.
Cover the pie tightly when refrigerating to prevent absorption of other flavors.
This nourishing no-bake christmas peppermint pie recipe is sure to be a staple in your kitchen. Enjoy every moist, high protein slice — it is perfect for breakfast or as a wholesome snack any time.
Yes — refrigerate for at least 2 hours; overnight is best for firm slices.
Freeze for up to 2 months, wrapped tightly in plastic and foil; thaw overnight in the refrigerator.
This No-Bake Christmas Peppermint Pie recipe makes perfectly juicy, tender, and flavorful steak every time! Serve with potatoes and a side salad for an unforgettable dinner in under 30 minutes.
Remove cream cheese from the refrigerator 30 minutes before starting so it reaches room temperature. Chill a metal bowl and whisk for whipping cream if available to help the cream whip faster.
Place peppermint candies in a zipper bag and crush with a rolling pin or pulse in a food processor to coarse pieces. Reserve 2 tablespoons for garnish.
In a large bowl, beat the softened cream cheese on medium speed until smooth. Gradually add powdered sugar and beat until creamy and fully incorporated; then mix in vanilla and peppermint extract.
In a chilled bowl, whip the heavy cream to medium peaks. Fold half into the cream cheese mixture to loosen, then gently fold in the remainder to keep the filling light and airy.
Stir in crushed peppermint and add red food coloring in small drops until you reach a festive pale pink; swirl for a subtle marbled effect if desired.
Pour filling into the prepared chocolate cookie crust, smooth the top, cover with plastic wrap, and refrigerate at least 2 hours or overnight to set. For faster setting, freeze 45-60 minutes then refrigerate.
Spread thawed whipped topping over the chilled pie, sprinkle reserved crushed peppermint, and slice with a hot, clean knife for neat portions. Store leftovers refrigerated up to 3–4 days.
Last Step: Please leave a rating and comment letting us know how you liked this recipe! This helps our business to thrive and continue providing free, high-quality recipes for you.
Leave a comment & rating below or tag
@solushcooks on social media!

A lighter take on a classic comfort favorite that swaps pasta for roasted spaghetti squash and keeps all the creamy, cheesy goodness with optional broccoli or chicken for extra heartiness.

A dreamy no-cook breakfast that tastes like coconut cream pie — creamy coconut milk, tangy Greek yogurt, shredded coconut, and optional banana make mornings feel indulgent and effortless.

Crisp-edged sweet potato rounds roasted until tender, finished with salty feta, a drizzle of honey, and fresh parsley—an effortless crowd-pleaser for gatherings or weeknights.
Leave a comment & rating below or tag @solushcooks on social media!
Enjoyed this recipe? Share it with friends and family, and don't forget to leave a review!
This recipe looks amazing! Can't wait to try it.
Comments are stored locally in your browser. Server comments are displayed alongside your local comments.

Join to receive our email series which contains a round-up of some of our quick and easy family favorite recipes.
