
Mint Butter Candy

Soft, mint scented butter candies that melt on the tongue. Easy to make with pantry staples and perfect for gifting or party treats.

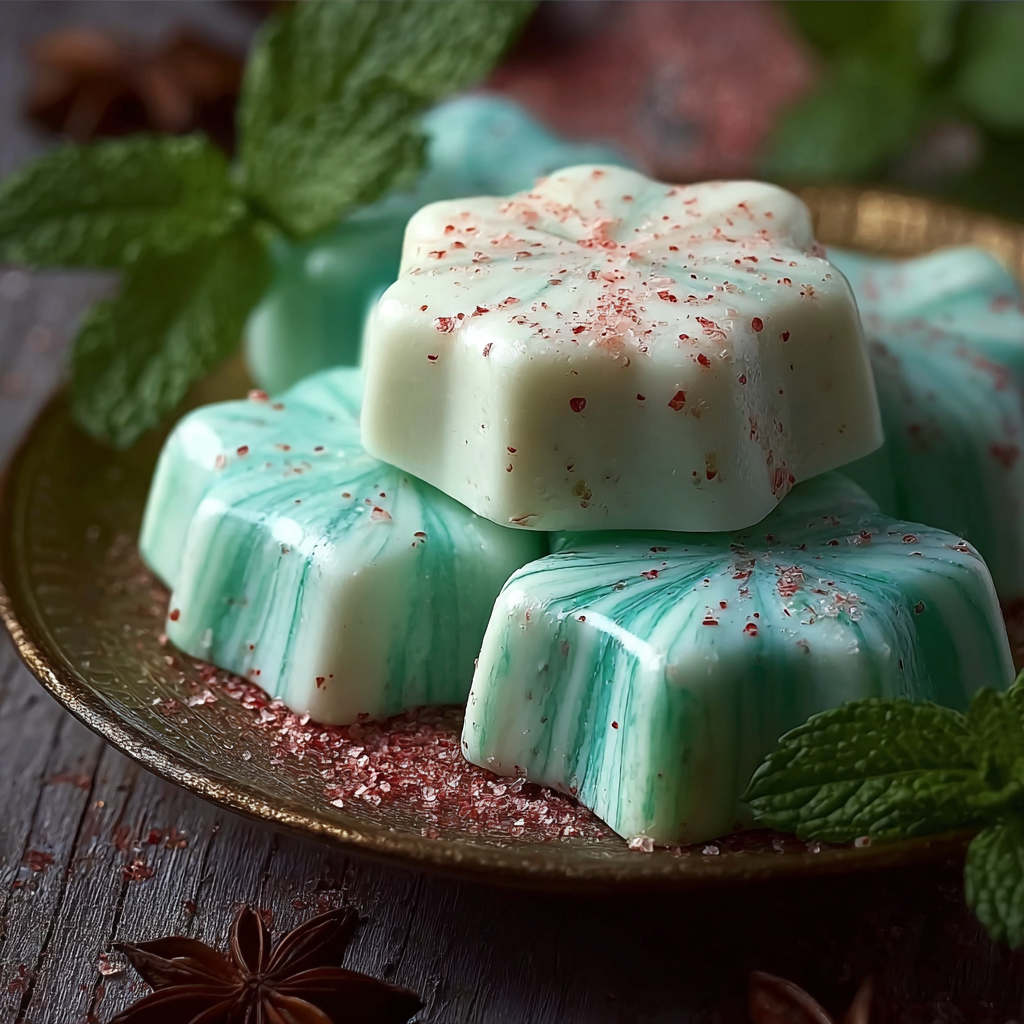
This mint butter candy became a winter tradition in my kitchen the first year I wanted a small, elegant homemade gift for neighbors. I discovered the combination while experimenting with a simple buttercream texture and a few drops of peppermint extract. The result was a silky, firm candy that melts on the tongue with a fresh mint finish and a hint of creamy butter. It requires only a handful of common ingredients and a little patience while the pieces set. I remember my first batch sitting on the counter while fresh snow fell outside and every person who stopped by asked for the recipe.
The charm of these candies is their nostalgic texture and the way they capture the cool brightness of peppermint without being overpowering. They are sweet yet balanced and hold their shape when chilled while still giving a luxurious, creamy mouthfeel. I like to make a double batch when friends are coming over because they disappear quickly. Over the years I have tweaked the ratio of butter to powdered sugar to achieve the ideal density and to make them pipeable so each piece looks polished and confectionery shop worthy.
Why You'll Love This Recipe
- Quick to prepare with about fifteen minutes of active time and minimal equipment so you can assemble candy between other tasks
- Uses pantry staples such as butter and powdered sugar which are easy to source year round
- Versatile texture that can be rolled, piped, or pressed into molds for different presentations
- Perfect for neighborhood gifts because they store well in an airtight tin and hold their flavor for days
- Customizable with food coloring for holiday themes or flavored oils for variety without changing the method
In my family these treats are the small luxury that makes holidays feel special. I once took a tin to a potluck and someone said they tasted like the best part of a candy cane combined with shortbread. That comparison stuck because the butter adds a depth that keeps the mint from tasting one dimensional. Making them taught me how important butter temperature and creaming technique are to the final texture.
Ingredients
- Unsalted butter one half cup softened to room temperature about one stick. Choose a high quality brand such as Plugra or Kerrygold for a rich flavor and minimal water content
- Powdered sugar four cups sifted to remove lumps. Use a standard confectioners sugar like Domino or Caster sugar if available because fine texture yields a smoother candy
- Heavy cream or milk one tablespoon to bind and add silkiness. For a more decadent finish use heavy cream
- Peppermint extract one half teaspoon. Use pure peppermint extract rather than imitation for a clear, crisp mint note
- Salt one pinch to lift the sweetness. Fine sea salt or table salt both work
- Gel food coloring optional. A small drop of gel color gives festive green without thinning the mixture
Instructions
Prepare the butterPlace softened butter in a medium mixing bowl. Beat with an electric mixer on medium speed until smooth and slightly paler about one to two minutes. The goal is to incorporate air for a lighter texture but not to whip until fluffy.Add base liquidStir in one tablespoon of heavy cream or milk and a pinch of salt. Mix on low to combine so the liquid disperses evenly. If using cream expect a slightly richer mouthfeel and a softer set when cooled.Incorporate powdered sugarAdd sifted powdered sugar in two additions while mixing on low. Scrape the bowl between additions and finish mixing until the mass is smooth and holds shape. The texture should be dense but malleable, like a thick dough.Flavor and colorStir in one half teaspoon peppermint extract and a single tiny drop of gel food coloring if desired. Taste the mixture and adjust extract carefully one quarter teaspoon at a time. Too much extract will become medicinal.Shape the piecesTransfer the mixture to a piping bag fitted with a plain round tip or press into a silicone mold. Pipe small coins or press and cut into squares about one inch across for uniform treats. Place pieces on a parchment lined tray.Chill to setRefrigerate the tray for at least thirty minutes until firm. For longer storage keep candies in an airtight tin layered with parchment. Allow candies to come to cool room temperature for a few minutes before serving to soften slightly.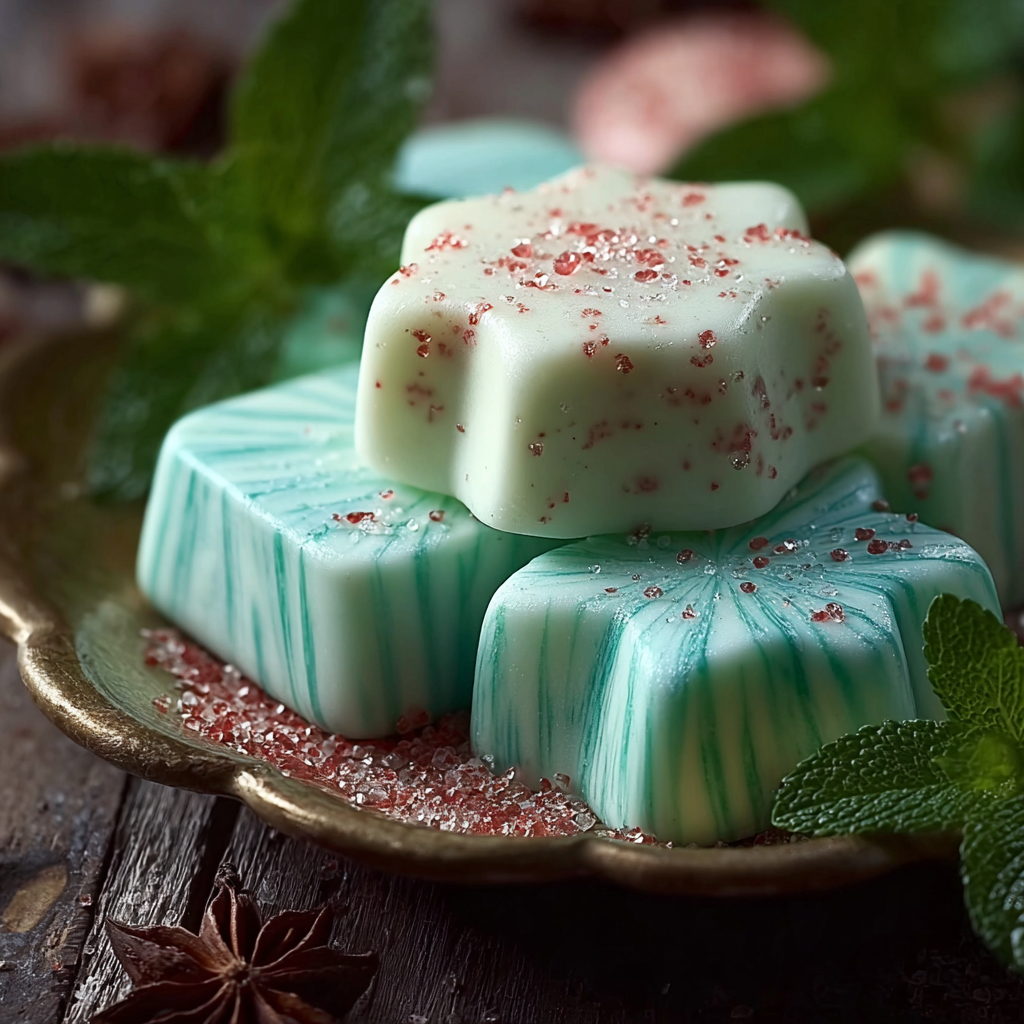
You Must Know
- Keep butter at room temperature but not melted. Too soft butter will make the mixture oily while too cold butter makes it hard to combine
- Candies keep in the refrigerator up to two weeks and freeze up to three months wrapped well in parchment and placed in an airtight container
- Use gel coloring sparingly because liquid food color will change consistency and may require more powdered sugar
- For consistent pieces weigh or measure pipe length to ensure uniform serving sizes and appearance
My favorite part of this method is how forgiving it is. I have rebalanced a batch with an extra tablespoon of powdered sugar when humidity made the dough sticky and it came out beautifully. Friends have told me these are great tucked into lunch boxes as a small treat and that the mint is refreshing after a heavy meal. The simplicity of the ingredients makes them a reliable craft to teach to kids with supervision.
Storage Tips
Store these candies in an airtight container layered with parchment paper at cool refrigerator temperature. Room temperature is acceptable for a day but not recommended in warm climates. Frozen pieces thaw well in the refrigerator overnight and retain texture. For gifting keep candies in a tin with a tight fitting lid and include a small packet of silica gel if shipping to humid locations. Avoid direct sunlight and strong odors which can transfer to the candies.
Ingredient Substitutions
For a dairy free option replace butter with a firm vegan butter block and use full fat coconut cream instead of heavy cream. Expect a slight coconut note. To reduce sweetness replace one cup of powdered sugar with finely ground cashew powder but note the texture will be slightly grittier. For an alcohol free mint use peppermint oil sparingly because it is more concentrated than extract. Always adjust flavor by small increments.
Serving Suggestions
Arrange candies on a small white dish with a sprig of fresh mint for an elegant presentation. They pair well with coffee or strong black tea and make a bright contrast on a holiday dessert board. For parties place them in paper candy cups and scatter crushed candy cane for holiday texture. Use different colors to match party themes and place a small label with flavor notes when gifting.
Cultural Background
Mint flavored butter confections are part of a long tradition of European and American home made sweets where simple dairy and sugar are transformed into small confections. They echo classic butter creams and fondants that appeared in home kitchens when refined sugar became more available. The combination of butter and peppermint captures the same celebratory feel as candy canes and petit fours used at gatherings.
Seasonal Adaptations
In winter add a touch of crushed candy cane for sparkle. For spring swap peppermint for a light spearmint or a drop of lemon oil for a citrus lift. For summer consider reducing the mint and adding a few drops of natural fruit flavor such as raspberry oil then tint with pale pink gel color. These small changes keep the method intact while offering seasonal variety.
Meal Prep Tips
Make a large batch and portion into small tins for quick hostess gifts. Double the recipe and work in two bowls to speed shaping. Keep a piping bag ready in the freezer to firm the tip quickly if working in warm kitchens. Portion candies on trays and freeze briefly before transferring to storage so they keep shape and do not stick together.
This candy is proof that simple ingredients handled with care produce something memorable. Whether you make a few for a quiet evening or wrap dozens for holiday sharing these mint butter candies reward small effort with big flavor. Try a practice batch and adjust the mint to your taste then make a larger run for company.
Pro Tips
Keep butter at room temperature but not melted to ensure a smooth, non oily texture
Sift powdered sugar to prevent lumps and to achieve a smooth finish
Adjust peppermint extract by quarter teaspoon increments to avoid an overpowering taste
If mixture is too sticky add a tablespoon of powdered sugar at a time until workable
Use gel food coloring to avoid adding liquid which would change consistency
This nourishing mint butter candy recipe is sure to be a staple in your kitchen. Enjoy every moist, high protein slice — it is perfect for breakfast or as a wholesome snack any time.
FAQs about Recipes
How long do these candies keep?
Store in an airtight container in the refrigerator for up to two weeks or freeze up to three months.
What is the easiest way to shape them?
Use a clean piping bag and pipe onto parchment. Chill briefly to firm then transfer to storage.
Tags
Mint Butter Candy
This Mint Butter Candy recipe makes perfectly juicy, tender, and flavorful steak every time! Serve with potatoes and a side salad for an unforgettable dinner in under 30 minutes.
Instructions
Prepare the butter
Place softened butter in a medium bowl. Beat on medium until smooth and slightly paler one to two minutes.
Add the cream and salt
Stir in one tablespoon heavy cream and a pinch of salt. Mix on low until evenly incorporated.
Incorporate the powdered sugar
Add sifted powdered sugar in two additions. Mix on low and scrape the bowl between additions until dough is smooth and holds shape.
Flavor and color
Stir in one half teaspoon peppermint extract and a tiny drop of gel food coloring if using. Taste and adjust slowly.
Shape the pieces
Pipe or press mixture into molds or onto parchment making about one inch pieces. Keep sizes consistent for uniform setting.
Chill to set
Refrigerate for at least thirty minutes until firm. Store in an airtight container layered with parchment.
Last Step: Please leave a rating and comment letting us know how you liked this recipe! This helps our business to thrive and continue providing free, high-quality recipes for you.
Nutrition
Did You Make This?
Leave a comment & rating below or tag
@solushcooks on social media!
Categories:
You might also like...

Spaghetti Squash Mac & Cheese
A lighter take on a classic comfort favorite that swaps pasta for roasted spaghetti squash and keeps all the creamy, cheesy goodness with optional broccoli or chicken for extra heartiness.

Coconut Cream Pie Overnight Oats
A dreamy no-cook breakfast that tastes like coconut cream pie — creamy coconut milk, tangy Greek yogurt, shredded coconut, and optional banana make mornings feel indulgent and effortless.

Roasted Sweet Potato Rounds with Honey & Feta
Crisp-edged sweet potato rounds roasted until tender, finished with salty feta, a drizzle of honey, and fresh parsley—an effortless crowd-pleaser for gatherings or weeknights.
Did You Make This?
Leave a comment & rating below or tag @solushcooks on social media!
Rate This Recipe
Share This Recipe
Enjoyed this recipe? Share it with friends and family, and don't forget to leave a review!
Comments (1)
This recipe looks amazing! Can't wait to try it.
Comments are stored locally in your browser. Server comments are displayed alongside your local comments.

Hi, I'm Lena!
What's Popular

30-Minute Meals!
Join to receive our email series which contains a round-up of some of our quick and easy family favorite recipes.