
>>

A light, no-bake marshmallow whip cheesecake set in a buttery graham crust — dreamy, fluffy, and perfect for make-ahead celebrations.

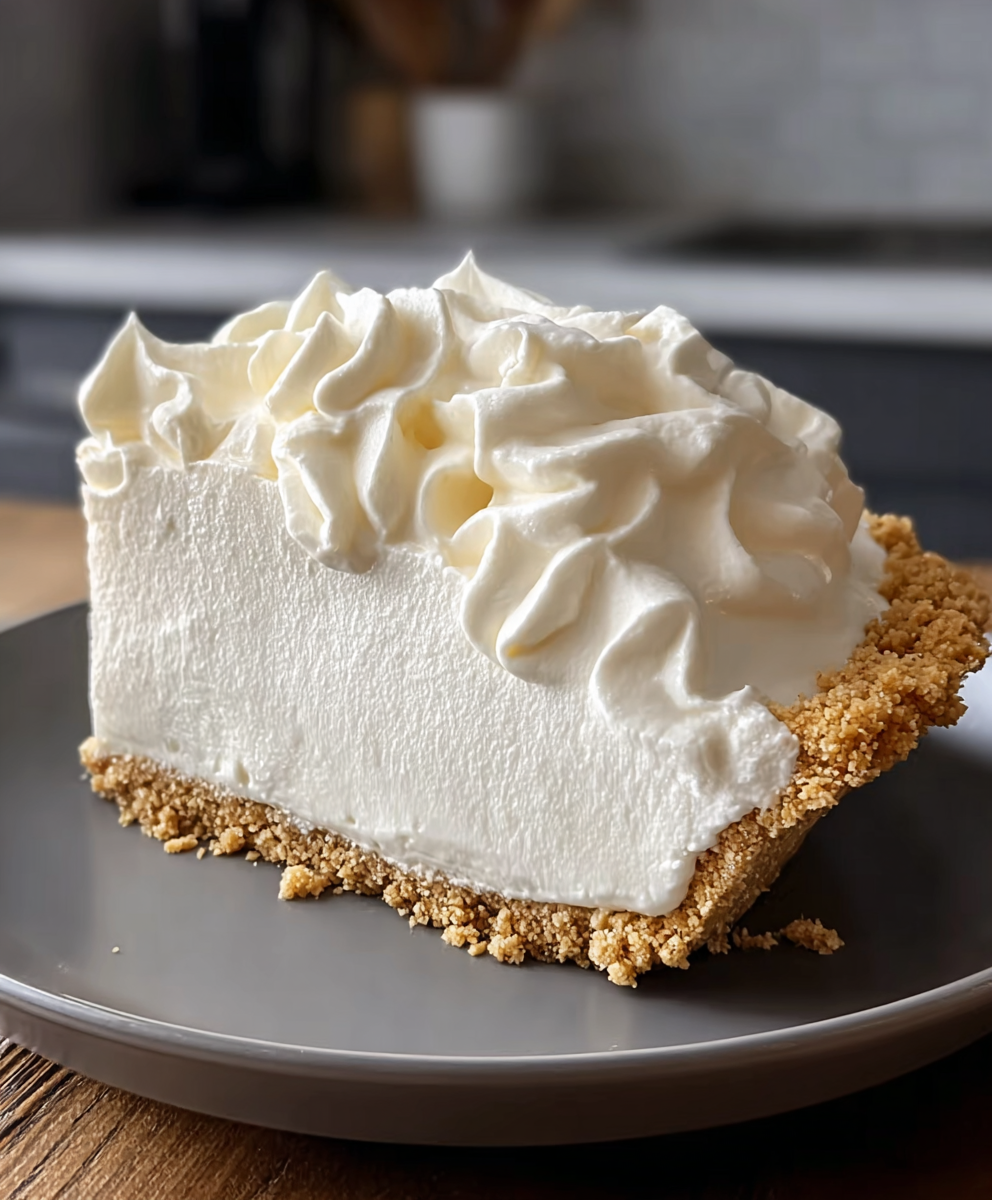
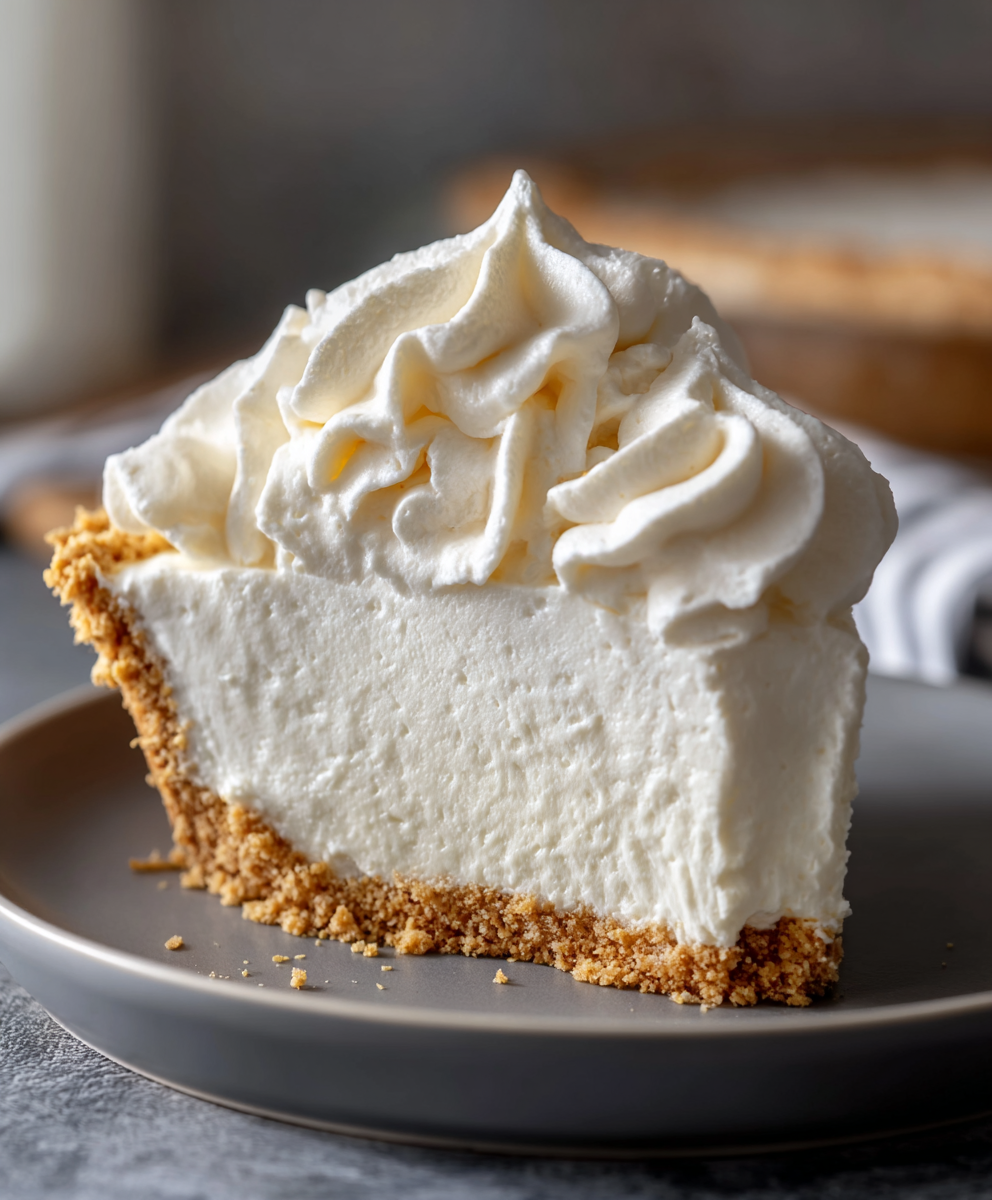
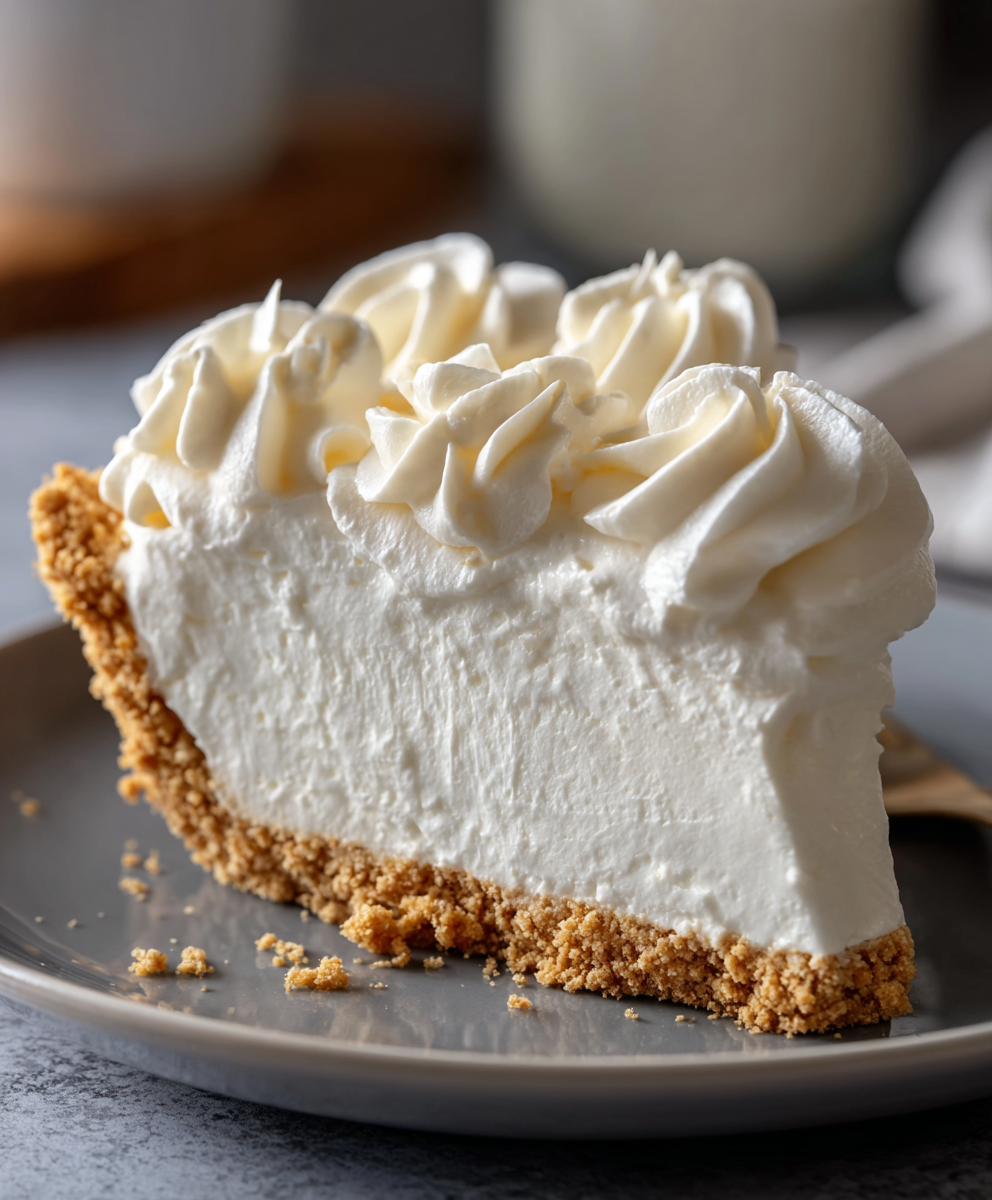
This marshmallow whip cheesecake has been a comfort dessert in my kitchen for years. I first made it on a rainy afternoon when I needed something simple, no-heat, and celebratory after a small household success. The texture surprised me: cloud-like, airy filling with a subtle sweetness from the marshmallow creme balanced by the tang of cream cheese, all resting on a crisp, buttery graham crust. It’s the kind of dessert that prompts smiles before the first forkful — light enough that people ask for seconds without feeling weighed down.
I discovered this combination while rummaging through the pantry and refrigerator one evening and realizing I had a tub of whipped topping, a jar of marshmallow creme, and some cream cheese. The result was unexpectedly delightful: silky, stable, and perfectly set with only refrigeration. Over the years I’ve learned to adjust the beat times, the folding technique, and chill time to get a reliably smooth surface and clean slices. It’s my go-to for summer parties, potlucks, and simple weeknight treats because it can be made ahead and decorated just before serving.
My family’s reaction the first time I served this was immediate: everyone asked how I made it so light. I’ve since brought it to birthday dinners and neighborhood potlucks; people often ask for the recipe and then tell me they halve a wedge and call it lunch — that’s how light it feels. The combination of textures, from the crunchy crust to the pillowy center, always gets compliments.
One of my favorite things about this dessert is how versatile it is. I have brought it to summer barbecues and holiday dinners; it fits both casual and festive tables. Once, I swapped fresh strawberries for a summer brunch and everyone raved about the bright contrast between tart berries and the sweet marshmallow center. It’s reliably popular and easy to adapt to the season or occasion.
Store the pie covered in the refrigerator for up to 4 days. Use an airtight cake carrier or loosely tent with plastic wrap to avoid absorbing odors. If freezing, wrap the pie in two layers of plastic wrap and one layer of foil, label with the date, and freeze for up to 3 months. Thaw slowly in the refrigerator for 12–24 hours before serving to avoid condensation that can make the crust soggy. For single-serve freezing, slice wedges and wrap individually; these thaw faster and are convenient for packed lunches.
For a gluten-free version, use a gluten-free graham or cookie crust available in most grocery stores; you may need to slightly increase butter so crumbs bind well. To make it dairy-free, swap the cream cheese for a high-quality vegan cream cheese and use a non-dairy whipped topping; note that flavor will be milder and texture slightly different. If you prefer a less sweet result, reduce the marshmallow creme by 1/4 cup and add 1–2 tablespoons lemon juice to brighten the filling. For a homemade crust, combine 1 1/4 cups graham cracker crumbs with 5 tablespoons melted butter and 1 tablespoon sugar, press into a 9-inch pan, and chill before filling.
Serve slices chilled with a garnish of lightly sweetened whipped cream and fresh berries for a bright contrast. For a holiday presentation, top with candied nuts and a drizzle of warm chocolate sauce; for a summer table, scatter sliced peaches or raspberries across the surface. Pair with a cup of strong coffee or a dessert wine such as Moscato for a simple but elegant finish. Offer spoons of toasted coconut or crushed toffee on the side for guests who want extra texture.
This style of no-bake, whipped filling has roots in American home baking where convenience met creativity: marshmallow-based fillings have been popular since the early 20th century when marshmallow creme became commercially available. The marriage of whipped toppings and cream cheese evolved as a quicker alternative to baked cheesecakes, especially for summertime entertaining. Over time, variations proliferated: chocolate, pumpkin, and fruit layers adapt the same technique across seasons and family traditions.
Spring and summer invite fresh fruit toppings — raspberries, strawberries, or a mango compote — while autumn pairs beautifully with canned pumpkin folded into the cream cheese before adding marshmallow for a pumpkin mousse pie. For winter holidays, add 1/4 teaspoon ground cinnamon and top with toasted pecans. Special-occasion adaptations include a chocolate graham crust and a ribbon of ganache on the surface for a richer celebration dessert.
Make the filling up to 24 hours in advance and store it refrigerated in an airtight container; fold in whipped topping just before filling the crust if you want the freshest volume. Assemble the pie and chill overnight for best results. When transporting, keep the pie on a flat surface in a cooler bag with ice packs to maintain shape. For party service, pre-slice and place wedges on plates for quick distribution.
Every time I serve this it sparks conversation about its simplicity — people are always surprised that such a delicate texture comes from so few ingredients. I hope you enjoy making it as much as I do; tweak the garnishes and make it yours.
Bring the cream cheese to room temperature before beating to avoid lumps and ensure a silky texture.
Gently fold whipped topping in with a rubber spatula to preserve air and keep the filling light.
For clean slices, heat a knife in hot water, dry it, then make each cut; repeat between cuts.
Cover the pie lightly while chilling to prevent condensation on the surface that can mar the top.
This nourishing marshmallow whip cheesecake recipe is sure to be a staple in your kitchen. Enjoy every moist, high protein slice — it is perfect for breakfast or as a wholesome snack any time.
Yes — chill for at least 4 hours, but overnight yields the best texture and clean slices.
Yes, wrap tightly in plastic and foil and freeze for up to 3 months. Thaw overnight in the refrigerator.
Use a warm, dry knife for slicing: dip in hot water, dry the blade, then slice for smooth edges.
This Marshmallow Whip Cheesecake recipe makes perfectly juicy, tender, and flavorful steak every time! Serve with potatoes and a side salad for an unforgettable dinner in under 30 minutes.
Place cream cheese in a bowl and beat on medium-high until smooth and fluffy, 2–3 minutes. Scrape the sides to ensure no lumps remain.
Mix in marshmallow creme and vanilla on low to combine, then increase speed briefly to homogenize without deflating.
Gently fold the thawed whipped topping into the cream cheese mixture with a rubber spatula, preserving volume and stopping once uniform.
Spread filling into the 9-inch crust, smoothing the top with an offset spatula for a clean finish.
Refrigerate for at least 4 hours or overnight to allow the filling to firm up for clean slicing.
Top with whipped cream, fruit, or chocolate shavings just before serving for the best presentation.
Last Step: Please leave a rating and comment letting us know how you liked this recipe! This helps our business to thrive and continue providing free, high-quality recipes for you.
Leave a comment & rating below or tag
@solushcooks on social media!

A lighter take on a classic comfort favorite that swaps pasta for roasted spaghetti squash and keeps all the creamy, cheesy goodness with optional broccoli or chicken for extra heartiness.

A dreamy no-cook breakfast that tastes like coconut cream pie — creamy coconut milk, tangy Greek yogurt, shredded coconut, and optional banana make mornings feel indulgent and effortless.

Crisp-edged sweet potato rounds roasted until tender, finished with salty feta, a drizzle of honey, and fresh parsley—an effortless crowd-pleaser for gatherings or weeknights.
Leave a comment & rating below or tag @solushcooks on social media!
Enjoyed this recipe? Share it with friends and family, and don't forget to leave a review!
This recipe looks amazing! Can't wait to try it.
Comments are stored locally in your browser. Server comments are displayed alongside your local comments.

Join to receive our email series which contains a round-up of some of our quick and easy family favorite recipes.
