
Magic of Candy Cane Cookies

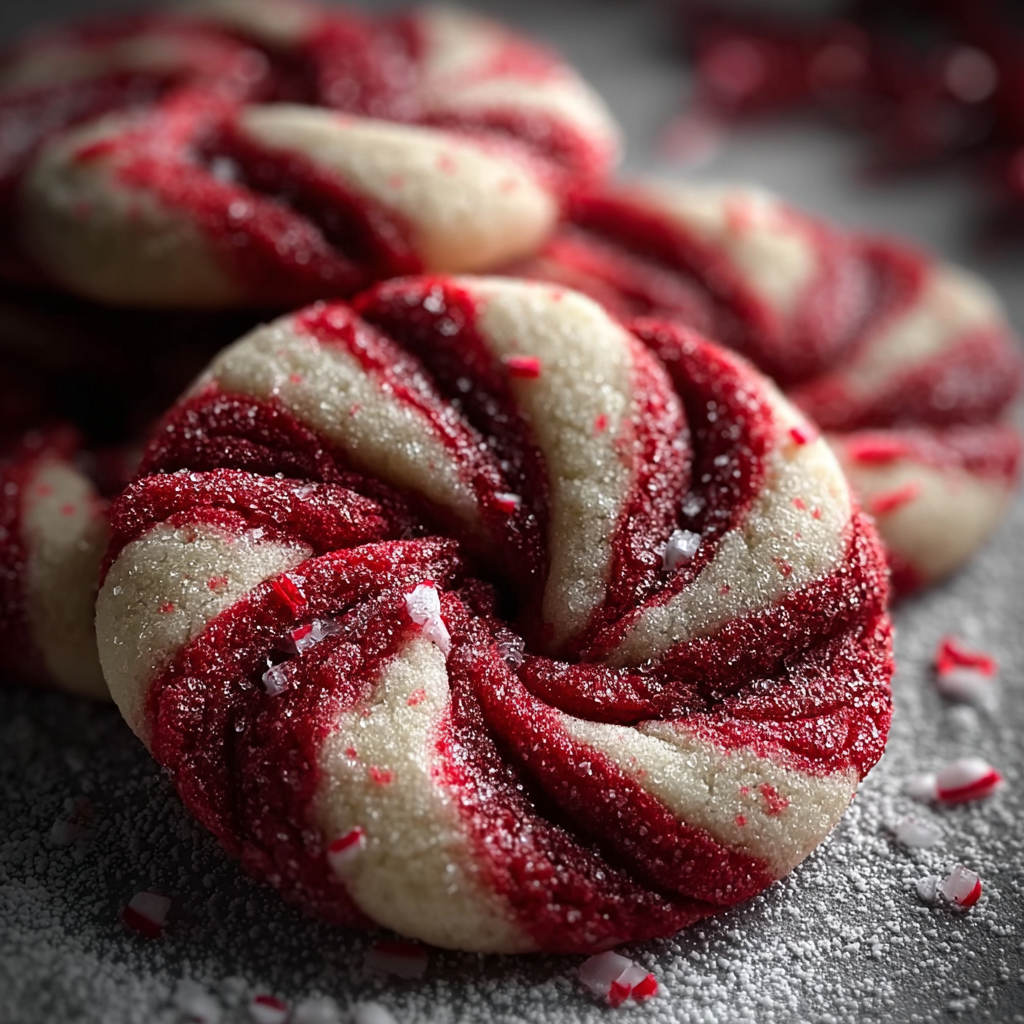
Delicate, peppermint scented cookies shaped like candy canes with swirl ribbons of red and white. A festive bake that is crisp at the edges and tender inside.

Why You'll Love This Recipe
- Simple ingredients you likely have on hand, including unsalted butter, powdered sugar, all purpose flour, and a touch of peppermint extract for a classic holiday flavor profile.
- Make ahead friendly, the dough chills well for up to two days, so you can prepare in advance and shape the cookies on the day you want them fresh.
- Quick bake time, cookies are done in about eight to ten minutes, making this an efficient option for batches and last minute gatherings.
- Kid friendly shaping technique, rolling ropes and twisting allows little helpers to take part without handling hot equipment.
- Pantry staple method, uses gel food coloring for vivid red without adding extra liquid so texture remains unchanged.
- Great for gifting and decorating, the crisp edges make a neat candy cane silhouette that holds up in transport.
I grew to love this recipe after a cold December when I needed an easy way to put together a tray of cookies for neighbors. My family asked for seconds and the shaping became an annual friendly competition. Over the years I tweaked the peppermint amount and the chilling time until the dough was easy to handle but still soft enough to shape, and that balance is what I share here.
Ingredients
- Unsalted butter: 1 cup softened to room temperature. Use a high quality European style butter if you want a richer flavor, but standard unsalted butter works well. Softening is key for smooth creaming.
- Powdered sugar: 1 cup. Also labeled confectioners sugar, it produces a fine, tender crumb unlike granulated sugar which would add grit.
- Large egg: 1, at room temperature. Room temperature egg helps the dough come together evenly and improves texture. Bring an egg to room temperature by placing it in warm water for five minutes if needed.
- Vanilla extract: 1 teaspoon. Use pure vanilla extract for depth. Artificial vanilla will still work but the flavor is flatter.
- Peppermint extract: 1/2 teaspoon. Pure peppermint oil or extract provides the cool finish. Start with a half teaspoon because peppermint can dominate quickly.
- All purpose flour: 2 1/2 cups. Spoon and level into the cup when measuring to avoid packing. This quantity gives a dough that holds shape without becoming dry.
- Salt: 1/2 teaspoon. Balance is important with sweet cookies; use fine salt and add to dry ingredients.
- Red gel food coloring: A few drops to tint half the dough. Gel color is concentrated so it provides bright color without adding liquid.
Instructions
Cream the butter and sugar Beat 1 cup softened unsalted butter with 1 cup powdered sugar until the mixture is smooth and fluffy. Use an electric mixer on medium speed, about two to three minutes, scraping the bowl once. The texture should be light and airy which traps air that helps the cookies spread minimally while baking. Add the egg and extracts Mix in 1 large room temperature egg, 1 teaspoon vanilla extract, and 1/2 teaspoon peppermint extract until just combined. Avoid over beating after the egg goes in to keep the dough tender. You want a homogenous pale batter with no streaks of egg. Combine dry ingredients In a separate bowl, whisk 2 1/2 cups all purpose flour with 1/2 teaspoon salt. Gradually add the dry mixture to the wet mixture on low speed, mixing until a soft dough forms. If the mixture seems crumbly add a teaspoon of milk at a time until cohesive, but proper measuring should avoid that need. Divide and color the dough Divide the dough into two even portions. Knead a few drops of red gel food coloring into one portion until uniformly colored. Wear gloves or use a small spatula to avoid staining your hands. Wrap each dough half tightly in plastic wrap and chill in the refrigerator for one hour. Chilling firms the butter and makes shaping easier. Preheat and shape Preheat the oven to 350 degrees Fahrenheit. On a lightly floured surface, roll equal pieces of the red and white dough into ropes roughly one half inch thick. Lay the ropes side by side and twist them together, then bend the top to form the curved candy cane shape. Press the ends gently so they adhere. Bake until set Place shaped cookies on a parchment lined baking sheet with spacing for expansion. Bake in the preheated oven for eight to ten minutes, until the edges are just set and the centers appear slightly underdone. Remove to trays to cool completely; cookies will firm as they cool.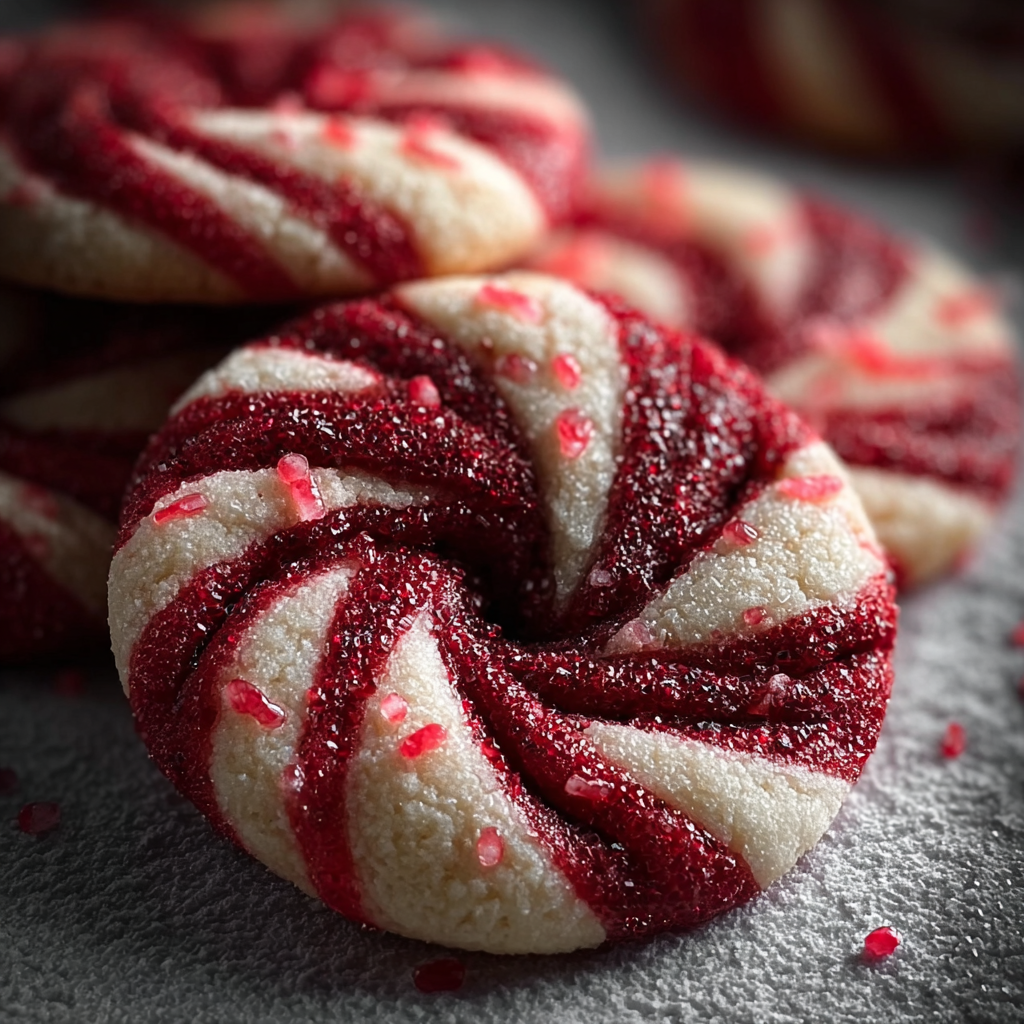
You Must Know
- These treats freeze well for up to three months when wrapped tightly in plastic and stored in an airtight container. Thaw at room temperature to retain texture.
- High in sugar and butter, they are an energy dense cookie. Serve in small portions and they pair well with plain yogurt or a cup of tea to balance indulgence.
- Chilling the dough is essential. Cold dough holds a crisp silhouette during baking rather than spreading into shapeless rounds.
- Use gel coloring to avoid adding moisture that would soften dough. A little goes a long way so add a drop at a time until the desired red is reached.
One of my favorite aspects is how customizable the peppermint intensity is. When I first made these I used a little too much extract and learned to start small. Family members now have their preferred strength which makes gifting batches fun, each tin labeled by peppermint level. The shaping also becomes a group activity which brings laughter and hands covered in flour and bright color, a memory I treasure every season.
Storage Tips
Store cooled cookies in an airtight container at room temperature for up to five days. Layer parchment between rows to prevent sticking. For longer storage place in the freezer in a single layer to flash freeze, then transfer to a freezer safe container for up to three months. To reheat and refresh crispness, warm in a 300 degrees Fahrenheit oven for five minutes. Avoid prolonged exposure to humidity which will soften the cookie and make the red color bleed.
Ingredient Substitutions
For a dairy free version substitute a vegan butter stick measured cup for cup and use a flax egg instead of the large egg if avoiding animal products. The texture will be slightly different but still tender. To make them gluten free, use 1 to 1 gluten free flour blend with xanthan gum included and reduce chilling time slightly as the dough can be more fragile. If you prefer a milder mint flavor use peppermint candy extract at half the amount, or swap peppermint for almond extract for a completely different profile.
Serving Suggestions
Arrange these on a festive platter with sprigs of rosemary and cranberries for color contrast. They pair beautifully with hot chocolate, coffee, or a simple spiced tea. For a decorative table setting, tie small bundles together with ribbon and include a handwritten note. Use crushed candy canes sprinkled over plain sugar cookies to make a mixed cookie plate with visual and textural contrast. They are also a charming edible ornament for holiday tables.
Cultural Background
The candy cane shape became associated with the holidays in the 19th century and is widely linked to Western winter celebrations. These cookies are a nod to that tradition, turning a classic confection into a shaped butter cookie. Variations appear across cultures where mint and sugar feature in winter treats, but the visual of the red and white twist is distinctly festive in many Western homes. Baking shaped treats like this has long been a way to mark seasonal moments and bring communities together.
Seasonal Adaptations
In colder months boost the warming spices by adding a pinch of ground cinnamon or a quarter teaspoon of ground ginger to the flour for holiday spice notes. For summertime parties reduce peppermint to a quarter teaspoon and add lemon zest for a fresher profile. Swap red gel for natural beet powder if preferred, adding one teaspoon of neutral oil if extra moisture is needed. For Valentine celebrations shape small sticks instead of canes and tint the dough pink for a romantic twist.
Success Stories
One year I brought a tray of these to a neighborhood cookie exchange and came home with requests for the recipe from three different families. At a school bake sale they sold out in under an hour and parents asked whether I could teach a small class. My son still smiles when he finds crumbs in the cookie jar and asks to make more, which is the best endorsement. These little canes have a way of starting conversations and reviving small delights at gatherings.
Meal Prep Tips
Prepare the dough on a dedicated baking day, forming the ropes and storing them in the refrigerator for up to two days before baking. Alternatively, shape and freeze unbaked cookie shapes on a sheet pan then transfer to a freezer bag. When ready, bake directly from frozen adding one to two minutes to the bake time. This makes it easy to produce fresh cookies for guests without last minute work.
These candy cane cookies are simple, nostalgic, and adaptable. With a bit of attention to chilling and a light hand with peppermint, you will have a luminous addition to any celebration. Share them with friends, give them as gifts, and most of all enjoy the little ritual of rolling ropes and twisting them into cheerful canes.
Pro Tips
Use gel food coloring to avoid changing dough hydration and add color drop by drop until you reach the desired shade.
Chill the dough for at least one hour; cold dough holds its shape and prevents excess spread during baking.
If the dough is too soft after chilling, return it to the refrigerator for 15 minutes rather than adding extra flour.
Roll ropes to a uniform thickness so cookies bake evenly, and twist gently to avoid compressing the air out of the dough.
This nourishing magic of candy cane cookies recipe is sure to be a staple in your kitchen. Enjoy every moist, high protein slice — it is perfect for breakfast or as a wholesome snack any time.
Tags
Magic of Candy Cane Cookies
This Magic of Candy Cane Cookies recipe makes perfectly juicy, tender, and flavorful steak every time! Serve with potatoes and a side salad for an unforgettable dinner in under 30 minutes.
Ingredients
Dough
Instructions
Cream butter and sugar
Beat 1 cup softened unsalted butter with 1 cup powdered sugar until smooth and fluffy, two to three minutes with an electric mixer.
Incorporate egg and extracts
Mix in 1 large room temperature egg, 1 teaspoon vanilla extract and 1/2 teaspoon peppermint extract until homogeneous, avoiding over mixing.
Combine dry ingredients
Whisk 2 1/2 cups all purpose flour with 1/2 teaspoon salt in a separate bowl, then add gradually to the wet mixture on low speed until a soft dough forms.
Divide and color
Divide dough in half, knead a few drops of red gel food coloring into one half until evenly colored, wrap both halves and chill for one hour.
Shape into canes
Preheat oven to 350 degrees Fahrenheit. Roll equal pieces of red and white dough into ropes about 1/2 inch thick, twist together and form candy cane shapes.
Bake and cool
Place on a parchment lined baking sheet and bake eight to ten minutes until edges are set. Cool on trays before serving to allow cookies to firm.
Last Step: Please leave a rating and comment letting us know how you liked this recipe! This helps our business to thrive and continue providing free, high-quality recipes for you.
Nutrition
Did You Make This?
Leave a comment & rating below or tag
@solushcooks on social media!
Categories:
You might also like...

Spaghetti Squash Mac & Cheese
A lighter take on a classic comfort favorite that swaps pasta for roasted spaghetti squash and keeps all the creamy, cheesy goodness with optional broccoli or chicken for extra heartiness.

Coconut Cream Pie Overnight Oats
A dreamy no-cook breakfast that tastes like coconut cream pie — creamy coconut milk, tangy Greek yogurt, shredded coconut, and optional banana make mornings feel indulgent and effortless.

Roasted Sweet Potato Rounds with Honey & Feta
Crisp-edged sweet potato rounds roasted until tender, finished with salty feta, a drizzle of honey, and fresh parsley—an effortless crowd-pleaser for gatherings or weeknights.
Did You Make This?
Leave a comment & rating below or tag @solushcooks on social media!
Rate This Recipe
Share This Recipe
Enjoyed this recipe? Share it with friends and family, and don't forget to leave a review!
Comments (1)
This recipe looks amazing! Can't wait to try it.
Comments are stored locally in your browser. Server comments are displayed alongside your local comments.

Hi, I'm Lena!
What's Popular

30-Minute Meals!
Join to receive our email series which contains a round-up of some of our quick and easy family favorite recipes.