
Homemade Twinkies Fun & Nostalgic Treats

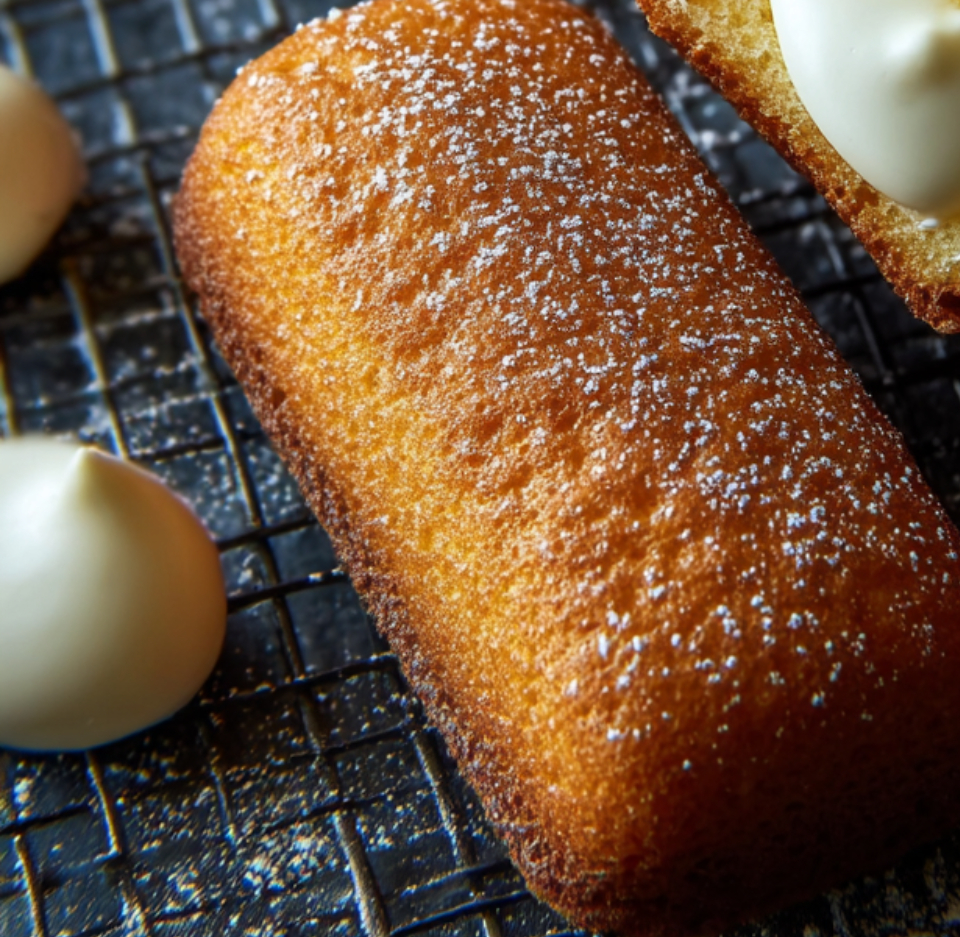
Light, pillowy cakes filled with a cloudlike vanilla cream, these homemade Twinkies capture childhood nostalgia with fresh ingredients and simple techniques.

Why You'll Love This Recipe
- Ready from start to finish in under 60 minutes, this is a quick and impressive bake that uses basic pantry staples and common equipment.
- The sponge is feather light because eggs and sugar are beaten until thick and pale, giving an airy texture without complex ingredients.
- Filling is stable and scoopable thanks to butter and marshmallow creme, making it perfect for piping and for make ahead, chill, and serve.
- Perfect for brunch trays, party platters, or an indulgent snack, these keep well for a couple of days refrigerated or can be frozen for longer storage.
- Customizable flavor options let you adapt the profile to lemon, chocolate, or coffee for seasonal menus and celebrations.
On a personal note, these brought back a flood of childhood afternoon memories. My nephews declared them the best treat after school, and my neighbor asked for the recipe the next day. Simple, nostalgic, and reliably loved, they are a small celebration in every bite.
Ingredients
- All purpose flour, 1 cup: Use a spoon and level method when measuring for accuracy. Cake flour will make the sponge even softer but stick with all purpose for the classic texture and sturdier shape. King Arthur or a trusted local brand works well.
- Baking powder, 1/2 teaspoon: Provides a gentle lift. Check the date on the can for strength. If it is older than six months, replace to ensure the cakes rise properly.
- Salt, 1/4 teaspoon: Enhances sweetness and balances flavor. Fine sea salt is ideal for even distribution.
- Large eggs, 4: Room temperature eggs whip more voluminously. Bring eggs out 20 to 30 minutes before starting for best aeration and structure.
- Granulated sugar, 2/3 cup: Provides structure and tender crumb. If you prefer a slightly less sweet cake, reduce by one tablespoon and taste the batter.
- Vanilla extract, 1/2 teaspoon: Pure vanilla lends warmth. If you have Madagascar or Nielsen Massey, the aroma will be noticeably richer.
- Milk, 2 tablespoons: Warm milk helps loosen the batter so it fills molds smoothly. Whole milk contributes richness, but 2 percent is fine.
- Unsalted butter, 1 tablespoon melted for batter: Adds tenderness and a hint of richness without weighing the sponge down.
- Unsalted butter for filling, 1/2 cup softened: Creamy base for the filling. Soften to room temperature but not oil slick, so it whips properly.
- Marshmallow creme, 1/2 cup: Gives a fluffy, cloudlike texture to the center. Brands like Jet Puffed are reliable for consistency.
- Powdered sugar, 1 cup: Provides sweetness and helps stabilize the filling. Sift if lumpy for a silky finish.
- Vanilla extract for filling, 1 teaspoon: Boosts the cream flavor and rounds the profile.
- Heavy cream, 1 tablespoon: Loosens the filling slightly while keeping it stable for piping.
Instructions
Prepare and preheat: Preheat the oven to 350 degrees Fahrenheit, ensuring the rack is centered. Grease a Twinkie pan or mini loaf pan well with butter or nonstick spray and dust lightly with flour. If using silicone, a light grease will prevent sticking without excess oil. This ensures even browning and easy release. Sift dry ingredients: In a small bowl, sift together the all purpose flour, baking powder, and salt. Sifting removes lumps and introduces tiny amounts of air which helps maintain the sponge lightness when folding into the whipped eggs. Whip eggs and sugar: In a large mixing bowl, beat the eggs with the granulated sugar using an electric mixer on medium high until the mixture is thick, pale, and has tripled in volume, about six to eight minutes. The ribbon stage is your visual cue, where the batter falls back slowly and leaves a faint trail on the surface. Fold in flavor and dry ingredients: Add the vanilla extract, then gently fold in the flour mixture in two or three additions, using a rubber spatula and careful strokes. Avoid vigorous stirring to keep the trapped air intact. Aim for just combined with no streaks of flour. Add milk and butter: Combine the warmed milk and melted butter, then fold into the batter in a single slow addition until uniform. The batter should be light and slightly billowy, not liquid. If it appears too stiff, one additional teaspoon of milk will help without collapsing the structure. Portion and bake: Fill each mold about three quarters full with batter. Smooth tops with a small offset spatula to ensure even rise. Bake for twelve to fifteen minutes or until the tops are golden and a toothpick inserted comes out clean. Rotate the pan at eight minutes for even color if your oven has hot spots. Cool and release: Allow the cakes to cool completely in the pan on a rack before removing. Warm cakes will break and tear when filled. Once cooled, gently run a thin knife around the edges if needed and invert the pan to release the cakes intact. Make the filling: Beat the softened butter until light and airy, then add the marshmallow creme, powdered sugar, vanilla extract, and heavy cream. Beat until smooth and pipeable. The filling should hold shape while still creamy enough to flow through a small round tip. Fill the cakes: Using a piping bag fitted with a small round tip, poke three small holes into the bottom of each cake. Gently insert the tip and dispense the cream to fill the interior. Stop when you feel a slight resistance which signals the cavity is full.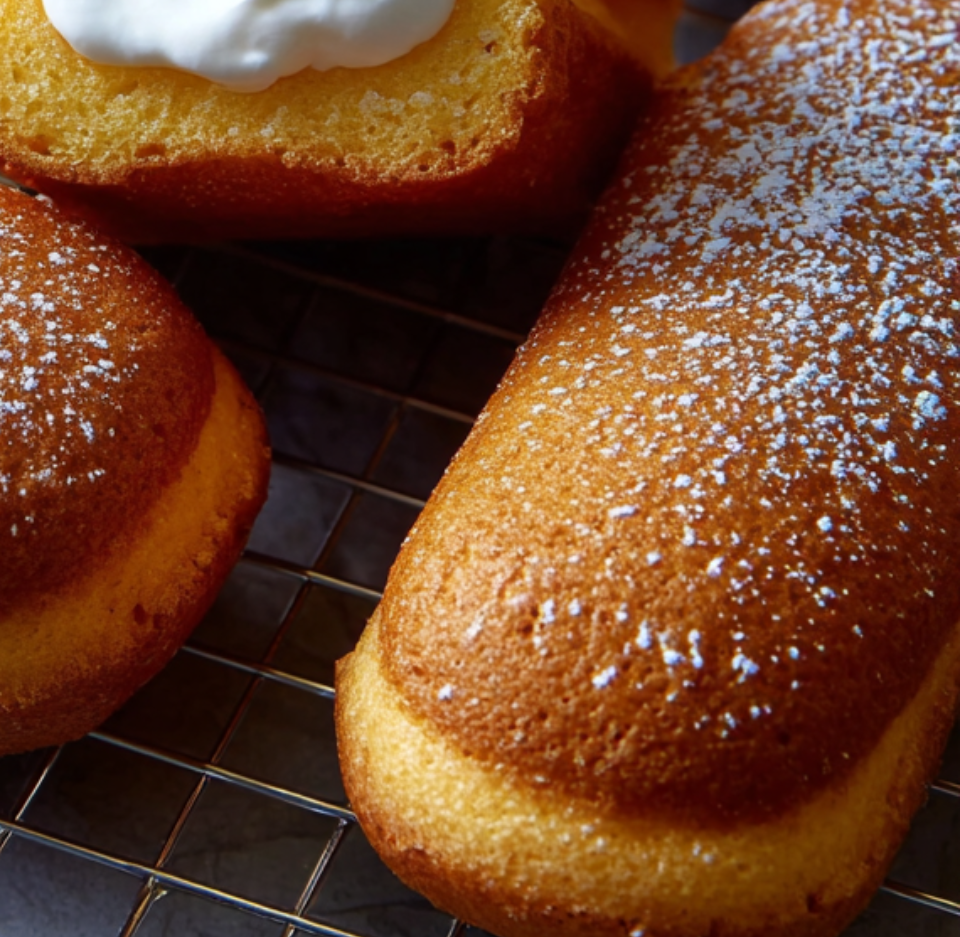
You Must Know
- These keep well refrigerated in an airtight container for up to three days and freeze well for up to three months when double wrapped to prevent freezer burn.
- High in simple carbohydrates and fat, they are an occasional indulgence rather than a daily choice, and each serving will vary by size but generally contains about 300 to 350 calories.
- Use room temperature eggs for maximum volume, and never over fold the batter which will lose its lift and yield dense cakes.
- If using a mini loaf pan rather than a Twinkie tin, adjust baking time by a minute or two and test with a toothpick to avoid overbaking.
My favorite part of this process is the transformation from a glossy, whipped batter to a delicate sponge that almost feels like a cloud. I once made a batch for a neighborhood potluck and came home with only a handful left. The texture and the tiny pockets of cream inside make every bite a little nostalgic surprise. Watching people take that first bite and close their eyes is a small reward for the time spent beating and folding with care.
Storage Tips
Store the treats in a single layer in an airtight container in the refrigerator for up to three days. If stacking is necessary place parchment paper between layers to prevent sticking. For longer storage, flash freeze the filled cakes on a tray until firm, then transfer to a freezer safe bag. Thaw overnight in the refrigerator before serving, and refresh the surface by letting them sit at room temperature for 20 minutes. Reheat briefly in a warm oven for a few minutes if you prefer the sponge warmed, but avoid microwaving which can make the texture gummy.
Ingredient Substitutions
You can swap whole milk for non dairy milk for a slightly lighter profile but expect a small change in crumb richness. Unsalted butter can be replaced with salted butter if you reduce additional salt in other components. For a lighter filling use stabilized whipped cream combined with marshmallow creme instead of butter for a lower butter content. If you need a gelatin free marshmallow creme check labels or use a homemade marshmallow whip based on egg whites and sugar. Using cake flour will produce a silkier crumb, reduce the all purpose amount by two tablespoons if substituting.
Serving Suggestions
Serve these as part of a retro dessert board with petite cookies, fresh berries, and a small pitcher of coffee. Dust with a light sprinkling of powdered sugar for presentation or dip one end in melted chocolate for an upgraded finish. They pair especially well with cold milk or an espresso for contrast. For celebrations, pipe pastel colored icing dots on top to match party themes. These also make charming lunchbox treats when packed in a small airtight container.
Cultural Background
The golden sponge cake with a creamy center became an iconic American snack during the mid twentieth century and remains connected to nostalgic childhood moments. Over time, bakers and home cooks have reinterpreted the concept using fresher butter and real vanilla to elevate taste. Regional variations include chocolate encased versions, lemon filled in summer, and even matcha adapted versions in fusion kitchens. Making them at home highlights the craftsmanship and freshness lost in mass produced products.
Seasonal Adaptations
In spring swap the vanilla filling for a light lemon curd whipped into the buttercream for a bright finish. In autumn add a pinch of cinnamon and nutmeg to the batter and fold brown butter into the filling for warm spice notes. Holiday versions include adding peppermint extract and dipping the ends in dark chocolate with crushed candy cane for a festive touch. The sponge accepts fold in additions like mini chocolate chips but be careful not to weigh down the batter.
Meal Prep Tips
Prepare the sponge cakes a day ahead and store them in a single layer, wrapped in plastic, to allow flavors to settle. Make the filling the morning of serving and pipe just before guests arrive for best texture. For a grab and go option fill, freeze, then thaw in the refrigerator overnight when you need quick dessert portions. Use small disposable piping bags to portion and label if sending to events, and keep a small cooling rack and parchment on hand for quick assembly.
Whether you are making them to revisit a childhood memory or to impress friends with a whimsical homemade bite, these treats are comforting and surprisingly simple. They are an invitation to slow down, whisk thoroughly, and share something handmade. Give them a try and adapt the flavors to tell your own story.
Pro Tips
Bring eggs to room temperature before whipping to achieve maximum volume and a light sponge.
Fold dry ingredients gently to preserve the air incorporated during whipping.
Sift powdered sugar before adding to the filling to avoid lumps and ensure a silky texture.
Chill filled treats briefly before packaging to help the filling set and prevent squishing during transport.
This nourishing homemade twinkies fun & nostalgic treats recipe is sure to be a staple in your kitchen. Enjoy every moist, high protein slice — it is perfect for breakfast or as a wholesome snack any time.
FAQs about Recipes
How long do homemade Twinkies keep?
Store in an airtight container in the refrigerator for up to three days, or freeze for up to three months. Thaw in the refrigerator before serving.
What is the key to a light sponge?
Use room temperature eggs and beat until the mixture is thick and pale, around six to eight minutes for most mixers. This creates the light sponge.
Tags
Homemade Twinkies Fun & Nostalgic Treats
This Homemade Twinkies Fun & Nostalgic Treats recipe makes perfectly juicy, tender, and flavorful steak every time! Serve with potatoes and a side salad for an unforgettable dinner in under 30 minutes.
Ingredients
Cakes
Filling
Instructions
Prepare and Preheat
Preheat oven to 350 degrees Fahrenheit and grease a Twinkie pan or mini loaf pan. Center the oven rack and ensure molds are ready before making the batter.
Sift Dry Ingredients
Sift the all purpose flour, baking powder, and salt into a bowl to remove lumps and incorporate small amounts of air for a lighter result.
Whip Eggs and Sugar
Beat eggs and granulated sugar on medium high until thick and pale, about six to eight minutes, reaching the ribbon stage for best volume.
Fold in Dry Ingredients
Add vanilla and fold the sifted dry ingredients into the whipped eggs in two or three additions using a rubber spatula, taking care not to deflate the batter.
Add Milk and Butter
Combine warm milk with melted butter and fold into the batter in one addition until just combined and smooth but still airy.
Portion and Bake
Fill each mold three quarters full and bake for twelve to fifteen minutes until golden and a toothpick comes out clean. Cool completely before removing.
Make the Filling
Beat softened butter until light, then add marshmallow creme, powdered sugar, vanilla, and heavy cream. Beat until smooth and pipeable.
Fill the Cakes
Poke three small holes into the bottom of each cake with the piping tip and fill each cavity until you feel slight resistance. Serve or refrigerate.
Last Step: Please leave a rating and comment letting us know how you liked this recipe! This helps our business to thrive and continue providing free, high-quality recipes for you.
Nutrition
Did You Make This?
Leave a comment & rating below or tag
@solushcooks on social media!
Categories:
You might also like...

Spaghetti Squash Mac & Cheese
A lighter take on a classic comfort favorite that swaps pasta for roasted spaghetti squash and keeps all the creamy, cheesy goodness with optional broccoli or chicken for extra heartiness.

Coconut Cream Pie Overnight Oats
A dreamy no-cook breakfast that tastes like coconut cream pie — creamy coconut milk, tangy Greek yogurt, shredded coconut, and optional banana make mornings feel indulgent and effortless.

Roasted Sweet Potato Rounds with Honey & Feta
Crisp-edged sweet potato rounds roasted until tender, finished with salty feta, a drizzle of honey, and fresh parsley—an effortless crowd-pleaser for gatherings or weeknights.
Did You Make This?
Leave a comment & rating below or tag @solushcooks on social media!
Rate This Recipe
Share This Recipe
Enjoyed this recipe? Share it with friends and family, and don't forget to leave a review!
Comments (1)
This recipe looks amazing! Can't wait to try it.
Comments are stored locally in your browser. Server comments are displayed alongside your local comments.

Hi, I'm Lena!
What's Popular

30-Minute Meals!
Join to receive our email series which contains a round-up of some of our quick and easy family favorite recipes.