
>>

Thinly sliced, butter-brushed russet potatoes roasted until crisp on the outside and tender inside — an elegant yet easy side everyone will love.

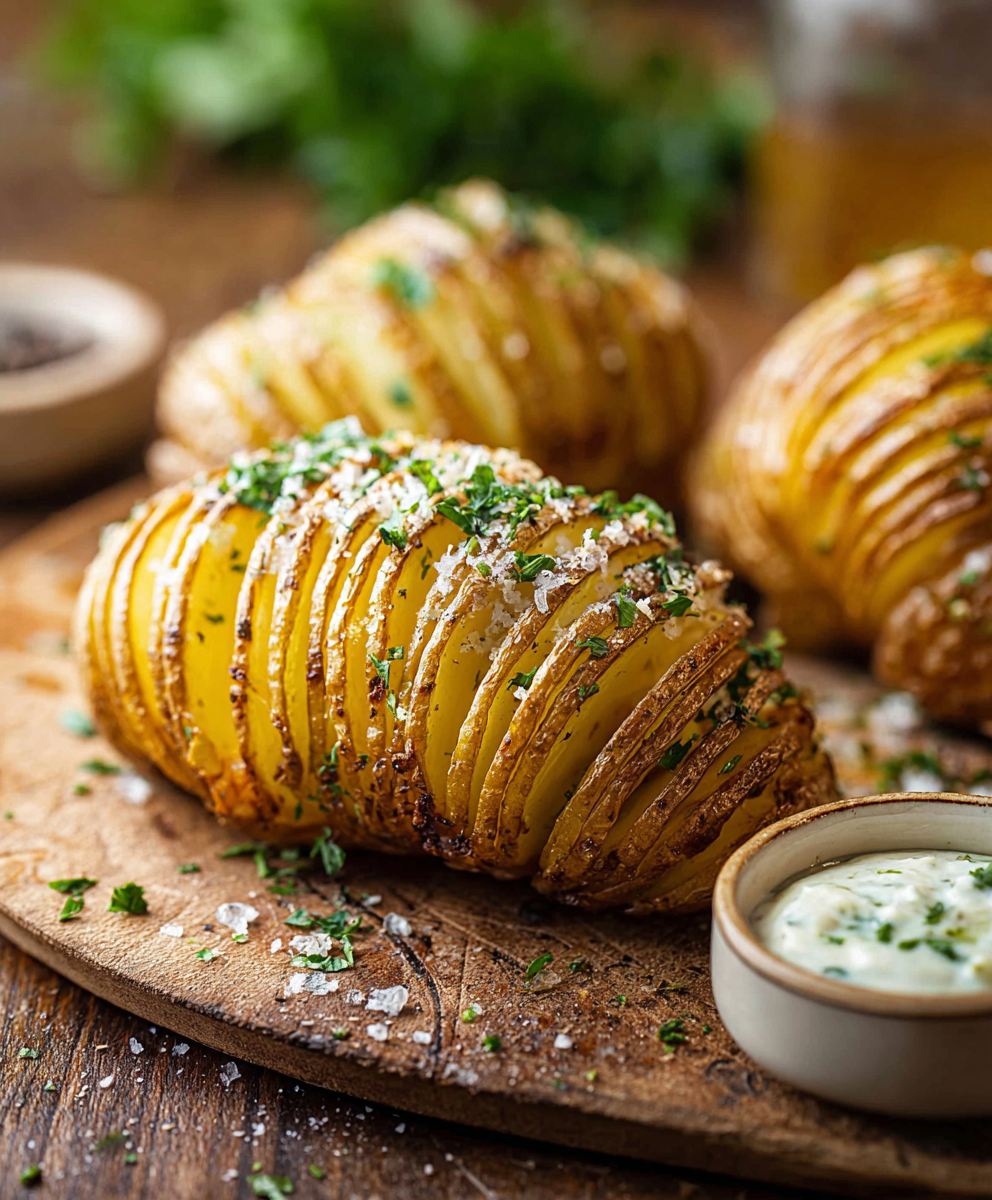
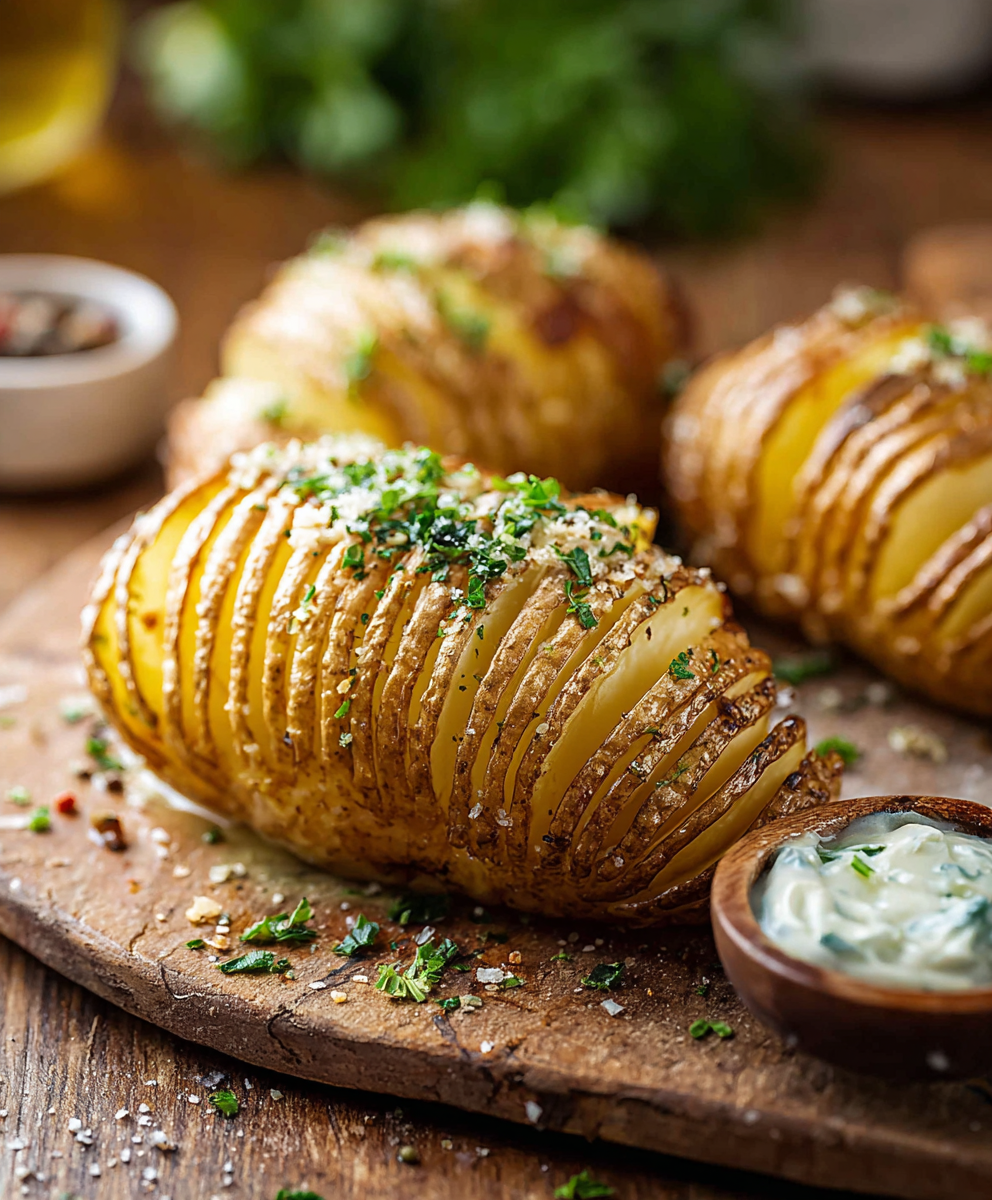
This version of Hasselback potatoes has been my go-to way to dress up humble spuds whenever I want something that looks fancy but takes almost no extra effort. I first made these on a chilly autumn evening when friends were coming over for dinner and I wanted a side that could be prepared ahead and finished in the oven while the main course rested. The thin fan-like slices let the butter and seasoning seep in while creating more surface area for crisping, giving each bite a contrast of golden, crunchy edges and soft, fluffy interior.
I remember the first time I served them: my neighbor’s eyes lit up at the presentation, and even the kids reached for seconds despite having been politely full. The texture is the real star — imagine a small potato accordion where every fold is a little crunch, and the inside is pillowy and smooth. Using simple pantry ingredients like unsalted butter, kosher salt, and fresh-cracked pepper keeps the flavor pure and lets the potato take center stage. These are perfect for holiday spreads, weeknight dinners, or as a make-ahead component that reheats beautifully.
In my kitchen these have become the default side for roast meats and holiday menus. Once I taught my sister the chopstick trick to keep the slices even and shallow, she never went back to whole-roasted potatoes. Guests often ask for the technique, and I love that it’s a small step that makes such a big difference.
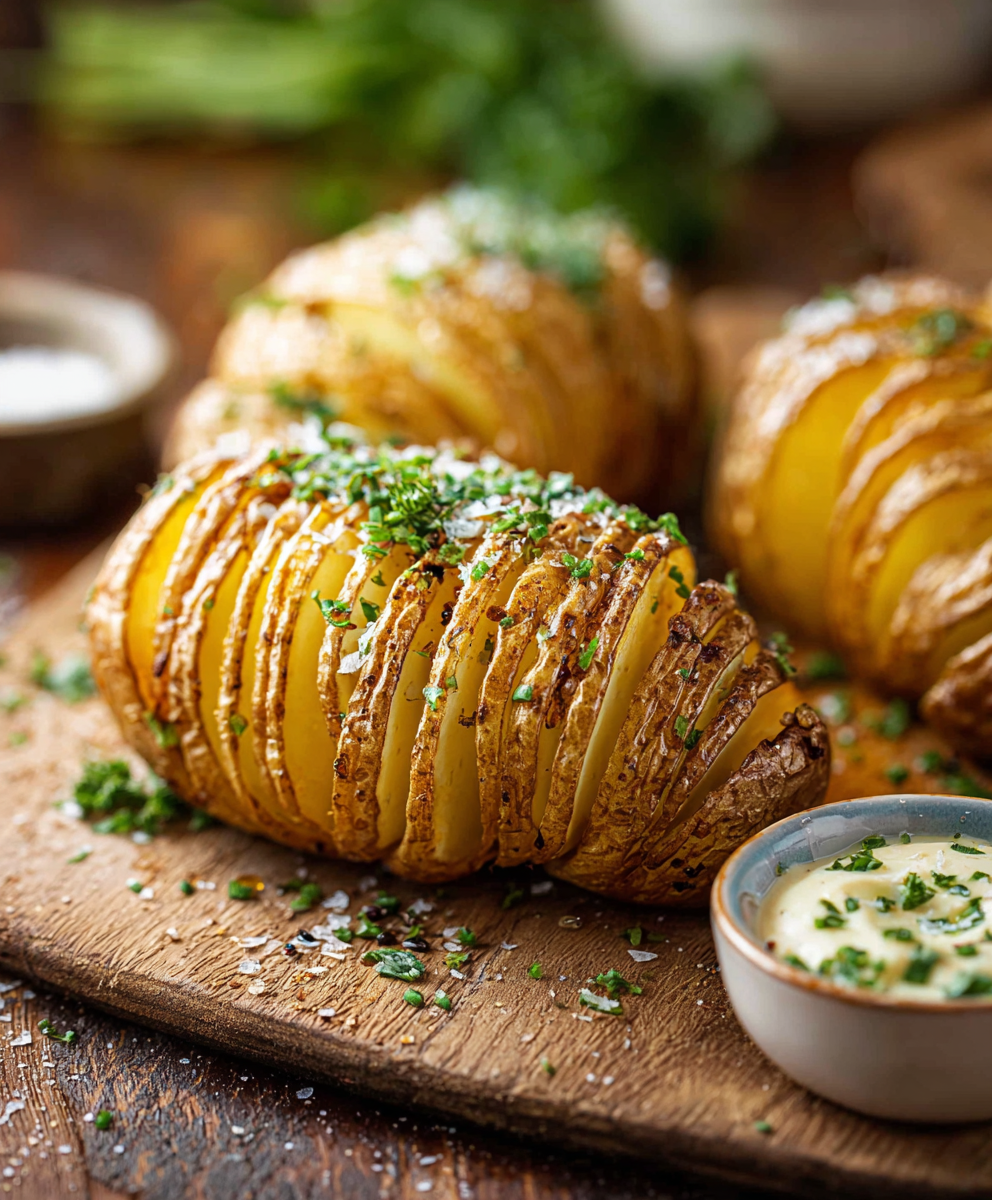
My favorite part of this method is the ritual of separating the slices after the first bake. It’s a small moment that guarantees crunch and allows you to really see the transformation from plain potato to golden, layered delight. Family gatherings often revolve around who gets the crispiest edges — a harmless game that always ends in laughter and second helpings.
Cool any leftovers to room temperature but no longer than two hours, then store in an airtight container in the refrigerator for up to 3 days. For best texture, reheat on a baking sheet in a preheated 375°F oven for 8–12 minutes until the edges regain crispness. For longer storage, fully bake the potatoes, cool completely, wrap individually in foil, and freeze for up to 3 months. Thaw overnight in the refrigerator and re-crisp in the oven before serving. Avoid storing while still steaming; excess moisture will soften the slices.
If you need to swap ingredients, use Yukon Gold potatoes for a creamier interior — they will hold their shape slightly better but produce less crispness than russets. For a dairy-free option, substitute melted vegan butter or neutral oil like avocado oil; allow a little more oil between the slices to mimic butter’s browning. If you like herbs, add 1 teaspoon dried rosemary or 1 tablespoon fresh chopped rosemary mixed into the melted butter. For a lower-sodium version, reduce added salt and finish with a small pinch of flaky sea salt on those who want it.
Serve warm as a side to roasted chicken, pan-seared steak, or a holiday turkey. Garnish with chopped fresh chives, parsley, or a sprinkle of grated Parmesan for a salty finish. For a decadent twist, after the final bake tuck a thin slice of garlic butter between a couple of the slits or sprinkle shredded Gruyère during the last 5 minutes so it melts without burning. These also pair beautifully with a crisp green salad and a bright vinaigrette to balance the richness.
The Hasselback method originated in Sweden in the mid-20th century and is named after the Hasselbacken restaurant in Stockholm where the technique was popularized. The concept — slicing thinly to increase surface area — reflects Scandinavian sensibilities of taking simple ingredients and elevating them through technique. Over time the approach spread internationally because it visually impresses while remaining approachable for home cooks, fitting both Nordic tradition and modern comfort-food tables.
In winter, add 1 teaspoon of smoked paprika to the butter for warmth and earthiness. In spring or summer, top with fresh lemon zest and chopped herbs like tarragon and parsley to brighten the dish. For holiday feasts, tuck slices of cranberry-chile chutney on the side or drizzle a rosemary-infused brown butter over the finished potatoes. These small switches allow the same base technique to feel at home during any season.
For make-ahead convenience, score and par-bake the potatoes for the initial 30 minutes, cool, and refrigerate in an airtight container for up to 24 hours. When ready to serve, separate the slices, baste with the remaining butter, and finish in a hot oven for 30–35 minutes to restore and amplify crispness. Use rimmed baking sheets and allow space between potatoes so hot air can circulate for even browning.
These Hasselback potatoes are a humble technique that creates a memorable side — elegant enough for guests, simple enough for weeknights. Try them next time you roast a main course and watch how a tiny change in slicing transforms dinner into something special.
Use chopsticks or skewers as guides so the knife stops before the base—this keeps the potato intact while creating even slits.
Brush melted butter into the slits after the first bake to get flavor deep inside and more crisping on the edges.
For extra crispness, use an unlined baking sheet and place potatoes at least 1 inch apart so hot air circulates.
If using salted butter, reduce added kosher salt by half and taste before finishing.
This nourishing hasselback potatoes recipe is sure to be a staple in your kitchen. Enjoy every moist, high protein slice — it is perfect for breakfast or as a wholesome snack any time.
Use chopsticks or wooden skewers as guides so you don’t cut through the base; a sharp knife helps make clean, even slices.
Reheat on a baking sheet in a 375°F oven for 8–12 minutes to regain crispness; avoid microwaving if you want crunch.
This Hasselback Potatoes recipe makes perfectly juicy, tender, and flavorful steak every time! Serve with potatoes and a side salad for an unforgettable dinner in under 30 minutes.
Preheat oven to 425°F and prepare a rimmed baking sheet. Pat potatoes dry so butter adheres and the skins crisp.
Place a potato between two chopsticks and make vertical cuts about 1/8 inch apart until the knife meets the chopstick to avoid cutting through the base.
Brush about half the melted butter over the potatoes, getting some between the slits. Season evenly with 1 teaspoon kosher salt and 1/2 teaspoon black pepper.
Bake at 425°F for 30 minutes until the outer edges begin to brown and the insides start to soften.
Gently pry the slices apart with a knife or forks, brush with remaining melted butter, making sure some reaches the slits.
Return to oven and bake another 30–35 minutes until deeply golden and crisp. Season with additional salt and pepper to taste and serve warm.
Last Step: Please leave a rating and comment letting us know how you liked this recipe! This helps our business to thrive and continue providing free, high-quality recipes for you.
Leave a comment & rating below or tag
@solushcooks on social media!

A lighter take on a classic comfort favorite that swaps pasta for roasted spaghetti squash and keeps all the creamy, cheesy goodness with optional broccoli or chicken for extra heartiness.

A dreamy no-cook breakfast that tastes like coconut cream pie — creamy coconut milk, tangy Greek yogurt, shredded coconut, and optional banana make mornings feel indulgent and effortless.

Crisp-edged sweet potato rounds roasted until tender, finished with salty feta, a drizzle of honey, and fresh parsley—an effortless crowd-pleaser for gatherings or weeknights.
Leave a comment & rating below or tag @solushcooks on social media!
Enjoyed this recipe? Share it with friends and family, and don't forget to leave a review!
This recipe looks amazing! Can't wait to try it.
Comments are stored locally in your browser. Server comments are displayed alongside your local comments.

Join to receive our email series which contains a round-up of some of our quick and easy family favorite recipes.
