
Christmas Pinwheel Cookies

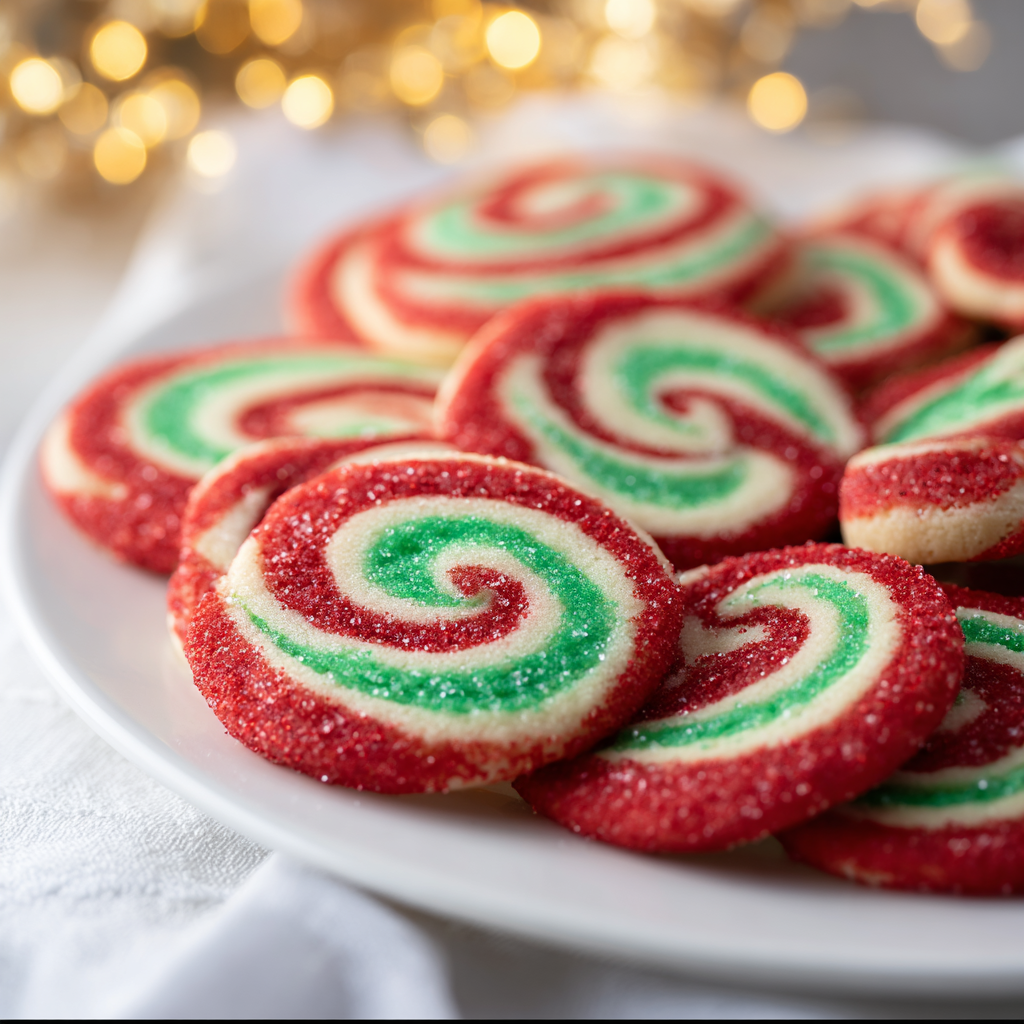
Festive red-and-green pinwheel cookies with a buttery, tender bite — perfect for holiday baking, cookie exchanges, and decorating with sanding sugar.

This recipe has been a holiday staple in my kitchen ever since I discovered the simple technique for making colorful pinwheel cookies during one particularly busy December. I was determined to create something that looked impressive on a cookie tray but did not demand complicated piping or tempering; the result was these cheerful red-and-green spirals that always get compliments. They have a crisp edge, a tender shortbread-like interior, and a playful swirl of color that makes them irresistible to kids and adults alike.
I first tested this method while preparing for a neighborhood cookie swap, and the dough's forgiving texture and the straightforward rolling process made it an instant favorite. The subtle vanilla flavor lets the buttery base shine, and the sanding sugar sprinkled on the outer edge gives a festive crunch and sparkle. Because the dough is chilled and rolled between parchment sheets, the finished cookies bake up with clean, tidy spirals every time — a great recipe to make with family members who want to help without getting overwhelmed.
Why You'll Love This Recipe
- Simple ingredients and straightforward technique: most are pantry staples (butter, sugar, flour, egg, vanilla) so you can assemble quickly without a special shopping trip.
- Impressive presentation with little effort: the pinwheel spiral looks like it took hours, but the rolling and chilling method is quick and reliable.
- Kid-friendly and great for groups: younger helpers can color the dough and press the sanding sugar, making this a fun holiday activity.
- Make-ahead friendly: dough can be refrigerated or frozen, so you can prepare components days in advance and slice-and-bake on the day of serving.
- Versatile flavor base: use different extracts, spices, or colored sugars to adapt to other celebrations beyond Christmas.
- Quick bake time: slices bake in about 10 to 12 minutes, so you can produce multiple batches on a single afternoon.
I still remember pulling a tray of these from the oven at a cookie swap and watching them disappear within the hour. Friends and family always ask how I made such perfectly even spirals — the secret is chilling and rolling each layer flat between parchment. That little extra patience yields a cookie that looks holiday-professional without an expert's skill.
Ingredients
- Unsalted butter (2/3 cup): Use a high-quality European-style butter if you can — it has a richer flavor and slightly higher fat, which makes the crumbs tender and the taste more buttery. Leave it soft but not melted for easy creaming.
- Granulated sugar (2/3 cup): Standard white sugar creates a fine, crisp texture. For a slightly deeper flavor you can substitute part with superfine sugar, which dissolves even more smoothly into the butter.
- Egg (1 large): Binds the dough and gives structure; if your egg is very large, the dough may be a touch softer — chill longer to firm up before rolling.
- Vanilla extract (1 teaspoon): Pure vanilla extract contributes warmth; if you prefer a brighter flavor, use vanilla paste for flecks of bean and extra aroma.
- All-purpose flour (1 3/4 cups): Provides structure. Spoon and level your measuring cup to avoid packing; if your flour is old or clumpy, sift it first for a smoother dough.
- Kosher salt (1/2 teaspoon): Balances sweetness and enhances butter flavor. If using table salt, use slightly less (about 1/4 to 1/3 teaspoon).
- Baking soda (1/4 teaspoon): A small lift agent to keep cookies from feeling dense; it also helps achieve a tender crumb.
- Red and green gel food coloring: Gel colors are concentrated and won't add liquid to the dough, preserving the texture. A little goes a long way — add gradually until you reach the shade you like.
- Red sanding sugar: For garnish — adds sparkle and a pleasant crunch along the cookie edge. Coarse sugar works best for decoration.
Instructions
Cream the butter and sugar: Place 2/3 cup softened unsalted butter and 2/3 cup sugar in the bowl of a stand mixer with the paddle attachment. Beat at medium speed for about 3 to 4 minutes until the mixture is smooth, pale, and slightly aerated — you should see the sugar begin to dissolve into the butter, which helps create a tender bite. Add egg and vanilla: Crack in 1 large egg and add 1 teaspoon vanilla extract. Beat on medium until fully incorporated. Scrape the sides of the bowl with a spatula to ensure an even mixture and to avoid streaks of unmixed butter. Combine dry ingredients: In a separate bowl, whisk together 1 3/4 cups all-purpose flour, 1/2 teaspoon kosher salt, and 1/4 teaspoon baking soda. With the mixer on low, gradually add the flour mixture until just combined — stop as soon as you don't see dry streaks to avoid overworking the dough. Divide and color the dough: Turn the soft dough onto a work surface and divide it into three equal portions. Return one third to the cleaned mixing bowl, add red gel food coloring a small amount at a time until you reach the desired shade, and mix until uniform. Repeat with another third and green gel. Leave the final third plain for contrast. Shape each portion into a ball, wrap tightly in plastic wrap, and refrigerate for 1 hour to firm up so the dough rolls smoothly. Roll each layer: Remove chilled dough from the refrigerator. Working one ball at a time, place it between two sheets of parchment and roll into a 7-inch square using a rolling pin. Keep the other balls refrigerated while you work; cold dough produces cleaner edges and better spirals. Chill to set: Place the rolled squares (still between parchment) back in the refrigerator for 15 minutes so the dough firms but remains pliable enough to stack. This prevents color bleeding and keeps layers distinct when you roll them together. Assemble the pinwheel: Layer the three chilled 7-inch squares on top of each other — choose the order you like (for a classic look, stack plain, green, then red). Press gently to remove air pockets, then trim the edges with a sharp knife to create a neat rectangle with even sides. Roll the stacked rectangle tightly from one short end to the other to form a log. Wrap the log in plastic and refrigerate for at least 30 minutes, or up to 2 hours for firmer slices. Slice and coat with sanding sugar: When firm, unwrap the log and using a sharp serrated knife, slice into 1/4- to 3/8-inch rounds. If desired, roll the outside edge of each slice in red sanding sugar for sparkle. Place cookies on a parchment-lined baking sheet, about 1 inch apart. Bake: Preheat oven to 350°F (177°C). Bake the slices for about 10 to 12 minutes until the edges are set and the bottom is just beginning to turn golden. Allow cookies to cool on the baking sheet for 2 minutes, then transfer to a wire rack to cool completely.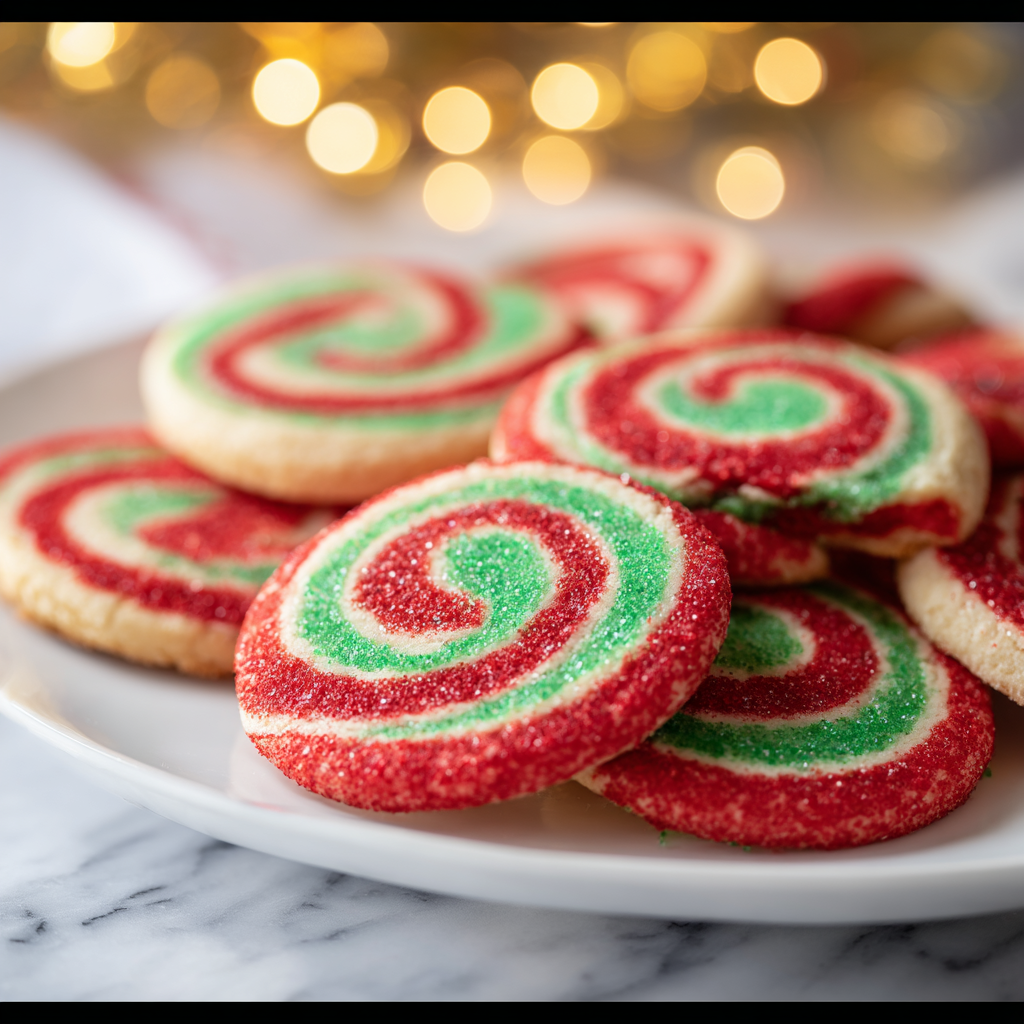
You Must Know
- Chill is essential: chilling after stacking and again after rolling the log prevents color smearing and helps achieve tidy spirals.
- Store in an airtight container at room temperature for up to 4 days; if you need longer life, freeze slices and bake from frozen with an extra minute or two.
- These are moderately sweet and high in simple carbohydrates; each cookie is a delightful treat rather than a nutritional staple.
- Sanding sugar adds texture and visual appeal — add it immediately after slicing so it adheres before the cookie dries out.
My favorite part of this method is how forgiving it is — slight imperfections in rolling become charming rustic swirls once baked. Over the years I’ve seen family members pick their favorite color spiral and proudly display the “best” cookie on their plate; it’s become a small holiday tradition that sparks conversation and smiles at every gathering.
Storage Tips
Store cooled cookies in an airtight container layered with parchment to prevent sticking at room temperature for up to 4 days. For longer storage, freeze the unbaked log wrapped tightly in plastic and aluminum foil for up to 3 months; when you’re ready, slice from frozen and bake, adding a minute or two to the bake time. For baked cookies, flash-freeze them on a tray, then transfer to a freezer-safe container to preserve shape and prevent breakage. Reheat gently in a 300°F oven for a few minutes to refresh crispness if desired.
Ingredient Substitutions
If you need a dairy-free option, substitute plant-based stick margarine measured 1:1 and use an egg replacement such as a flax egg (1 tablespoon ground flax mixed with 3 tablespoons warm water) — note the texture will be slightly different and the color contrast may be less vivid. For a gluten-free version, use a 1:1 gluten-free baking flour blend that contains xanthan gum; expect a slightly crumblier texture. To vary flavor, swap 1/2 teaspoon almond extract for part of the vanilla, or fold in 1/4 teaspoon ground cinnamon into the dry mix for a warming note.
Serving Suggestions
These cookies are ideal on a holiday tray alongside classics like gingerbread and shortbread. Plate them with hot cocoa, mulled cider, or a simple spiced tea for a cozy presentation. For a party, arrange them in alternating colors on tiered stands, and garnish plates with a few sprigs of fresh rosemary or holly (inedible greenery should be decorative only). They also make charming edible gifts packed in cellophane bags tied with festive ribbon.
Cultural Background
Colorful spiral cookies like these have roots in European decorative baking traditions where contrasting doughs are layered and rolled for visual effect. The pinwheel form became particularly popular in American holiday baking as simple colored doughs and sanding sugars became widely available. Today, the design is a playful, modern take on classic rolled dough techniques used in a variety of sweet and savory preparations.
Seasonal Adaptations
Adapt for other seasons by changing colors: pastels for Easter, orange and black for Halloween, or team colors for game-day treats. You can also fold a tablespoon of finely chopped candied citrus peel into the plain dough for a bright winter citrus note, or swap sanding sugar for finely chopped nuts for an autumnal texture. For Valentine’s Day, use pink and white spirals and coat edges in pearlized sugar.
Meal Prep Tips
Make multiple logs ahead of time and freeze them tightly wrapped; slices can be baked straight from frozen for fresh cookies on demand. Assemble dough portions in the morning and chill, then slice and bake in the afternoon when guests arrive. Use a ruler to measure and mark the log ends with light knife notches to slice consistently sized rounds for uniform baking.
These cookies represent the kind of holiday baking that yields both beautiful results and warm memories. Whether you’re making a large batch for a party or a small tray to share with neighbors, the pinwheel is a joyful, approachable treat that invites participation and celebration.
Pro Tips
Chill the dough between rolling steps to keep edges neat and colors from smudging.
Use a sharp serrated knife and wipe it between cuts for cleaner slices.
Roll dough between parchment to avoid sticky rolling surfaces and ensure uniform thickness.
Trim the stacked rectangle before rolling into a log to make even spirals.
This nourishing christmas pinwheel cookies recipe is sure to be a staple in your kitchen. Enjoy every moist, high protein slice — it is perfect for breakfast or as a wholesome snack any time.
FAQs about Recipes
Can I freeze the dough?
Yes — you can freeze the unbaked log wrapped tightly for up to 3 months. Slice and bake from frozen, adding a minute or two to the bake time.
Which food coloring works best?
Use gel food coloring for best results; liquid coloring can make the dough too soft and affect texture.
Tags
Christmas Pinwheel Cookies
This Christmas Pinwheel Cookies recipe makes perfectly juicy, tender, and flavorful steak every time! Serve with potatoes and a side salad for an unforgettable dinner in under 30 minutes.
Ingredients
Dough
Instructions
Cream butter and sugar
Beat 2/3 cup softened butter with 2/3 cup sugar in a stand mixer on medium for 3–4 minutes until pale and creamy.
Add egg and vanilla
Add 1 large egg and 1 teaspoon vanilla, mixing until combined and scraping down the bowl as needed.
Whisk dry ingredients and combine
Whisk 1 3/4 cups flour, 1/2 teaspoon kosher salt, and 1/4 teaspoon baking soda, then add gradually to the mixer on low until just combined.
Divide and color
Divide dough into three equal parts. Color one portion red and one green using gel food coloring, leaving the third plain. Shape into balls, wrap, and refrigerate 1 hour.
Roll into squares
Roll each chilled ball between parchment into a 7-inch square. Refrigerate the sheets for 15 minutes to firm up.
Stack and roll into a log
Layer the three chilled squares, trim edges for evenness, roll tightly into a log, wrap, and chill 30–120 minutes until firm.
Slice and bake
Preheat oven to 350°F. Slice the chilled log into 1/4–3/8-inch rounds, coat edges with sanding sugar if desired, and bake 10–12 minutes until edges set.
Last Step: Please leave a rating and comment letting us know how you liked this recipe! This helps our business to thrive and continue providing free, high-quality recipes for you.
Nutrition
Did You Make This?
Leave a comment & rating below or tag
@solushcooks on social media!
Categories:
You might also like...

Spaghetti Squash Mac & Cheese
A lighter take on a classic comfort favorite that swaps pasta for roasted spaghetti squash and keeps all the creamy, cheesy goodness with optional broccoli or chicken for extra heartiness.

Coconut Cream Pie Overnight Oats
A dreamy no-cook breakfast that tastes like coconut cream pie — creamy coconut milk, tangy Greek yogurt, shredded coconut, and optional banana make mornings feel indulgent and effortless.

Roasted Sweet Potato Rounds with Honey & Feta
Crisp-edged sweet potato rounds roasted until tender, finished with salty feta, a drizzle of honey, and fresh parsley—an effortless crowd-pleaser for gatherings or weeknights.
Did You Make This?
Leave a comment & rating below or tag @solushcooks on social media!
Rate This Recipe
Share This Recipe
Enjoyed this recipe? Share it with friends and family, and don't forget to leave a review!
Comments (1)
This recipe looks amazing! Can't wait to try it.
Comments are stored locally in your browser. Server comments are displayed alongside your local comments.

Hi, I'm Lena!
What's Popular

30-Minute Meals!
Join to receive our email series which contains a round-up of some of our quick and easy family favorite recipes.