
>>

Quick, melty wraps filled with shredded chicken tossed in garlic aioli and sharp cheddar — a 20-minute comfort lunch or easy weeknight dinner.
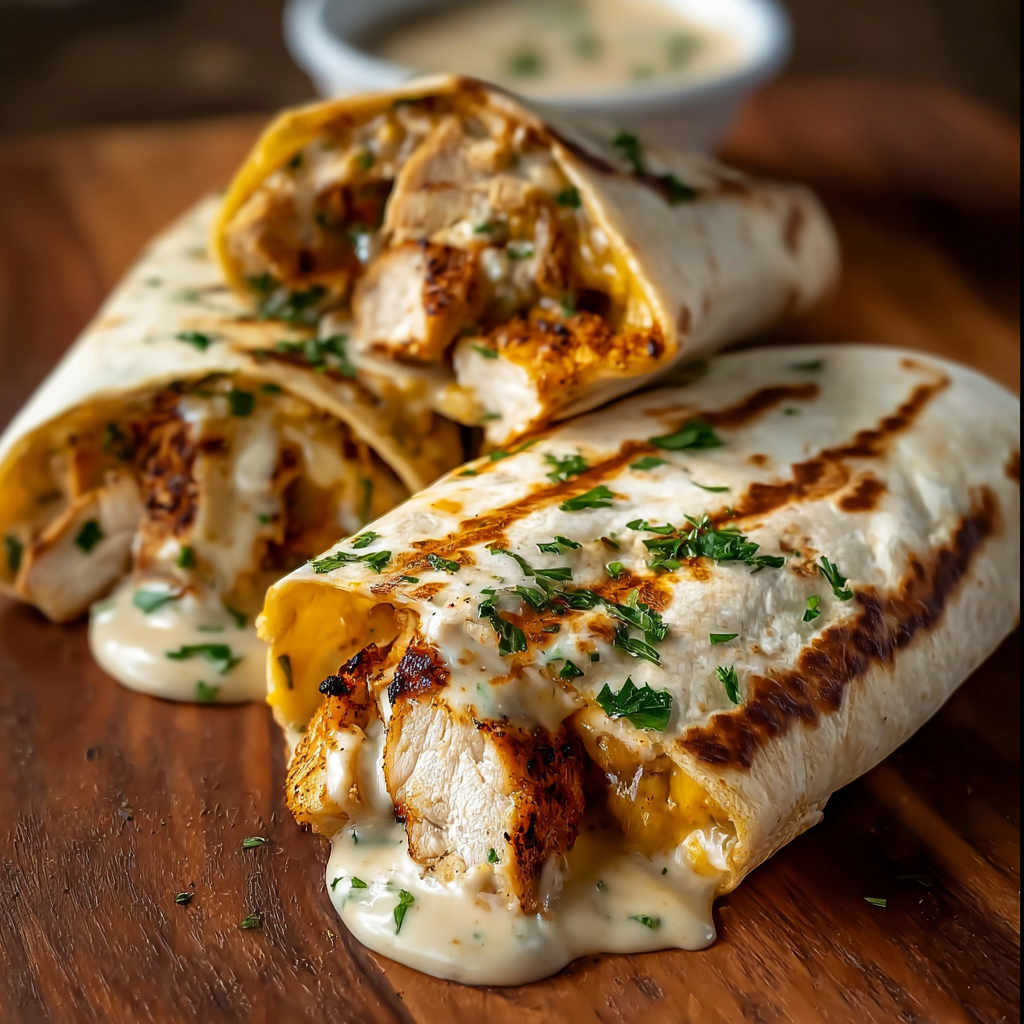
This Cheesy Garlic Chicken Wrap has been a go-to in my kitchen whenever I want something fast, satisfying, and a little indulgent. I first put this together on a hectic weeknight when I had leftover cooked chicken and a jar of garlic aioli in the fridge. The combination was unexpectedly brilliant: creamy, garlicky chicken wrapped with sharp cheddar in a warm tortilla that crisps at the edges. It became an instant crowd-pleaser — my partner declared it “better than takeout,” and my kids loved the melty cheese pockets.
What makes these wraps special is the simplicity. There are no complicated marinades or long cook times; the flavor comes from good quality ingredients and a little technique when warming and pressing the wrap. The texture contrast between the soft, creamy filling and the golden, slightly crisp tortilla gives every bite that comforting, satisfying feel. I often double the mix for leftovers because reheated slices are an easy grab-and-go lunch that keeps well for a day or two.
On a personal note, the first time I served these at a casual get-together everyone asked for the recipe. I started making them in batches for birthday parties and tailgates because they travel easily and hold up well under heat lamps or in insulated carriers. They remind me of the simple, unfussy meals that make hosting low-stress and delicious.

My favorite thing about this dish is how forgiving it is. I’ve made it with rotisserie chicken, poached breasts, and even turkey deli meat in a pinch. Each time, the aioli and cheddar tie everything together. It’s a recipe that fits into busy routines — a reliable, delicious option whether I’m cooking for one or feeding a small group.
To store, cool the wraps completely, then place them seam-side down in an airtight container. Refrigerate for up to 48 hours. For longer storage, wrap each tightly in foil and place in a freezer-safe bag; they’ll keep up to 3 months. Reheat refrigerated wraps in a skillet over medium heat for 2–3 minutes per side until warmed through and crisp; frozen wraps should be thawed overnight first. Avoid microwaving from frozen — the tortilla becomes chewy and the exterior won’t crisp.
If you need dairy-free options, swap the cheddar for a dairy-free shreddable and use an oil-based garlic spread instead of aioli. For gluten-free, choose certified gluten-free tortillas or lettuce leaves for a low-carb wrap. If you prefer a tangier profile, replace half the aioli with plain Greek yogurt. For more heat, add a teaspoon of hot sauce or a sprinkle of red pepper flakes to the chicken mix.
Serve these warm with a crisp side salad, oven-roasted sweet potato wedges, or a simple slaw for contrast. A quick herb salsa (chopped parsley, lemon juice, olive oil) brightens the flavors. For parties, slice into 2-inch rounds and secure with toothpicks for bite-sized pinwheels. Pair with pickles or a light cucumber salad to cut the richness.
While not tied to a single culinary tradition, this wrap is rooted in classic American comfort-food techniques — combining roasted or leftover poultry with creamy sauce and melting cheese inside a griddled flatbread. It echoes the efficiency of street food and the portability of lunch wraps that became popular across the U.S. in the late 20th century, blending convenience with homestyle flavors.
In spring and summer, add fresh herbs like basil or dill and thinly sliced cucumber for brightness. In autumn, fold in roasted butternut squash cubes and swap cheddar for Gruyère for a nuttier flavor. For winter comfort, serve alongside a bowl of tomato soup or add caramelized onions and sautéed mushrooms to make the filling heartier.
Make the chicken aioli mixture ahead and store it in the refrigerator for up to 2 days. Assemble wraps and store them ungrilled on a parchment-lined tray covered in plastic wrap for up to 24 hours; grill just before serving to keep the tortilla crisp. If packing lunches, reheat in a skillet or toaster oven for best results — microwaves make the tortilla soft and less appealing.
These Cheesy Garlic Chicken Wraps are the sort of recipe I come back to again and again — easy to adapt, reliably comforting, and wonderfully portable. Give them a try this week and make them your own with favorite add-ins or a different cheese. Enjoy!
Use freshly shredded cheddar rather than pre-shredded for the creamiest melt.
Press the wrap gently while grilling to ensure the cheese melts evenly and the outside crisps.
If the tortilla browns too quickly, lower the heat and cover the skillet for 30–60 seconds to help the cheese melt.
Double the filling and refrigerate for up to 48 hours for quick assembly and reheating throughout the week.
This nourishing cheesy garlic chicken wraps recipe is sure to be a staple in your kitchen. Enjoy every moist, high protein slice — it is perfect for breakfast or as a wholesome snack any time.
This Cheesy Garlic Chicken Wraps recipe makes perfectly juicy, tender, and flavorful steak every time! Serve with potatoes and a side salad for an unforgettable dinner in under 30 minutes.
In a medium bowl, toss 2 cups shredded cooked chicken with 1/2 cup garlic aioli until evenly coated. Season with salt and pepper to taste and adjust the garlic level if desired.
Place a large tortilla flat, spoon approximately 1/2 cup of the chicken mixture into the center, and top with 1/4 cup shredded cheddar. Leave a 1-inch border for folding.
Fold the bottom over the filling, tuck the sides in, and roll tightly into a compact cylinder. Press the seam lightly to seal and prevent the filling from falling out while grilling.
Heat a nonstick or cast-iron skillet over medium heat (around a 350°F surface temperature). Lightly oil or butter the pan to promote even browning.
Place wraps seam-side down in the skillet and cook 2–3 minutes per side until golden and crisp. Press gently with a spatula; reduce heat and cover briefly if the tortilla browns before the cheese melts.
Let the grilled wraps rest 1 minute on a cutting board, then slice in half on the bias and serve warm for best texture and melted cheese.
Last Step: Please leave a rating and comment letting us know how you liked this recipe! This helps our business to thrive and continue providing free, high-quality recipes for you.
Leave a comment & rating below or tag
@solushcooks on social media!

A lighter take on a classic comfort favorite that swaps pasta for roasted spaghetti squash and keeps all the creamy, cheesy goodness with optional broccoli or chicken for extra heartiness.

A dreamy no-cook breakfast that tastes like coconut cream pie — creamy coconut milk, tangy Greek yogurt, shredded coconut, and optional banana make mornings feel indulgent and effortless.

Crisp-edged sweet potato rounds roasted until tender, finished with salty feta, a drizzle of honey, and fresh parsley—an effortless crowd-pleaser for gatherings or weeknights.
Leave a comment & rating below or tag @solushcooks on social media!
Enjoyed this recipe? Share it with friends and family, and don't forget to leave a review!
This recipe looks amazing! Can't wait to try it.
Comments are stored locally in your browser. Server comments are displayed alongside your local comments.

Join to receive our email series which contains a round-up of some of our quick and easy family favorite recipes.
