
Burnt Basque Cheesecake

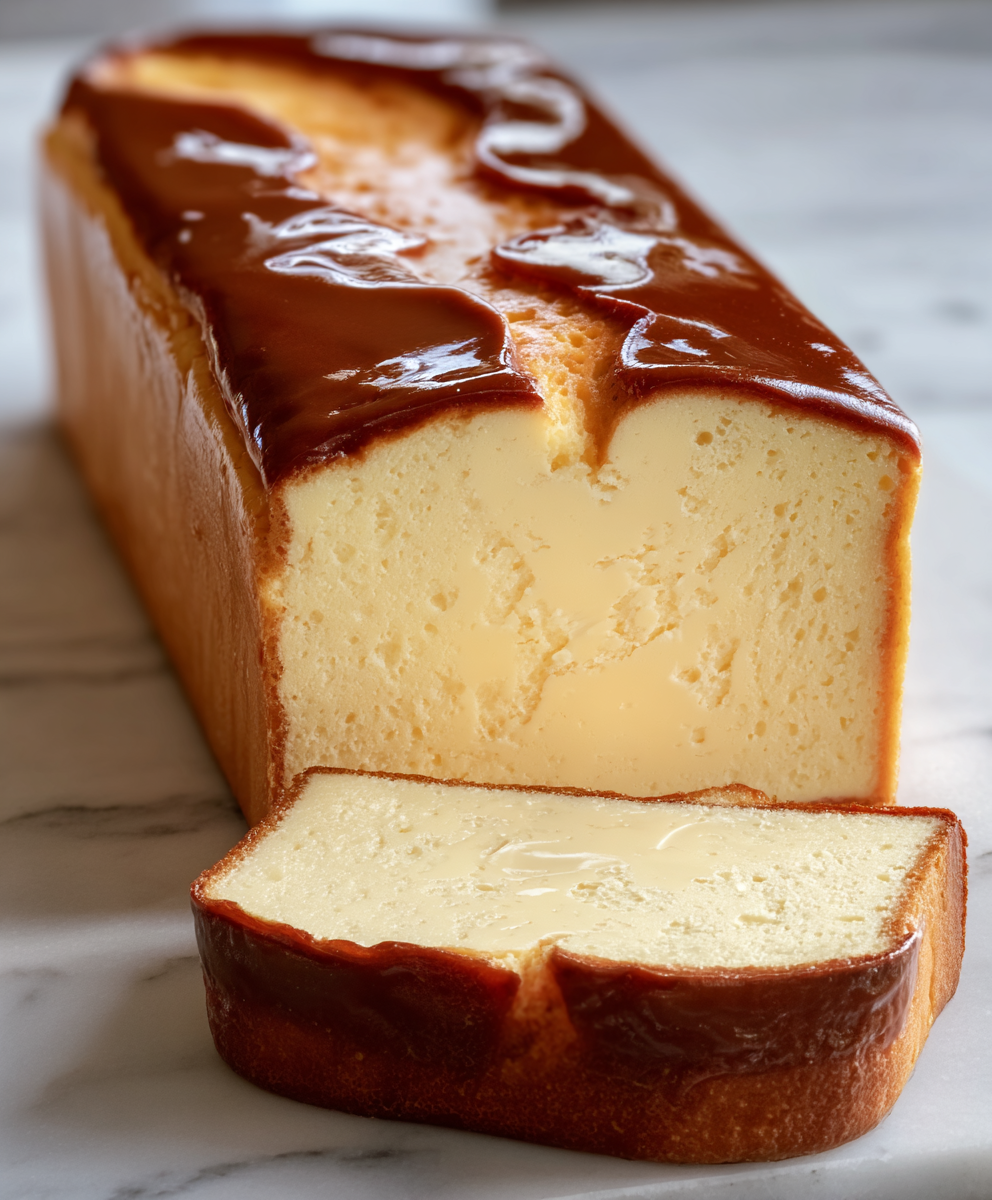
A luxuriously creamy, caramelized cheesecake with a deeply browned top and custardy interior—simple ingredients, stunning results.
This Burnt Basque cheesecake has been my shortcut to impressive desserts for years. I first fell in love with it on a chilly evening when I wanted something rich and comforting without fussing over a crust. The moment I sliced into that deeply caramelized top and found a silky, slightly wobbly interior, I knew this would become a wherever-I-can-serve-it favorite. It’s a recipe that manages to be simultaneously elegant and forgiving: imperfectly charred on top, luscious underneath, and reliably crowd-pleasing.
I discovered my preferred proportions after several tests in a loaf pan when I didn’t have a springform available. The simple ingredient list—cream cheese, eggs, sugar, heavy cream, a little flour and salt—comes together into a custard that bakes at a high temperature so the exterior browns aggressively while the center remains soft. Each bite contrasts the bittersweet, toasty top with rich, tangy creaminess below. I often make it for dinner parties and family gatherings; it reliably draws compliments and seconds, and leftovers (if there are any) keep beautifully in the fridge.
Why You'll Love This Recipe
- Incredibly simple ingredient list: uses pantry staples and a standard loaf pan so you can make it any night without a special pan.
- Quick assembly: about 15 minutes of active work and then hands-off baking; perfect for last-minute entertaining or an impressive weeknight dessert.
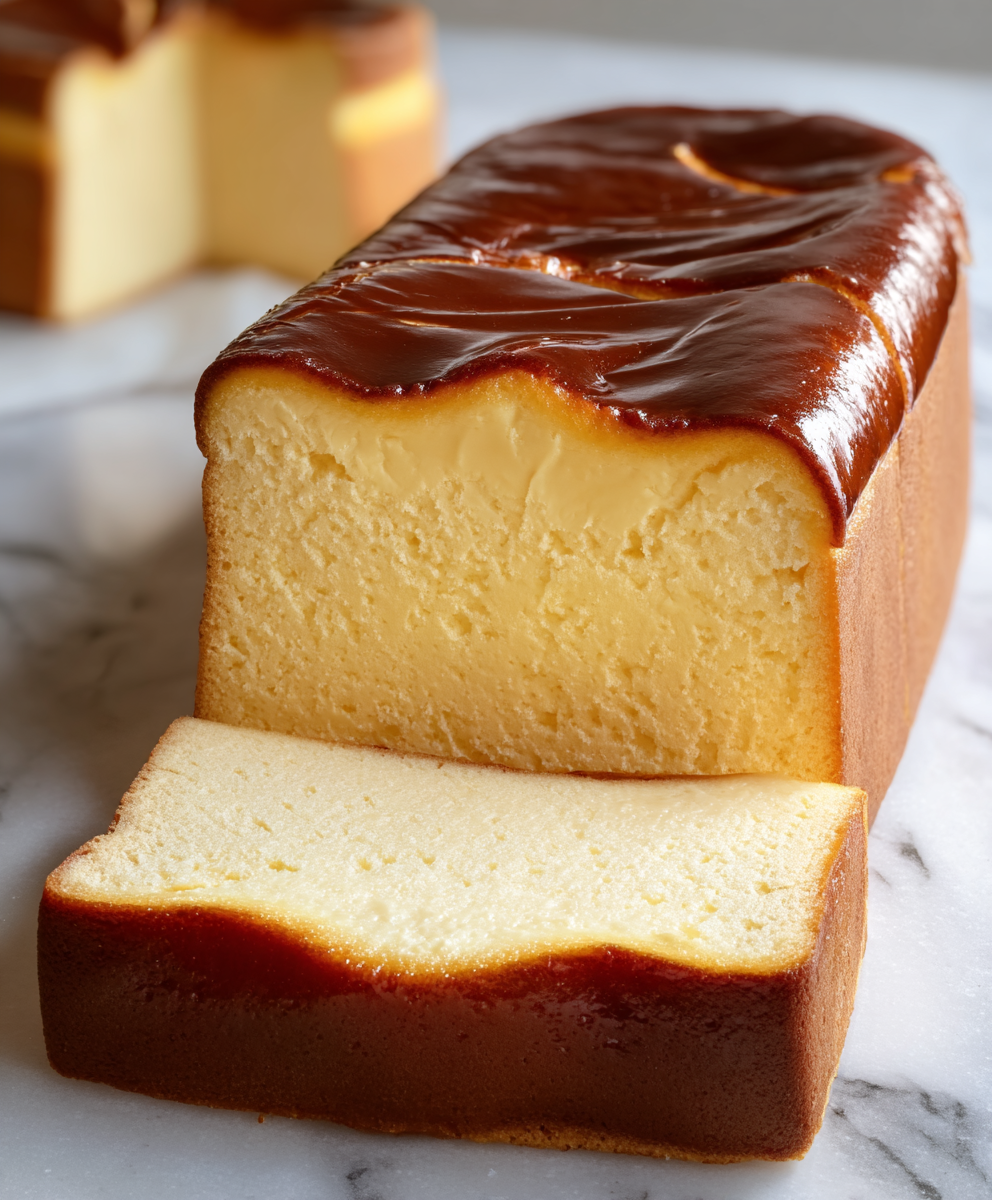
- Show-stopping results: the deeply browned top looks rustic and dramatic while the interior stays luxuriously custardy.
- Flexible serving options: serve warm for a spoonable custard experience or chilled for cleaner slices—both are delicious.
- Make-ahead friendly: bakes well ahead and improves in flavor after resting overnight, saving time on the day you serve it.
- Easy to adapt: swap heavy cream for a lighter cream or use gluten-free flour alternatives if you need a gluten-free version.
My family always asks for this when I say I’m baking something special. Once I learned to watch the color—aiming for a near-black top in places but not burnt-tasting—the results were consistently loved. It’s the kind of dessert that looks like effort but is actually wonderfully simple.
Ingredients
- Full-Fat Cream Cheese (16 oz / 2 packages): Room temperature cream cheese gives the cheesecake its dense, tangy body. I prefer Philadelphia for consistency, but any block-style full-fat brand will work. Avoid whipped tubs; they contain stabilizers and more air.
- Granulated Sugar (3/4 cup): Dissolved into the batter to sweeten and help the top caramelize. If you like your top darker and slightly more bitter, you can increase by 1 tablespoon, but I stick with 3/4 cup for balance.
- Large Eggs (3): At room temperature so they blend smoothly and trap less air. Room-temp eggs help maintain a creamy texture rather than a grainy one.
- Heavy Cream (1 cup): Adds silkiness and richness. You can substitute a lighter cream (light whipping cream) if you want a slightly less rich finish, but full-fat yields the most luxurious mouthfeel.
- All-Purpose Flour (1/4 cup): A small amount to stabilize the custard and improve sliceability without developing a cakey crumb. Gluten-free 1-to-1 blends also work if you need a gluten-free result.
- Salt (1/4 teaspoon): Small but essential: it amplifies sweetness and balances the rich dairy flavors.
- Optional Toppings: Whipped cream, fresh berries, or a drizzle of caramel add freshness and contrast to the rich interior. I often serve with lightly sweetened whipped cream and a handful of berries for brightness.
Instructions
1. Prepare the pan and oven: Preheat the oven to 400°F. Line a standard 9x5-inch loaf pan with a double layer of parchment paper, leaving plenty of overhang on both long sides so you can lift the cheesecake out after baking. The parchment should come up above the rim by at least 1.5 inches so it can brown without sticking to the pan. This high oven temperature is crucial to get the signature deeply browned top. 2. Soften and mix the cream cheese: Place the 16 oz of room-temperature cream cheese in a mixing bowl. Whisk or beat on low with a hand mixer until smooth and lump-free—about 1 to 2 minutes. Scrape the bowl to prevent any cold pockets. Smooth cream cheese ensures an even custard without graininess. 3. Add sugar and eggs: With the mixer running, add the 3/4 cup sugar gradually and mix until glossy. Add the eggs one at a time, fully incorporating each before adding the next. Over-mixing at this stage can incorporate too much air; beat just until the mixture looks smooth and homogenous. 4. Fold in cream, flour and salt: Pour in the 1 cup heavy cream and whisk gently until combined. Sift in the 1/4 cup flour and 1/4 teaspoon salt, folding with a spatula to avoid lumps. The batter should be pourable but still thick, like a thin custard. Sifting and folding here prevents pockets of flour that can make the texture uneven. 5. Bake: Pour the batter into the prepared loaf pan and tap gently on the counter to release large air bubbles. Bake at 400°F for 40–50 minutes. After about 20 minutes the top will begin to darken; aim for a dark mahogany to nearly black top with a custardy middle that still jiggles slightly. If the top is browning too quickly, tent loosely with foil for the final 5–10 minutes, but the caramelized top is part of the charm. 6. Cool and chill: Remove from the oven and let cool to room temperature in the pan. The baked interior will continue to set as it cools. Once cooled, lift out using the parchment overhang and refrigerate for at least 4 hours, preferably overnight. Chilling improves sliceability and deepens flavor. 7. Serve: Slice with a hot, clean knife for neat pieces, wiping the blade between cuts. Serve simple with whipped cream and fresh berries or a drizzle of caramel sauce if you like a sweeter contrast. Store leftovers covered in the refrigerator for up to 4 days.
You Must Know
- This dessert is rich and calorie-dense; it freezes well for up to 3 months when wrapped tightly in plastic and aluminum foil.
- High in protein and fat from cream cheese and heavy cream; each serving is approximately 416 calories when divided into eight slices.
- Store covered in the refrigerator and let sit at room temperature 15–20 minutes before serving for the best texture.
- It contains dairy, eggs, and gluten (unless you substitute gluten-free flour). If you need a gluten-free version, swap in a 1-to-1 gluten-free flour for the 1/4 cup.
My favorite thing about this dessert is how the dramatic, dark top makes it look like a bakery showpiece while remaining one of the easiest sweets to prepare. Family and guests always comment on its depth of flavor and how it pairs with bright berries or a salted caramel drizzle. Once you get the timing right for your oven, it becomes wonderfully reliable.
Storage Tips
Cool completely before refrigerating. Wrap in plastic wrap or store in an airtight container for up to 4 days. For longer storage, slice into portions and freeze wrapped individually for up to 3 months; thaw in the refrigerator overnight. Reheat gently at 275°F for 6–8 minutes if you prefer a slightly warm center—avoid overheating or the custard will lose its silky texture.
Ingredient Substitutions
If you want a lighter version, substitute light whipping cream for heavy cream (the texture will be slightly less rich). For a gluten-free result, use a 1-to-1 gluten-free flour blend in place of the all-purpose flour. For dairy-free adaptations, this dessert is challenging to convert without changing character; plant-based cream cheeses and creams often lack the same structure and may produce a different texture.
Serving Suggestions
Serve with lightly sweetened whipped cream and a scattering of fresh berries for brightness. A drizzle of warm salted caramel adds a lovely contrast to the browned top. For a brunch-friendly presentation, pair slices with black coffee or an espresso martini for a decadent finish.
Cultural Background
Originating from the Basque region of Spain, this style of cheesecake became popular for its rustic, intentionally burnt exterior and creamy interior. The original version is crustless, highlighting the custard itself and the caramelized flavors from high-heat baking. While variations exist across Spain and beyond, the essence remains the same: few ingredients, dramatic presentation, and a focus on texture contrast.
Seasonal Adaptations
In summer, serve with macerated berries and a sprig of mint. In fall, a spoonful of warm spiced pear compote makes a cozy pairing. For holidays, top slices with candied citrus or a drizzle of bourbon caramel to add seasonal flair without changing the base method.
Meal Prep Tips
Bake a day ahead and chill overnight to allow flavors to meld and texture to firm for cleaner slices. Store in a single layer in an airtight container. When packing for events, slice and place parchment between slices to prevent sticking. If you need multiple desserts, the batter scales easily—use two loaf pans and watch the baking time closely, as thinner batters may finish sooner.
Ultimately, this dessert celebrates simplicity and technique: a few humble ingredients, one bold oven temperature, and a dramatic result that rarely fails to impress. Make it your own by experimenting with toppings and serving temperatures—you’ll find your favorite moment to enjoy each spoonful.
Pro Tips
Use room-temperature eggs and cream cheese to avoid lumps and reduce mixing time.
Line the loaf pan with parchment leaving a good overhang to lift the cake easily after baking.
Aim for a very dark, almost black top—that caramelization is key to flavor; a little foil tenting in the last minutes can help if it’s scorching.
Chill for at least 4 hours, preferably overnight, for best texture and cleaner slices.
This nourishing burnt basque cheesecake recipe is sure to be a staple in your kitchen. Enjoy every moist, high protein slice — it is perfect for breakfast or as a wholesome snack any time.
FAQs about Recipes
Can I make this ahead of time?
Chilling overnight helps the custard firm up and improves sliceability and flavor.
Can I freeze the cheesecake?
Yes, freeze wrapped slices for up to 3 months and thaw in the refrigerator overnight.
Tags
Burnt Basque Cheesecake
This Burnt Basque Cheesecake recipe makes perfectly juicy, tender, and flavorful steak every time! Serve with potatoes and a side salad for an unforgettable dinner in under 30 minutes.
Ingredients
For the Cake
Optional Toppings
Instructions
Prepare the pan and oven
Preheat oven to 400°F. Line a 9x5-inch loaf pan with a double layer of parchment paper, leaving a good overhang to lift the cake after baking.
Mix cream cheese
In a mixing bowl, beat 16 oz room-temperature cream cheese until smooth and lump-free, about 1–2 minutes.
Add sugar and eggs
Add 3/4 cup sugar and beat until glossy. Add eggs one at a time, mixing gently until each is incorporated to avoid over-aeration.
Add cream, flour and salt
Pour in 1 cup heavy cream, then sift in 1/4 cup flour and 1/4 teaspoon salt. Fold with a spatula until smooth and pourable.
Bake
Pour batter into the prepared pan and bake at 400°F for 40–50 minutes until the top is deeply browned and the center still jiggles slightly.
Cool and chill
Cool to room temperature in the pan, then lift out with parchment and refrigerate at least 4 hours or overnight for best texture.
Serve
Slice with a hot knife for neat pieces. Serve with whipped cream, fresh berries, or caramel drizzle as desired.
Last Step: Please leave a rating and comment letting us know how you liked this recipe! This helps our business to thrive and continue providing free, high-quality recipes for you.
Nutrition
Did You Make This?
Leave a comment & rating below or tag
@solushcooks on social media!
Categories:
You might also like...

Spaghetti Squash Mac & Cheese
A lighter take on a classic comfort favorite that swaps pasta for roasted spaghetti squash and keeps all the creamy, cheesy goodness with optional broccoli or chicken for extra heartiness.

Coconut Cream Pie Overnight Oats
A dreamy no-cook breakfast that tastes like coconut cream pie — creamy coconut milk, tangy Greek yogurt, shredded coconut, and optional banana make mornings feel indulgent and effortless.

Roasted Sweet Potato Rounds with Honey & Feta
Crisp-edged sweet potato rounds roasted until tender, finished with salty feta, a drizzle of honey, and fresh parsley—an effortless crowd-pleaser for gatherings or weeknights.
Did You Make This?
Leave a comment & rating below or tag @solushcooks on social media!
Rate This Recipe
Share This Recipe
Enjoyed this recipe? Share it with friends and family, and don't forget to leave a review!
Comments (1)
This recipe looks amazing! Can't wait to try it.
Comments are stored locally in your browser. Server comments are displayed alongside your local comments.

Hi, I'm Lena!
What's Popular

30-Minute Meals!
Join to receive our email series which contains a round-up of some of our quick and easy family favorite recipes.