
>>

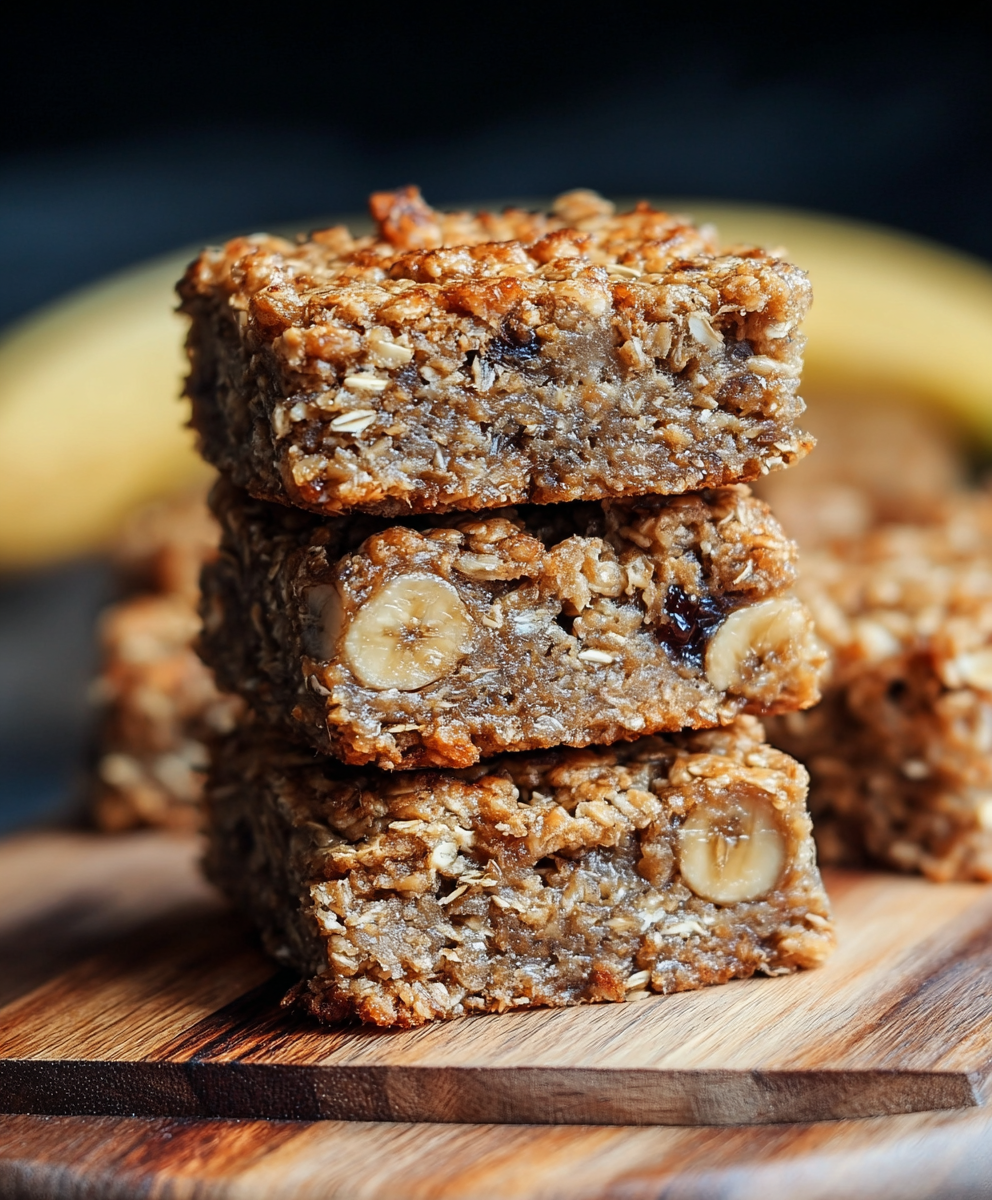
Wholesome banana oatmeal bars—naturally sweetened, egg-bound, and perfect for breakfast or a healthy snack. Simple to make, portable, and family-friendly.

This recipe for banana oatmeal bars has been a quiet hero in my kitchen for years. I first developed the formula during a busy autumn when I wanted something portable, nourishing, and not overly sweet to hand out to hungry kids and adults between errands and after-school activities. The combination of ripe banana, rolled oats, a touch of honey or maple syrup, and eggs creates a tender, chewy bar with a golden top and a comforting aroma that always brings people to the table.
What makes these bars special is how forgiving and versatile they are: they come together in one bowl, require no mixer, and rely on pantry basics. The texture lands somewhere between a soft cookie and a light granola bar—moist inside thanks to mashed banana and set by eggs and baked oats. I remember bringing a pan to a neighbor's potluck once; people asked for the recipe faster than I expected. They're an ideal snack for school lunches, a pre-workout bite, or a simple breakfast alongside yogurt and berries.
My family always asks for these when bananas get too ripe. I often mash bananas by hand while a pot of coffee brews; it’s a small ritual that makes weekday mornings feel a little calmer. Over time I learned to adjust sweeteners and baking time to match humidity and oven variances—those tweaks are in the notes below.
My favorite part is the aroma that fills the kitchen as these bake—warm bananas and oats create an almost nostalgic scent. When I bring a batch to a weekend brunch, they disappear quickly; friends often comment that they feel indulgent despite being made from simple ingredients. Over time I've learned to tweak bake time, which makes the difference between a fudgy chew and a cake-like texture.
Store cooled bars in an airtight container at room temperature for up to 2 days. For longer freshness, refrigerate for up to 7 days—place parchment between layers to prevent sticking. To freeze, wrap individual squares tightly in plastic wrap and place them in a freezer bag; they keep well for 2–3 months. Reheat frozen bars in a 325°F oven for 10–12 minutes or microwave briefly (20–30 seconds) for a quick warm snack. Watch for sogginess after thawing; if texture softens, briefly toasting under a broiler can restore a bit of crisp at the edges.
Eggs can be replaced with a flax "egg" (1 tablespoon ground flaxseed + 3 tablespoons warm water per egg) for an egg-free version—expect a slightly denser texture. For nutty flavor and extra protein, fold in 1/2 cup chopped walnuts or 1/3 cup nut butter and reduce oats by 1/4 cup. Swap honey for maple syrup to make the flavor more neutral and vegan-friendly. Use quick oats if you prefer a softer crumb, and add 1/4 teaspoon cinnamon or a tablespoon of cocoa powder for flavor twists. Note: liquid substitutions may affect bake time slightly.
Serve bars warm with a dollop of Greek yogurt and fresh berries for a balanced breakfast, or pair with a hot cup of coffee as a mid-morning snack. For an after-school treat, top with a smear of almond or peanut butter and a drizzle of honey. They also make excellent picnic snacks—wrap individually and tuck into a lunch tote. For a dessert version, warm a square and top with a scoop of vanilla ice cream and toasted pecans.
Adjust the recipe for seasonal produce: stir in 1/2 cup grated apple and 1/4 teaspoon nutmeg in autumn, or fold in 1/2 cup chopped peaches during summer. In winter I like to add 1/4 cup dried cranberries and 1/4 cup chopped toasted almonds for holiday flair. Swap in mashed sweet potato for banana in a pinch—reduce the sweetener slightly to taste. These small swaps keep the core method while embracing seasonal flavors.
Make a double batch and freeze half for the week ahead. Slice into consistent squares using a sharp knife or bench scraper; chilling the pan for 20 minutes before cutting yields cleaner edges. Pack bars in single-serve containers with a small ice pack for lunchboxes, or stack in a resealable bag with parchment between layers to prevent sticking. Label frozen bags with date and best-by to help rotate your freezer stash.
One memorable success was when I brought these bars to a community bake sale—parents praised the ingredient list and many asked for a gluten-free option. A friend with two picky teenagers reported that they took the bars to school instead of store-bought snacks for a full week. I’ve also seen them served at postpartum care packages because they're nourishing, easy to eat, and freeze well. Those small confirmations make this one of my most-requested, informal go-to dishes.
These banana oatmeal bars are a simple, reliable formula that adapts to your pantry and schedule. They strike a balance between comfort and health, and once you make a batch you’ll find many ways to personalize them—share freely and enjoy the ease of a homemade, wholesome snack.
Use very ripe bananas for natural sweetness and moisture; they mash easily and caramelize during baking.
Line the pan with parchment paper for easy removal and cleaner slices.
Let the bars cool for at least 10 minutes before slicing to avoid crumbling; for cleaner cuts chill briefly.
If the batter seems too wet, add oats by the tablespoon until spreadable; if too dry, add a teaspoon of milk or water.
Rotate the pan halfway through baking if your oven has uneven heat to ensure even browning.
This nourishing banana oatmeal bars for healthy snacking recipe is sure to be a staple in your kitchen. Enjoy every moist, high protein slice — it is perfect for breakfast or as a wholesome snack any time.
Yes—slice into squares and freeze individually wrapped for up to 3 months. Thaw overnight in the fridge or reheat briefly.
Use certified gluten-free rolled oats, as regular oats may be cross-contaminated with gluten during processing.
This Banana Oatmeal Bars for Healthy Snacking recipe makes perfectly juicy, tender, and flavorful steak every time! Serve with potatoes and a side salad for an unforgettable dinner in under 30 minutes.
Preheat oven to 350°F (175°C). Grease or line an 8x8-inch baking dish with parchment paper, leaving an overhang for easy removal.
Mash 3 ripe bananas in a medium bowl until mostly smooth with a few small chunks remaining, about 1 1/2 cups mashed.
Whisk eggs, honey or maple syrup, and vanilla into the mashed banana until evenly combined and slightly frothy.
Stir in 2 cups rolled oats and 1 teaspoon baking powder until just combined; do not overmix. Adjust consistency with small amounts of liquid or additional oats if necessary.
Spread batter into prepared pan and bake at 350°F for 25-30 minutes until golden and set. Cool for at least 10 minutes, then lift with parchment and slice into 9 or 12 squares.
Last Step: Please leave a rating and comment letting us know how you liked this recipe! This helps our business to thrive and continue providing free, high-quality recipes for you.
Leave a comment & rating below or tag
@solushcooks on social media!

A lighter take on a classic comfort favorite that swaps pasta for roasted spaghetti squash and keeps all the creamy, cheesy goodness with optional broccoli or chicken for extra heartiness.

A dreamy no-cook breakfast that tastes like coconut cream pie — creamy coconut milk, tangy Greek yogurt, shredded coconut, and optional banana make mornings feel indulgent and effortless.

Crisp-edged sweet potato rounds roasted until tender, finished with salty feta, a drizzle of honey, and fresh parsley—an effortless crowd-pleaser for gatherings or weeknights.
Leave a comment & rating below or tag @solushcooks on social media!
Enjoyed this recipe? Share it with friends and family, and don't forget to leave a review!
This recipe looks amazing! Can't wait to try it.
Comments are stored locally in your browser. Server comments are displayed alongside your local comments.

Join to receive our email series which contains a round-up of some of our quick and easy family favorite recipes.
